
本文实例讲述了JavaScript实现多张图片放大镜效果。分享给大家供大家参考,具体如下:
效果如下:可以展示图片列表的放大镜效果,图片尺寸没有要求会自动调整至水平垂直居中效果
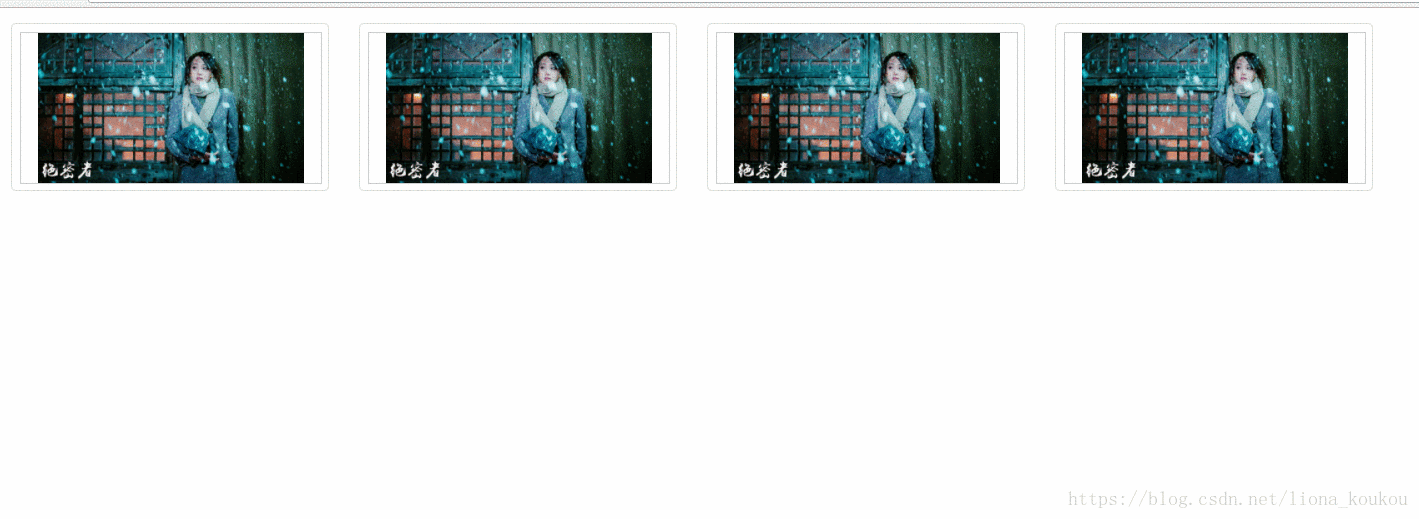
代码如下,除了图片要替换一下,其它的可直接运行查看效果,enlarge是图片要放大查看的倍数,注意:.bigBox的宽高与.tool的宽高比值要与enlarge保持一致,比如本例中这个比值是4
<!doctype html>
<html>
<head>
  <meta charset="UTF-8">
  <title>Document</title>
  <script>
    function fontAuto() {
      document.documentElement.style.fontSize = document.documentElement.clientWidth / 19.2 + 'px';
    }
    fontAuto();
    window.onresize = function () {
      fontAuto();
    }
  </script>
  <style type="text/css">
    * {
      margin: 0;
      padding: 0;
    }
    /*图片放大镜*/
    .result-list li {
      float: left;
      width: 3rem;
      margin: 0.15rem;
      border: 1px solid #ddd;
      padding: 0.08rem;
      border-radius: 0.05rem;
      list-style-type: none;
    }
    .result-list li:hover {
      box-shadow: 0 0 10px 5px #ddd;
    }
    .img-to-big {
      width: 100%;
      height: 1.5rem;
      margin: 0 auto;
    }
    .small-box {
      width: 100%;
      height: 1.5rem;
      border: 1px #ccc solid;
      cursor: move;
      position: relative;
      vertical-align: middle;
      display: block;
    }
    .small-box img {
      max-width: 100%;
      max-height: 100%;
      margin: auto;
      display: block;
      position: absolute;
      top: 0;
      left: 0;
      right: 0;
      bottom: 0;
    }
    .tool {
      width: 1rem;
      height: 1rem;
      background-color: lightgray;
      opacity: 0.6;
      filter: alpha(opacity=60);
      position: absolute;
      left: 0;
      top: 0;
      display: none;
    }
    .tool.active {
      display: block;
    }
    .big-box {
      width: 4rem;
      height: 4rem;
      overflow: hidden;
      border: 2px solid lightgray;
      position: absolute;
      background: #fff;
      display: none;
      left: 3rem;
      z-index: 100;
    }
    .big-box.active {
      display: table-cell;
      vertical-align: middle;
    }
    .big-box img {
      position: absolute;
      display: block;
    }
    /*图片放大镜*/
  </style>
</head>
<body>
<div class="result-list">
  <ul>
    <li>
      <div class="img-to-big">
        <div class="small-box">
          <img class="small-img" src="img/zs2.jpg"/>
          <div class="tool"></div>
        </div>
        <div class="big-box">
          <img src="img/zs2.jpg" class="big-img"/>
        </div>
      </div>
    </li>
    <li>
      <div class="img-to-big">
        <div class="small-box">
          <img class="small-img" src="img/zs2.jpg"/>
          <div class="tool"></div>
        </div>
        <div class="big-box">
          <img src="img/zs2.jpg" class="big-img"/>
        </div>
      </div>
    </li>
    <li>
      <div class="img-to-big">
        <div class="small-box">
          <img class="small-img" src="img/zs2.jpg"/>
          <div class="tool"></div>
        </div>
        <div class="big-box">
          <img src="img/zs2.jpg" class="big-img"/>
        </div>
      </div>
    </li>
    <li>
      <div class="img-to-big">
        <div class="small-box">
          <img class="small-img" src="img/zs2.jpg"/>
          <div class="tool"></div>
        </div>
        <div class="big-box">
          <img src="img/zs2.jpg" class="big-img"/>
        </div>
      </div>
    </li>
  </ul>
</div>
<script>
  window.onload = function () {
    forImg();
    window.onresize = function () {
      forImg();
    };
  }
  function forImg() {
    var enlarge = 4;
    var imgToBig = document.getElementsByClassName("img-to-big");
    var list = document.getElementsByClassName("result-list")[0];
    for (var i = 0; i < imgToBig.length; i++) {
      var smallBox = imgToBig[i].getElementsByClassName("small-box")[0];//小盒子
      var smallImg = smallBox.getElementsByClassName("small-img")[0];
      var tool = imgToBig[i].getElementsByClassName("tool")[0];//小盒子中的灰色区域
      var bigBox = imgToBig[i].getElementsByClassName("big-box")[0];//大盒子
      bigBox.style.left = smallBox.offsetLeft + smallBox.offsetWidth + "px";
      bigBox.style.top = smallBox.offsetTop + "px";
      var bigImg = imgToBig[i].getElementsByClassName("big-img")[0];//放大的图片
      var leftNum = smallBox.offsetParent;
      var num = leftNum.offsetLeft;
      imgSize(smallBox, smallImg, smallImg.getAttribute("src"), bigImg, enlarge);
      toBigImg(smallBox, tool, bigBox, bigImg, num, smallImg, list, enlarge);
    }
    function imgSize(smallBox, thisImg, src, bigImg, enlarge) {
      var img = new Image();
      img.src = src;
      img.onload = function () {
        var realWidth = img.width;
        var realHeight = img.height;
        if ((realWidth / smallBox.offsetWidth) >= (realHeight / smallBox.offsetHeight)) {//当展示的图片尺寸并不统一时,根据图片长宽比例确定图片以高度还是宽度为准进行缩放展示
          thisImg.style.width = smallBox.offsetWidth + "px";
          thisImg.style.height = "auto";
          bigImg.style.width = smallBox.offsetWidth * enlarge + "px";
          bigImg.style.height = "auto";
        } else {
          thisImg.style.height = smallBox.offsetHeight + "px";
          thisImg.style.width = "auto";
          bigImg.style.height = smallBox.offsetHeight * enlarge + "px";
          bigImg.style.width = "auto";
        }
      }
    }
    function toBigImg(smallBox, tool, bigBox, bigImg, num, smallImg, list, enlarge) {
      smallBox.onmouseenter = function () {
        tool.className = "tool active";
        bigBox.className = "big-box active";
      };
      //鼠标离开小盒子区域,不显示黄色区域和大盒子
      smallBox.onmouseleave = function () {
        tool.className = "tool";
        bigBox.className = "big-box";
      };
      //鼠标在小盒子内移动
      smallBox.onmousemove = function (e) {
        var _e = window.event || e;//事件对象
        var x = _e.clientX - this.offsetLeft - tool.offsetWidth / 2 - num;//事件对象在小盒子内的横向偏移量
        var y = _e.clientY - this.offsetTop - list.offsetTop - tool.offsetHeight / 2;//竖向偏移量
        if (x < 0) {
          x = 0;//当左偏移出小盒子时,设为0
        }
        if (y < 0) {
          y = 0;//当上偏移出小盒子时,设为0
        }
        if (x > this.offsetWidth - tool.offsetWidth) {
          x = this.offsetWidth - tool.offsetWidth;//当右偏移出小盒子时,设为小盒子的宽度-黄色放大区域宽度
        }
        if (y > this.offsetHeight - tool.offsetHeight) {
          y = this.offsetHeight - tool.offsetHeight;//当下偏移出小盒子时,设为小盒子的高度-黄色放大区域高度
        }
        tool.style.left = x + "px";//灰色放大区域距离小盒子左偏距
        tool.style.top = y + "px";//灰色放大区域距离小盒子上偏距
        bigImg.style.left = (-x + smallImg.offsetLeft) * enlarge + "px";//放大图片移动方向相反,偏移距离加倍
        bigImg.style.top = (-y + smallImg.offsetTop) * enlarge + "px";
      }
    }
  }
</script>
</body>
</html>
更多关于JavaScript相关内容感兴趣的读者可查看本站专题:《JavaScript图片操作技巧大全》、《JavaScript切换特效与技巧总结》、《JavaScript运动效果与技巧汇总》、《JavaScript动画特效与技巧汇总》、《JavaScript错误与调试技巧总结》、《JavaScript数据结构与算法技巧总结》、《JavaScript遍历算法与技巧总结》及《JavaScript数学运算用法总结》
希望本文所述对大家JavaScript程序设计有所帮助。


