

Android8.0以后【凹口屏】得到迅速发展,目前已有了挖孔屏/水滴屏/刘海屏等各式各样的屏幕,究其根本依旧是【凹口屏】,单华为一个品牌就涵盖了基本所有类型,而对于屏幕适配也是不可逃避的问题。小菜单独对华为各型号屏幕进行适配尝试,部分方法可通用到其他品牌设备,为 Android 标准 SDK 方法。
其实凹口屏已经出现很久了,对于获取凹口宽高的方式也有很多种,但是以前主流的凹口屏中凹口位置一般是位于屏幕正上方,但随着发展,也出现了在左上角的挖孔屏样式。相应的, Android 9.0 即 SDK28 也发布了获取凹口屏的方法。
Android 9.0 以下适配方案
对华为设备凹口屏适配情况来说,若仅需获取凹口位置的宽高,如下方法即可,在 Android 各版本中均可( Android 9.0 及以上亦可)。此时获取屏幕水平方向安全位置时,可根据屏幕宽度-凹口宽度再左右均分即可。
/**
 * 华为凹口屏判断方法 Android 各版本均可
 * @param context
 * @return
 */
public static boolean hasNotchInScreen(Context context) {
  boolean ret = false;
  try {
    ClassLoader cl = context.getClassLoader();
    Class HwNotchSizeUtil = cl.loadClass("com.huawei.android.util.HwNotchSizeUtil");
    Method get = HwNotchSizeUtil.getMethod("hasNotchInScreen");
    ret = (boolean) get.invoke(HwNotchSizeUtil);
  } catch (ClassNotFoundException e) {
    Log.e(TAG, "hasNotchInScreen ClassNotFoundException");
  } catch (NoSuchMethodException e) {
    Log.e(TAG, "hasNotchInScreen NoSuchMethodException");
  } catch (Exception e) {
    Log.e(TAG, "hasNotchInScreen Exception");
  } finally {
    return ret;
  }
}

/**
 * 华为凹口屏宽高获取方式 int[]{width, height}
 * @param context
 * @return
 */
public static int[] getNotchSize(Context context) {
  int[] ret = new int[] { 0, 0 };
  try {
    ClassLoader cl = context.getClassLoader();
    Class HwNotchSizeUtil = cl.loadClass("com.huawei.android.util.HwNotchSizeUtil");
    Method get = HwNotchSizeUtil.getMethod("getNotchSize");
    ret = (int[]) get.invoke(HwNotchSizeUtil);
  } catch (ClassNotFoundException e) {
    Log.e(TAG, "getNotchSize ClassNotFoundException");
  } catch (NoSuchMethodException e) {
    Log.e(TAG, "getNotchSize NoSuchMethodException");
  } catch (Exception e) {
    Log.e(TAG, "getNotchSize Exception");
  } finally {
    notchWidth = ret[0];
    notchHeight = ret[1];
    return ret;
  }
}
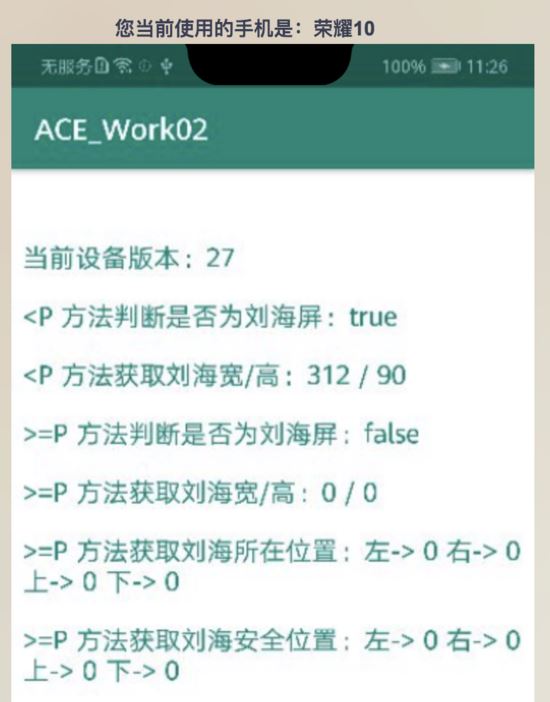
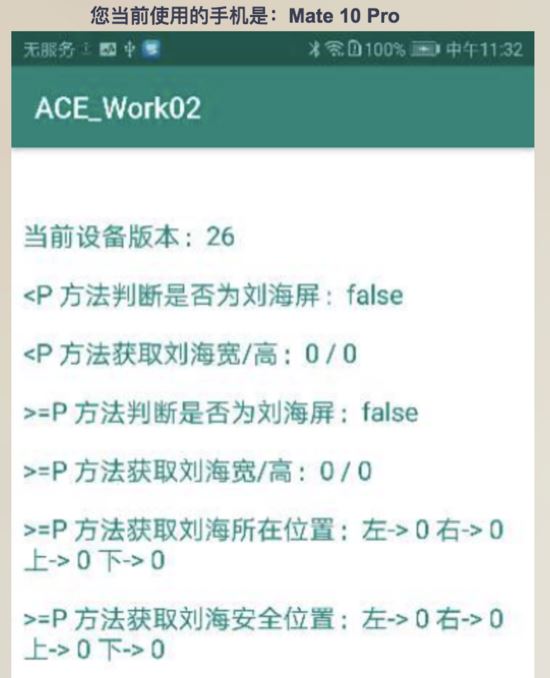
Android 9.0 及以上适配
对于华为新出的挖孔屏设备基本均为 Android 9.0 及以上, Android 9.0 提供了对凹口屏相关的 SDK ,谷歌认为凹口位置可以不固定位置也不固定个数,但是对于设备一条边只能有一个;如下方法对于 Android 9.0 及以上设备判断均可。 SDK 不仅可以判断是否为凹口屏,同时可以获取各个凹口大小及所在位置。
步骤如下: 升级 build.gradle 中 compileSdkVersion 或 targetSdkVersion 为 28 ; 在 Application 或 Activity 中设置 meta-data 属性,小菜测试不设置亦可;
<meta-data android:name="android.notch_support" android:value="true"/>
根据如下方法获取相应参数;
if (android.os.Build.VERSION.SDK_INT >= Build.VERSION_CODES.P) {
  getSupportActionBar().hide();
  getWindow().getDecorView()
    .setSystemUiVisibility(View.SYSTEM_UI_FLAG_FULLSCREEN | View.SYSTEM_UI_FLAG_LAYOUT_FULLSCREEN);
  //设置页面全屏显示
  WindowManager.LayoutParams lp = getWindow().getAttributes();
  lp.layoutInDisplayCutoutMode = WindowManager.LayoutParams.LAYOUT_IN_DISPLAY_CUTOUT_MODE_SHORT_EDGES;
  //设置页面延伸到凹口区显示
  getWindow().setAttributes(lp);
  getWindow().getDecorView()
    .findViewById(android.R.id.content)
    .getRootView()
    .setOnApplyWindowInsetsListener(new View.OnApplyWindowInsetsListener() {
      @Override
      public WindowInsets onApplyWindowInsets(View view, WindowInsets windowInsets) {
        DisplayCutout cutout = windowInsets.getDisplayCutout();
        if (cutout == null) {
          Log.e(TAG, "cutout==null, is not notch screen");//通过cutout是否为null判断是否凹口手机
          isNotchScreen = false;
        } else {
          List<Rect> rects = cutout.getBoundingRects();
          if (rects == null || rects.size() == 0) {
            Log.e(TAG, "rects==null || rects.size()==0, is not notch screen");
            isNotchScreen = true;
          } else {
            Log.e(TAG, "rect size:" + rects.size());//注意:凹口的数量可以是多个
            isNotchScreen = true;
            for (Rect rect : rects) {
              notchRight = rect.right;
              notchLeft = rect.left;
              notchTop = rect.top;
              notchBottom = rect.bottom;
              notchWidth = notchRight - notchLeft;
              notchHeight = notchBottom - notchLeft;
              safeLeft = cutout.getSafeInsetLeft();
              safeRight = cutout.getSafeInsetRight();
              safeTop = cutout.getSafeInsetTop();
              safeBottom = cutout.getSafeInsetBottom();
            }
          }
        }
        return windowInsets;
      }
    });
}
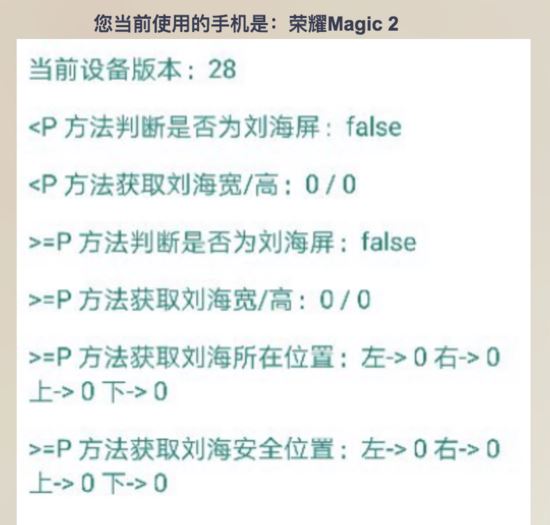
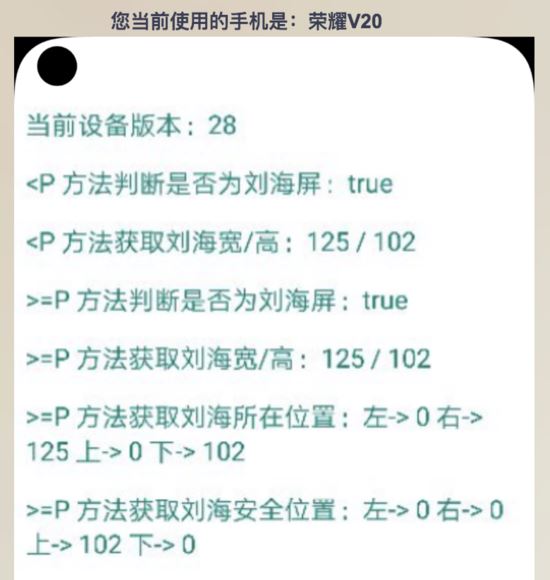
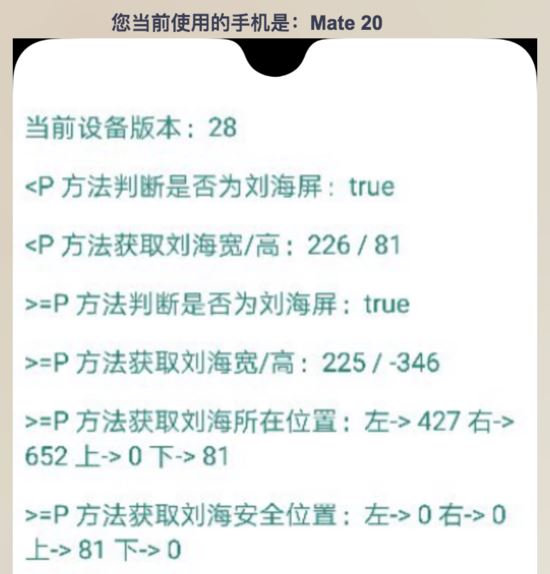
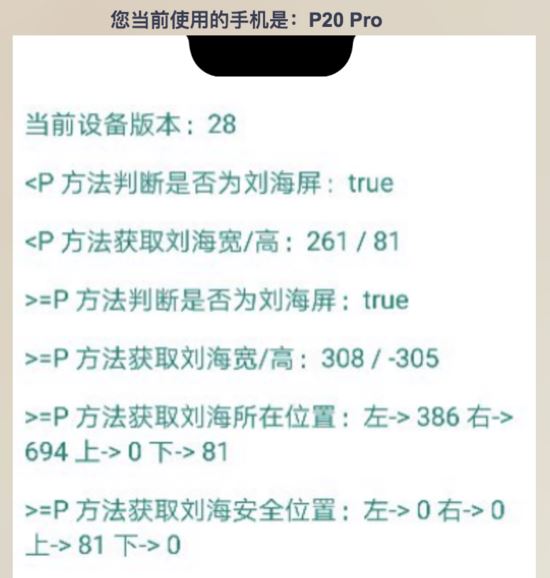
注意事项: 小菜在设置 Application 或 Activity 的主题为 NoActionBar 样式,此时要去掉 getSupportActionBar().hide(); 否则会报空指针异常;
<style name="NoBarTheme" parent="Theme.AppCompat.NoActionBar">
 <item name="android:windowNoTitle">true</item>
 <item name="android:windowContentOverlay">@null</item>
</style>
如下设置全屏使用凹口屏时要注意 View.SYSTEM_UI_FLAG_LAYOUT_FULLSCREEN ,否则参数很有可能获取不到;
getWindow().getDecorView().setSystemUiVisibility(View.SYSTEM_UI_FLAG_FULLSCREEN | View.SYSTEM_UI_FLAG_LAYOUT_FULLSCREEN);
WindowManager.LayoutParams lp = getWindow().getAttributes();
lp.layoutInDisplayCutoutMode = WindowManager.LayoutParams.LAYOUT_IN_DISPLAY_CUTOUT_MODE_SHORT_EDGES;
getWindow().setAttributes(lp);
设置主题 NoActionBar 或代码中动态设置 getSupportActionBar().hide(); 展示效果在 Android 9.0 以下有部分差异,如下:
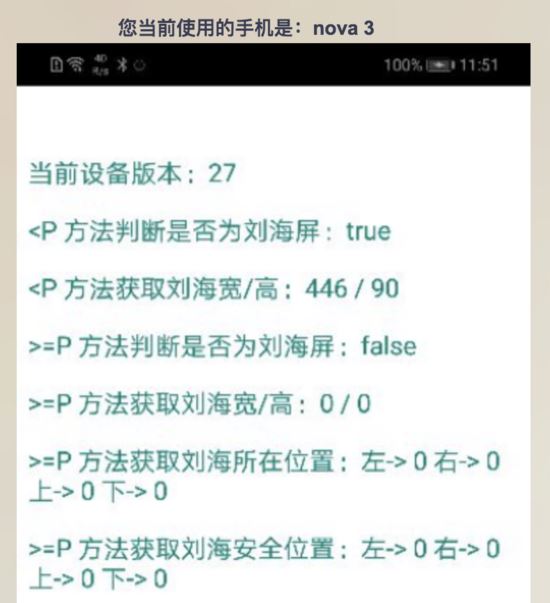
NoActionBar 主题
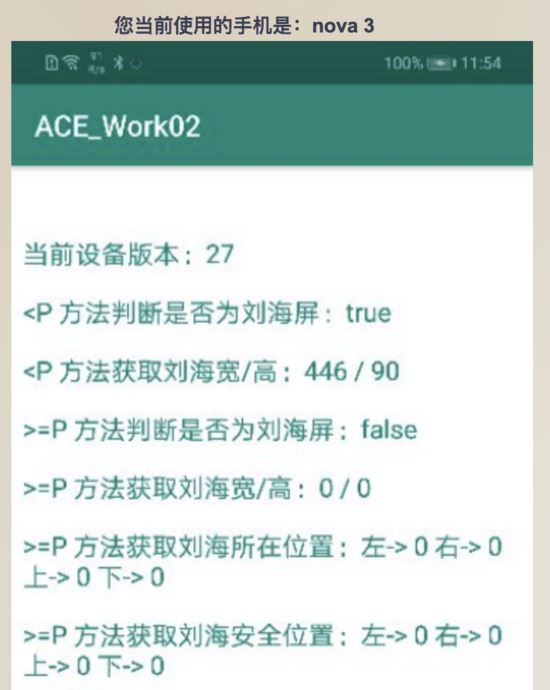
AppTheme 主题
对于凹口屏适配还有很多机型要单独处理,以上仅对华为设备进行参考;如果有不对的地方还希望多多指出。也希望大家多多支持脚本之家。


