

最近需要做个类似于水波纹动画的效果,思考了一下不需要UI切个动态图,Android原生的技术利用动画或者自定义控件都可以实现,下面上个图类似于这样的效果
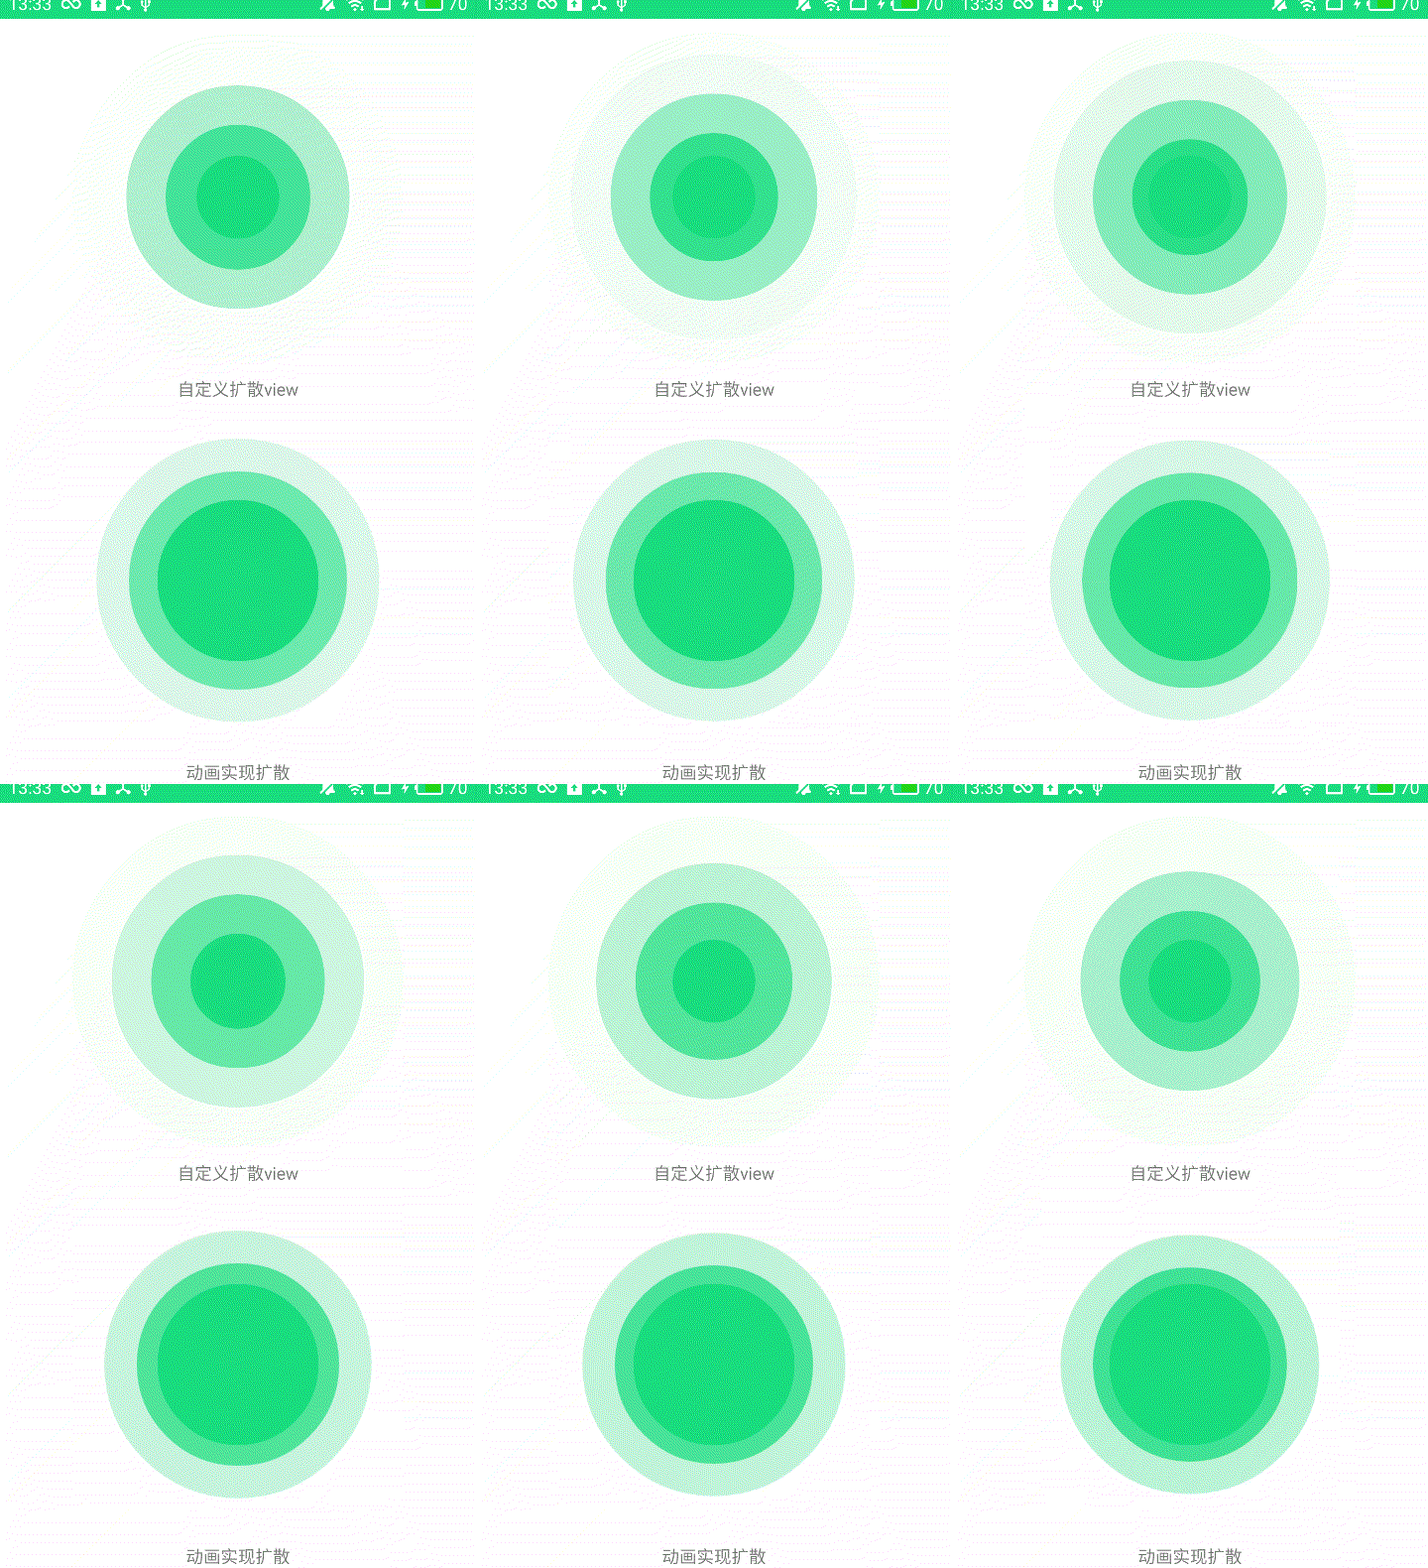
下面请看第一种动画实现,这种方式较为简单些,就是利用3个ImageView不断地做缩放和渐变的动画。
布局文件定义一下
<RelativeLayout
  android:id="@+id/rl"
  android:layout_width="match_parent"
  android:layout_height="match_parent"
  android:gravity="center"
  android:layout_marginBottom="160dp">
  <!--中心imageView-->
  <ImageView
    android:id="@+id/iv_wave"
    android:layout_width="150dp"
    android:layout_height="150dp"
    android:layout_centerHorizontal="true"
    android:background="@drawable/shape_circle" />
  <!--中间的imageView-->
  <ImageView
    android:id="@+id/iv_wave_1"
    android:layout_width="150dp"
    android:layout_height="150dp"
    android:layout_centerHorizontal="true"
    android:background="@drawable/shape_circle" />
  <!--最外层imageView-->
  <ImageView
    android:id="@+id/iv_wave_2"
    android:layout_width="150dp"
    android:layout_height="150dp"
    android:layout_centerHorizontal="true"
    android:background="@drawable/shape_circle" />
</RelativeLayout>
接下来中间的ImageView保持不变,通过操作另外两个ImageView达到效果
private void setAnim1() {
  AnimationSet as = new AnimationSet(true);
  //缩放动画,以中心从原始放大到1.4倍
  ScaleAnimation scaleAnimation = new ScaleAnimation(1.0f, 1.4f, 1.0f, 1.4f,
      ScaleAnimation.RELATIVE_TO_SELF, 0.5f,
      ScaleAnimation.RELATIVE_TO_SELF, 0.5f);
  //渐变动画
  AlphaAnimation alphaAnimation = new AlphaAnimation(1.0f, 0.5f);
  scaleAnimation.setDuration(800);
  scaleAnimation.setRepeatCount(Animation.INFINITE);
  alphaAnimation.setRepeatCount(Animation.INFINITE);
  as.setDuration(800);
  as.addAnimation(scaleAnimation);
  as.addAnimation(alphaAnimation);
  iv1.startAnimation(as);
}
private void setAnim2() {
  AnimationSet as = new AnimationSet(true);
  //缩放动画,以中心从1.4倍放大到1.8倍
  ScaleAnimation scaleAnimation = new ScaleAnimation(1.4f, 1.8f, 1.4f, 1.8f,
      ScaleAnimation.RELATIVE_TO_SELF, 0.5f,
      ScaleAnimation.RELATIVE_TO_SELF, 0.5f);
  //渐变动画
  AlphaAnimation alphaAnimation = new AlphaAnimation(0.5f, 0.1f);
  scaleAnimation.setDuration(800);
  scaleAnimation.setRepeatCount(Animation.INFINITE);
  alphaAnimation.setRepeatCount(Animation.INFINITE);
  as.setDuration(800);
  as.addAnimation(scaleAnimation);
  as.addAnimation(alphaAnimation);
  iv2.startAnimation(as);
}
接下来就是第二种自定义动画实现
首先定义style文件自定义属性--在values下创建attrs.xml文件
<declare-styleable name="SpreadView">
  <!--中心圆颜色-->
  <attr name="spread_center_color" format="color" />
  <!--中心圆半径-->
  <attr name="spread_radius" format="integer" />
  <!--扩散圆颜色-->
  <attr name="spread_spread_color" format="color" />
  <!--扩散间距-->
  <attr name="spread_distance" format="integer" />
  <!--扩散最大半径-->
  <attr name="spread_max_radius" format="integer" />
  <!--扩散延迟间隔-->
  <attr name="spread_delay_milliseconds" format="integer" />
</declare-styleable>
接下来创建SpreadView继承view,初始化构造方法
public SpreadView(Context context) {
  this(context,null,0);
}

public SpreadView(Context context, @Nullable AttributeSet attrs) {
  this(context, attrs,0);
}

public SpreadView(Context context, @Nullable AttributeSet attrs, int defStyleAttr) {
  super(context, attrs, defStyleAttr);
  TypedArray a = context.obtainStyledAttributes(attrs, R.styleable.SpreadView, defStyleAttr, 0);
  radius = a.getInt(R.styleable.SpreadView_spread_radius, radius);
  maxRadius = a.getInt(R.styleable.SpreadView_spread_max_radius, maxRadius);
  int centerColor = a.getColor(R.styleable.SpreadView_spread_center_color, ContextCompat.getColor(context, R.color.colorAccent));
  int spreadColor = a.getColor(R.styleable.SpreadView_spread_spread_color, ContextCompat.getColor(context, R.color.colorAccent));
  distance = a.getInt(R.styleable.SpreadView_spread_distance, distance);
  a.recycle();
  centerPaint = new Paint();
  centerPaint.setColor(centerColor);
  centerPaint.setAntiAlias(true);
  //最开始不透明且扩散距离为0
  alphas.add(255);
  spreadRadius.add(0);
  spreadPaint = new Paint();
  spreadPaint.setAntiAlias(true);
  spreadPaint.setAlpha(255);
  spreadPaint.setColor(spreadColor);
}
自定义View的绘制:
@Override
protected void onDraw(Canvas canvas) {
  super.onDraw(canvas);
  for (int i = 0; i < spreadRadius.size(); i++) {
    int alpha = alphas.get(i);
    spreadPaint.setAlpha(alpha);
    int width = spreadRadius.get(i);
    //绘制扩散的圆
    canvas.drawCircle(centerX, centerY, radius + width, spreadPaint);
    //每次扩散圆半径递增,圆透明度递减
    if (alpha > 0 && width < 300) {
      alpha = alpha - distance > 0 ? alpha - distance : 1;
      alphas.set(i, alpha);
      spreadRadius.set(i, width + distance);
    }
  }
  //当最外层扩散圆半径达到最大半径时添加新扩散圆
  if (spreadRadius.get(spreadRadius.size() - 1) > maxRadius) {
    spreadRadius.add(0);
    alphas.add(255);
  }
  //超过8个扩散圆,删除最先绘制的圆,即最外层的圆
  if (spreadRadius.size() >= 8) {
    alphas.remove(0);
    spreadRadius.remove(0);
  }
  //中间的圆
  canvas.drawCircle(centerX, centerY, radius, centerPaint);
  //延迟更新,达到扩散视觉差效果
  postInvalidateDelayed(delayMilliseconds);
}
最后在activity的布局文件中引用自定义属性:
<com.example.louliang.spread.SpreadView
  android:layout_width="match_parent"
  android:layout_height="wrap_content"
  app:spread_center_color="@color/colorAccent"
  app:spread_delay_milliseconds="35"
  app:spread_distance="5"
  app:spread_max_radius="90"
  app:spread_radius="150"
  app:spread_spread_color="@color/colorAccent" />
以上两种方法就实现了水波纹的效果,下载完整的demo请点击链接,希望对大家有所帮助。
源码下载:Android实现水波纹特效
以上就是本文的全部内容,希望对大家的学习有所帮助,也希望大家多多支持脚本之家。


