
水波纹效果已经不是什么稀罕的东西了,用过5.0新控件的小伙伴都知道这个效果,可是如果使用一个TextView或者Button或者其它普通控件的话,你是否知道如何给它设置水波纹效果呢?OK,我们今天就来看看这个水波纹效果的实现。水波纹效果的实现有系统自带属性可以实现,我们也可以自定义实现效果。
1.系统自带水波纹实现方式 有界水波纹
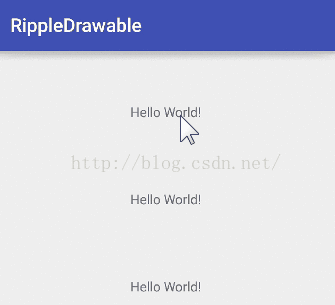
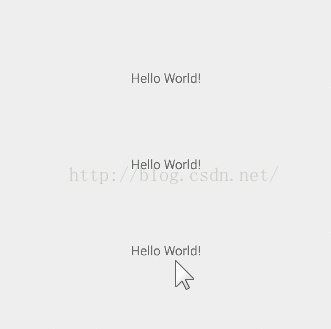
水波纹效果大致上可以分为两种,一种是有界的,一种无界,我们先来看看有界水波纹效果:
效果:
代码:
<TextView
 android:layout_width="match_parent"
 android:layout_height="56dp"
 android:layout_centerInParent="true"
 android:layout_marginTop="36dp"
 android:background="?android:attr/selectableItemBackground"
 android:clickable="true"
 android:gravity="center"
 android:text="Hello World!"/>
只需要给TextView设置背景即可,背景内容就为系统自带的selecttableItemBackground。这种是有界水波纹,就是水波纹会在TextView所在区域进行绘制。
无界水波纹
代码:
<TextView
 android:layout_width="match_parent"
 android:layout_height="56dp"
 android:layout_centerInParent="true"
 android:layout_marginTop="36dp"
 android:background="?android:attr/selectableItemBackgroundBorderless"
 android:clickable="true"
 android:gravity="center"
 android:text="Hello World!"/>
所谓的无界并非完全无界,而是以控件宽高中最大的数值作为水波纹效果所在正方形的边界进行绘制。OK,这两种都是系统自带的水波纹效果,如果我们想要自定义又该怎么做呢?
2.自定义水波纹实现方式无界水波纹
自定义这个效果其实也很简单,需要在drawable文件夹中定义ripple节点,再设置上颜色就可以了:
<?xml version="1.0" encoding="utf-8"?>
<ripple xmlns:android="http://schemas.android.com/apk/res/android" android:color="@color/colorAccent">
</ripple>
在布局文件中将之引用为控件的背景:
<TextView
 android:layout_width="match_parent"
 android:layout_height="56dp"
 android:layout_centerInParent="true"
 android:layout_marginTop="36dp"
 android:background="@drawable/nomaskripple"
 android:clickable="true"
 android:gravity="center"
 android:text="Hello World!"/>
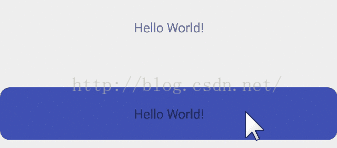
显示效果如下:
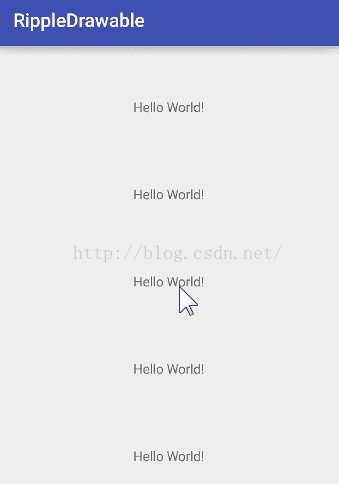
OK,大家看到这是无界水波纹。OK,如果想定义有界水波纹又该如何呢?
有界水波纹
<?xml version="1.0" encoding="utf-8"?>
<ripple xmlns:android="http://schemas.android.com/apk/res/android" android:color="@color/colorPrimary">
 <item
 android:id="@android:id/mask"
 android:drawable="@color/colorAccent"/>
</ripple>
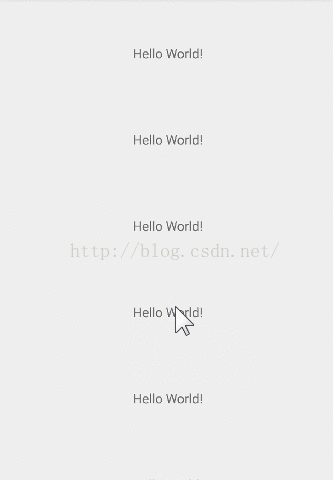
有界水波纹需要我们在ripple节点中定义item,item的id要为系统id mask,然后还要定义drawable,drawable中的颜色并没有什么卵用,水波纹的颜色是由ripple节点中的颜色来控制的,看看显示效果:
带图片形状的水波纹
有的时候如果你希望水波纹不是长条形,又该如何呢?有两种解决方案,一种是使用图片,还有就是自定义shape,我们先来看看使用图片:
<?xml version="1.0" encoding="utf-8"?>
<ripple xmlns:android="http://schemas.android.com/apk/res/android" android:color="@color/colorAccent">
 <item
 android:id="@android:id/mask"
 android:drawable="@drawable/ic_launcher"/>
</ripple>
我这里使用了系统自带的小机器人,我们来看看显示效果:
大家看到,这个时候的水波纹效果就是这个小机器人这张图片中非透明像素点所在的区域了。
自绘形状的水波纹
自绘shape,来看一个圆角矩形:
<?xml version="1.0" encoding="utf-8"?>
<shape xmlns:android="http://schemas.android.com/apk/res/android" android:shape="rectangle">
 <corners android:radius="10dp"/>
 <solid android:color="@color/colorPrimary"/>
</shape>
在ripple中引用该矩形:
<?xml version="1.0" encoding="utf-8"?>
<ripple xmlns:android="http://schemas.android.com/apk/res/android" android:color="@color/colorAccent">
 <item
 android:id="@android:id/mask"
 android:drawable="@drawable/custom_shape"/>
</ripple>
显示效果:

这种方式我们在shape中定义的颜色只是用来划定水波纹显示区域,于视图显示上并没有什么用。如果你想让控件一开始就显示shape中定义的颜色,可以这样来定义ripple:
<?xml version="1.0" encoding="utf-8"?>
<ripple xmlns:android="http://schemas.android.com/apk/res/android" android:color="@color/colorAccent">
 <!--<item-->
 <!--android:id="@android:id/mask"-->
 <!--android:drawable="@drawable/custom_shape"/>-->
 <item>
 <shape android:shape="rectangle">
  <corners android:radius="10dp"/>
  <solid android:color="@color/colorPrimary"/>
 </shape>
 </item>
</ripple>
显示效果如下:
大家看到,我可以在item中定义shape,那么可能有小伙伴会想到我是否可以在item中定义selector呢?当然可以。
带selector效果的水波纹
代码:
<?xml version="1.0" encoding="utf-8"?>
<ripple xmlns:android="http://schemas.android.com/apk/res/android"
 android:color="@color/colorAccent">
 <item>
 <selector>
  <item
  android:state_pressed="true"
  android:drawable="@drawable/ic_launcher"/>
  <item
  android:state_pressed="false"
  android:drawable="@drawable/bg"/>
 </selector>
 </item>
</ripple>
显示效果:

Ok,这就是5.0中水波纹效果的使用。
参考资料:
以上就是这篇文章的全部内容了,希望本文的内容对大家的学习或者工作具有一定的参考学习价值,如果有疑问大家可以留言交流,谢谢大家对脚本之家的支持。


