
学会了Paint,Canvas的基本用法之后,我们就可以动手开始实践了,先写个简单的图片加载进度条看看。
按照惯例,先看效果图,再决定要不要往下看:
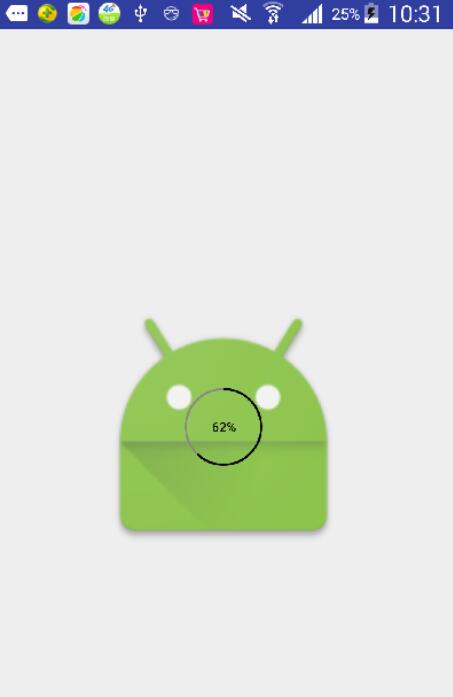
既然看到这里了,应该是想了解这个图片加载进度条了,我们先看具体用法,再看自定义View的实现:
<RelativeLayout xmlns:android="http://schemas.android.com/apk/res/android"
 xmlns:custom="http://schemas.android.com/apk/res-auto"
 android:layout_width="match_parent"
 android:layout_height="match_parent">
 <ImageView
 android:id="@+id/img"
 android:layout_width="200dp"
 android:layout_height="200dp"
 android:scaleType="centerCrop"
 android:layout_centerInParent="true"/>
 <com.example.circleprogresstest.CircleProgressView
 android:id="@+id/progressView"
 android:layout_width="60dp"
 android:layout_height="60dp"
 android:layout_centerInParent="true"
 custom:isShowProgress="true" />
</RelativeLayout>
ImageLoader.getInstance().displayImage(url, imageView, options,
 new SimpleImageLoadingListener() ,
 new ImageLoadingProgressListener() {
 @Override
 public void onProgressUpdate(String imageUri, View view, int current, int total) {
 if(current==total){
 progressView.setVisibility(View.GONE);
 }else{
 progressView.setSweepAngle((int)(360*current*1.0f/total));
 progressView.postInvalidate();
 }
 }
 }
);
可以看出,以上的用法,非常简单,在xml中添加我们自定义的View,和添加textview或者button完全相同,只是多了我们自己的自定义属性而已,可以设置圆的颜色,以及文字颜色,大小等等。之后,在MainActivity中使用的方法也是同样简单,只要在图片的进度更新的时候,同时更新我们进度条的进度就行了。
下面我们具体说下我们实现自定义进度条的过程,我们只需要重写onDraw()方法就够了,很明显,我们的进度条包括三部分,内圈圆,外圈圆弧,中间的文字,具体看代码:
protected void onDraw(Canvas canvas) {
 mWidth=getMeasuredWidth();
 mHeight=getMeasuredHeight();
 radius=(float)(Math.min(mWidth,mHeight)*1.0/2)-strokeWidth/2;
 //绘制内圈圆
 mPaint.setColor(initColor);
 mPaint.setStyle(Paint.Style.STROKE);
 mPaint.setStrokeWidth(strokeWidth);
 canvas.drawCircle(mWidth/2,mHeight/2,radius,mPaint);
 //绘制覆盖的圆弧
 mPaint.setColor(coverColor);
 RectF rectF=new RectF(mWidth/2-radius,mHeight/2-radius,mWidth/2+radius,mHeight/2+radius);
 canvas.drawArc(rectF,-90,sweepAngle,false,mPaint);
 //绘制中间的文本
 if(isShowProgress){
 progressText=String.format(getResources().getString(R.string.progress_text),(int)(sweepAngle*100.0/360));
 mPaint.setTextSize(textSize);
 mPaint.setColor(textColor);
 if(mBound==null){
 mBound=new Rect();
 }
 mPaint.getTextBounds(progressText,0,progressText.length(),mBound);
 mPaint.setStyle(Paint.Style.FILL);
 canvas.drawText(progressText,mWidth/2-mBound.width()/2,mHeight/2+mBound.height()/2,mPaint);
 }
}
当然,为了让我们可以自定义进度条的大小颜色,我们还采用了自定义属性,并且在构造器中,也需要加载xml中的各项属性:
<resources>
 <declare-styleable name="CircleProgressView">
 <attr name="initColor" format="color"/>
 <attr name="coverColor" format="color"/>
 <attr name="strokeWidth" format="dimension"/>
 <attr name="progressTextSize" format="dimension"/>
 <attr name="progressTextColor" format="color"/>
 <attr name="isShowProgress" format="boolean"/>
 </declare-styleable>
</resources>
private void initValues(Context context, AttributeSet attrs, int defStyleAttr){
 TypedArray typedArray=context.getTheme().obtainStyledAttributes(attrs,R.styleable.CircleProgressView,defStyleAttr,0);
 int num=typedArray.getIndexCount();
 for(int i=0;i<num;i++){
 int attr=typedArray.getIndex(i);
 switch (attr){
 case R.styleable.CircleProgressView_initColor:
 initColor=typedArray.getColor(attr,Color.GRAY);
 break;
 case R.styleable.CircleProgressView_coverColor:
 coverColor=typedArray.getColor(attr,Color.BLACK);
 break;
 case R.styleable.CircleProgressView_strokeWidth:
 strokeWidth=typedArray.getDimensionPixelOffset(attr,5);
 break;
 case R.styleable.CircleProgressView_progressTextSize:
 textSize=typedArray.getDimensionPixelSize(attr,30);
 break;
 case R.styleable.CircleProgressView_progressTextColor:
 textColor=typedArray.getColor(attr,Color.BLACK);
 break;
 case R.styleable.CircleProgressView_isShowProgress:
 isShowProgress=typedArray.getBoolean(attr,false);
 break;
 default:
 break;
 }
 }
 typedArray.recycle();

 mPaint=new Paint();
 mPaint.setAntiAlias(true);
}
源码下载
以上就是本文的全部内容,希望对大家的学习有所帮助,也希望大家多多支持脚本之家。


