
1、版本说明 :python 2.7.10, Django (1.6.11.6),centos7
2、步骤说明:
A、django 建立项目
django-admin.py startproject projtest
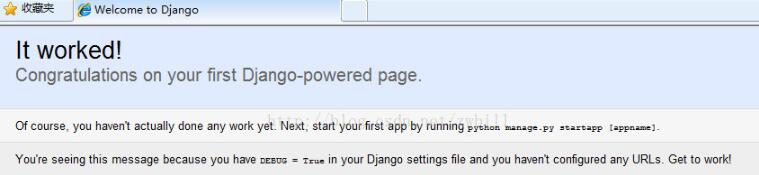
之后启动服务器,看看是否正确:
cd projtest
配置 projtest子目录下面的setting.py文件,允许外部机器访问
[root@VM_4_128_centos projtest]# vim projtest/settings.py
把其中ALLOWED_HOSTS改成如下
ALLOWED_HOSTS = ['*']
然后启动,外部机器 看看能否访问到:
# python manage.py runserver 0.0.0.0:80
B、创建应 用wechat
 [root@VM_4_128_centos projtest]# python manage.py startapp wechat
 [root@VM_4_128_centos projtest]# ls
 manage.py projtest wetchat
C、安装wechat_sdk
[root@VM_4_128_centos projtest]# pip install wechat-sdk
Requirement already satisfied: wechat-sdk in /usr/lib/python2.7/site-packages
Requirement already satisfied: six==1.10.0 in /usr/lib/python2.7/site-packages (from wechat-sdk)
Requirement already satisfied: requests==2.6.0 in /usr/lib/python2.7/site-packages (from wechat-sdk)
Requirement already satisfied: pycrypto==2.6.1 in /usr/lib64/python2.7/site-packages (from wechat-sdk)
Requirement already satisfied: xmltodict==0.9.2 in /usr/lib/python2.7/site-packages (from wechat-sdk)
D、修改projtest/projtest/setting.py文件,加入应用
目录结构如下:
|-- manage.py
|-- projtest
|  |-- __init__.py
|  |-- __init__.pyc
|  |-- settings.py
|  |-- settings.pyc
|  |-- urls.py
|  |-- urls.pyc
|  |-- wsgi.py
|  `-- wsgi.pyc
`-- wetchat
  |-- __init__.py
  |-- admin.py
  |-- models.py
  |-- tests.py
  `-- views.py
vim projtest/settings.py
`-- wetchatINSTALLED_APPS = (
  'django.contrib.admin',
  'django.contrib.auth',
  'django.contrib.contenttypes',
  'django.contrib.sessions',
  'django.contrib.messages',
  'django.contrib.staticfiles',
  'wechat',
)
注:应用名称后面要有逗号
E、在wechat目录下,重写views.py文件,代码如下(参考网上例子):
#!/usr/bin/python
# -*- coding: utf-8 -*-
# Create your views here.
from django.shortcuts import render
from django.http import HttpResponse
from django.views.decorators.csrf import csrf_exempt
from django.views.generic.base import View
from django.template import loader, Context

from wechat_sdk import WechatBasic
token = 'zwbswx'

class WeChat(View):
 #这里我当时写成了防止跨站请求伪造,其实不是这样的,恰恰相反。因为django默认是开启了csrf防护中间件的
 #所以这里使用@csrf_exempt是单独为这个函数去掉这个防护功能。
 @csrf_exempt
 def dispatch(self, *args, **kwargs):
  return super(WeChat, self).dispatch(*args, **kwargs)

 def get(self, request):
  wechat = WechatBasic(token=token)
  if wechat.check_signature(signature=request.GET['signature'],
               timestamp=request.GET['timestamp'],
               nonce=request.GET['nonce']):
    if request.method == 'GET':
      rsp = request.GET.get('echostr', 'error')
    else:
      wechat.parse_data(request.body)
      message = wechat.get_message()
      rsp = wechat.response_text(u'消息类型: {}'.format(message.type))
  else:
    rsp = wechat.response_text('check error')
  return HttpResponse(rsp)
F、修改projtest/projtest/urls.py ,添加映射到微信应用(类似servlet)
[root@VM_4_128_centos projtest]# vim projtest/urls.py
from django.conf.urls import patterns, include, url
from django.contrib import admin
from wechat import views as wt_views ##增加本行
admin.autodiscover()

urlpatterns = patterns('',
  # Examples:
  # url(r'^$', 'projtest.views.home', name='home'),
  # url(r'^blog/', include('blog.urls')),

  url(r'^admin/', include(admin.site.urls)),
  url(r'^wechat', wt_views.WeChat.as_view()), ##增加本行

)
)
G、微信提交配置通过
05/Jun/2017 03:31:01] "GET /wechat?signature=8a75afb21cf821bbc4e2535119aa05be5c987112&echostr=13869464754252084605×tamp=1496633461&nonce=3957453572 HTTP/1.0" 301 0

[05/Jun/2017 03:31:01] "GET /wechat/?signature=8a75afb21cf821bbc4e2535119aa05be5c987112&echostr=13869464754252084605×tamp=1496633461&nonce=3957453572 HTTP/1.0" 200 20
以上这篇利用django+wechat-python-sdk 创建微信服务器接入的方法就是小编分享给大家的全部内容了,希望能给大家一个参考,也希望大家多多支持脚本之家。


