
使用vue制作一个购物车功能,只是一个测试版本,注重的是功能实现,界面并没有做好,数据也是模拟数据等
不说那么多,直接上代码
<template>
<div id="app">
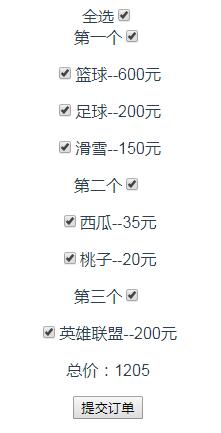
全选<input type="checkbox" v-model="checkall" @change="check_all()">
<div v-for="(item,index) in mylist" :key="index">
<span>{{item.oname}}</span><input type="checkbox" v-model="item.this_all" @change="check_list(index)">
<p v-for="(goods,nindex) in item.newlist" :key="nindex">
<input type="checkbox" v-model="goods.check_one" @change="click_input(index,nindex)">{{goods.newname}}--{{goods.price}}元
</p>
</div>
<p>总价:{{allprice}}</p>
<button @click="btn()">提交订单</button>
</div>
</template>
<script>
export default {
name: 'App',
data(){
return{
mylist:[
{oname:"第一个",this_all:true,newlist:[{newname:"篮球",check_one:true,price:600},{newname:"足球",check_one:true,price:200},{newname:"滑雪",check_one:true,price:150}]},
{oname:"第二个",this_all:true,newlist:[{newname:"西瓜",check_one:true,price:35},{newname:"桃子",check_one:true,price:20}]},
{oname:"第三个",this_all:true,newlist:[{newname:"英雄联盟",check_one:true,price:200}]},
],
checkall:true,
allprice:0,
cpmylist:[]
}
},
mounted:function(){
this.money();
},
methods: {
money:function(){
var that = this;
this.allprice=0;
that.mylist.forEach(item1 =>{
item1.newlist.forEach(item2 =>{
if(item2.check_one==true){
that.allprice+=item2.price;
}
})
})
},
check_all:function(){
var that = this;
that.mylist.forEach(item1 => {
item1.this_all=that.checkall
item1.newlist.forEach(item2 => {
item2.check_one=that.checkall
})
});
that.money();
},
abc:function(){
var that = this;
var aaa = that.mylist.filter(item2 =>{
return item2.this_all==true
})
aaa.length==that.mylist.length ? that.checkall = true : that.checkall = false
that.money();
},
check_list:function(i){
var that = this;
that.mylist[i].newlist.forEach(item1 =>{
item1.check_one=that.mylist[i].this_all
})
that.abc();
},
click_input:function(i,j){
var that = this;
var checklist = that.mylist[i].newlist.filter(item1 =>{
return item1.check_one==true
})
checklist.length==that.mylist[i].newlist.length ? that.mylist[i].this_all = true : that.mylist[i].this_all = false
that.abc();
},
btn:function(){
var that = this;
that.cpmylist=JSON.parse(JSON.stringify(that.mylist));
that.cpmylist.filter(item1 =>{
item1.newlist = item1.newlist.filter(item2 =>{
return item2.check_one==true
})
})
that.cpmylist=that.cpmylist.filter(item3 =>{
return item3.newlist.length!=0
})
if(that.cpmylist.length==0){
alert("请选择商品哦!")
}else{
console.log("★★★您购买的商品是:");
that.cpmylist.forEach(item4 =>{
console.log("----------"+item4.oname+"店铺----------");
item4.newlist.forEach(item5 =>{
console.log("——>:"+item5.newname);
})
})
}
}
},
}
</script>
<style>
#app {
font-family: 'Avenir', Helvetica, Arial, sans-serif;
-webkit-font-smoothing: antialiased;
-moz-osx-font-smoothing: grayscale;
text-align: center;
color: #2c3e50;
margin-top: 60px;
}
</style>
以上就是本文的全部内容,希望对大家的学习有所帮助,也希望大家多多支持脚本之家。


