

这个博客申请了有一段时间了,觉得好像是该写点什么了。这篇文章主要是关于一些xib的简单的用法,希望可以帮助到刚刚使用xib的新手们。
什么是xib? xib能做什么?
用来描述软件界面的文件。
如果没有xib,所有的界面都需要通过代码来手动创建。
有了xib以后,可以在xib中进行可视化开发,然后加载xib文件的时候,系统自动生成对应的代码来创建界面。
与xib类似的还有storyboard文件。xib和storyboard的比较,一个轻量级一个重量级。
共同点:
都用来描述软件界面。都用Interface Builder工具来编辑
不同点:
Xib是轻量级的,用来描述局部的UI界面
Storyboard是重量级的,用来描述整个软件的多个界面,并且能展示多个界面之间的跳转关系
二、xib的简单使用
1.建立xib文件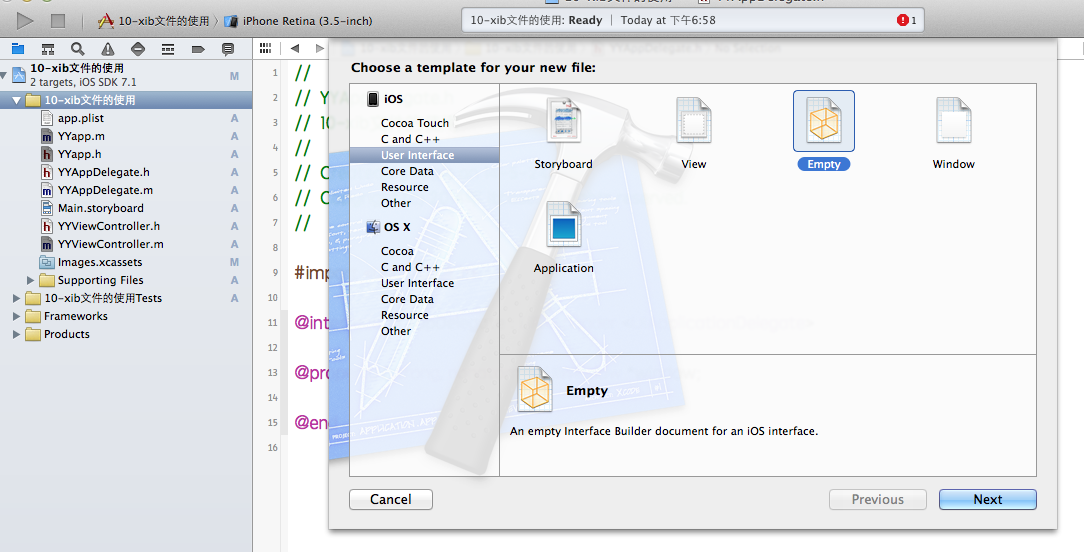
建立的xib文件命名为appxib.xib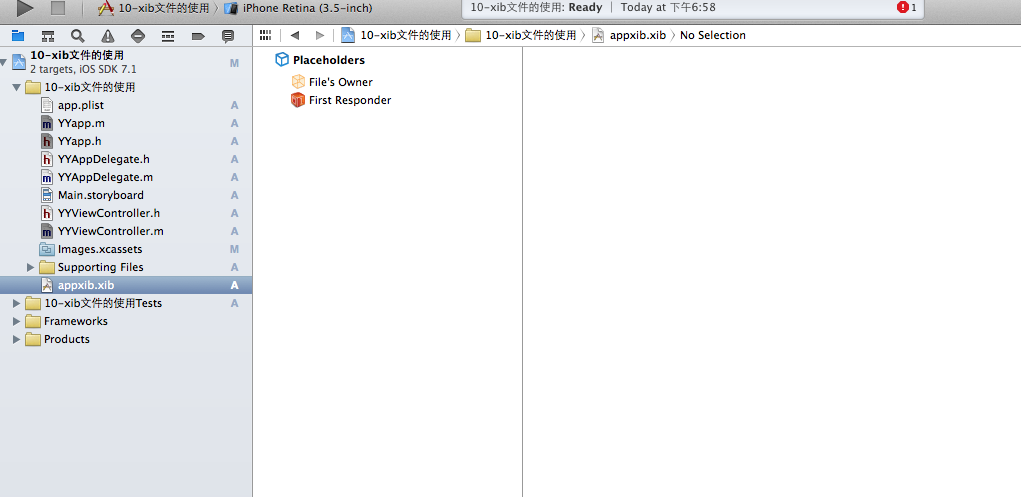
2.对xib进行设置
根据程序的需要,这里把view调整为自由布局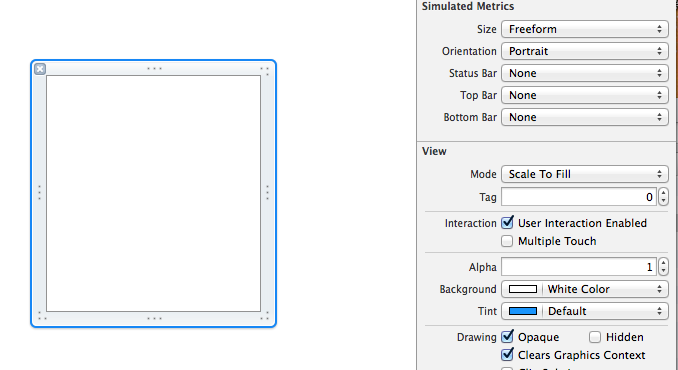
建立view模型(设置长宽等参数)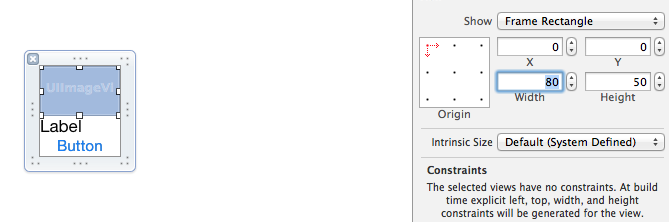
调整布局和内部的控件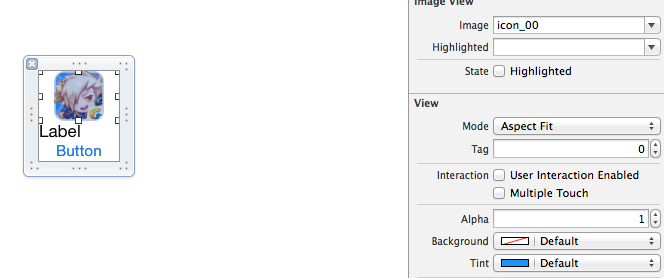
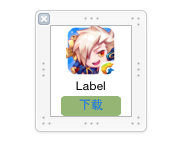
完成后的单个view
3.使用xib文件的代码示例
YYViewController.m文件代码如下:
//
// YYViewController.m
// 10-xib文件的使用
//
// Created by apple on 14-5-24.
// Copyright (c) 2014年 itcase. All rights reserved.
//

#import "YYViewController.h"
#import "YYapp.h"

@interface YYViewController ()
@property(nonatomic,strong)NSArray *app;
@end

@implementation YYViewController

//1.加载数据信息
-(NSArray *)app
{
  if (!_app) {
    NSString *path=[[NSBundle mainBundle]pathForResource:@"app.plist" ofType:nil];
    NSArray *temparray=[NSArray arrayWithContentsOfFile:path];

    //字典转模型
    NSMutableArray *arrayM=[NSMutableArray array ];
    for (NSDictionary *dict in temparray) {
      [arrayM addObject:[YYapp appWithDict:dict]];
    }
    _app=arrayM;
  }
  return _app;
}

//创建界面原型
- (void)viewDidLoad
{
  [super viewDidLoad];
  NSLog(@"%d",self.app.count);

  //九宫格布局
  int totalloc=3;
  CGFloat appviewW=80;
  CGFloat appviewH=90;
  CGFloat margin=(self.view.frame.size.width-totalloc*appviewW)/(totalloc+1);

  int count=self.app.count;
  for (int i=0; i<count; i++) {

    int row=i/totalloc;
    int loc=i%totalloc;
    CGFloat appviewX=margin + (margin +appviewW)*loc;
    CGFloat appviewY=margin + (margin +appviewH)*row;
    YYapp *app=self.app[i];

    //拿出xib视图
    NSArray *apparray= [[NSBundle mainBundle]loadNibNamed:@"appxib" owner:nil options:nil];
    UIView *appview=[apparray firstObject];
    //加载视图
    appview.frame=CGRectMake(appviewX, appviewY, appviewW, appviewH);

    UIImageView *appviewImg=(UIImageView *)[appview viewWithTag:1];
    appviewImg.image=app.image;

    UILabel *appviewlab=(UILabel *)[appview viewWithTag:2];
    appviewlab.text=app.name;

    UIButton *appviewbtn=(UIButton *)[appview viewWithTag:3];
    [appviewbtn addTarget:self action:@selector(appviewbtnClick:) forControlEvents:UIControlEventTouchUpInside];
    appviewbtn.tag=i;

    [self.view addSubview:appview];
  }
}

/**按钮的点击事件*/
-(void)appviewbtnClick:(UIButton *)btn
{
  YYapp *apps=self.app[btn.tag];
  UILabel *showlab=[[UILabel alloc]initWithFrame:CGRectMake(60, 450, 200, 20)];
  [showlab setText:[NSString stringWithFormat: @"%@下载成功",apps.name]];
  [showlab setBackgroundColor:[UIColor lightGrayColor]];
  [self.view addSubview:showlab];
  showlab.alpha=1.0;

  //简单的动画效果
  [UIView animateWithDuration:2.0 animations:^{
    showlab.alpha=0;
  } completion:^(BOOL finished) {
    [showlab removeFromSuperview];
  }];
}

@end
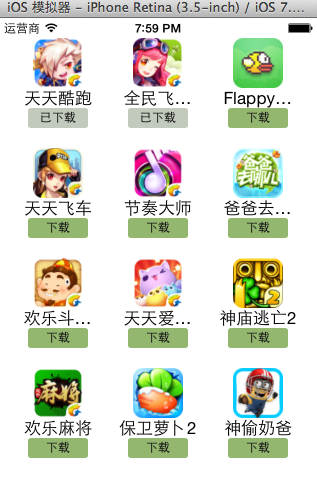
运行效果:
三、对xib进行连线示例
1.连线示例
新建一个xib对应的视图类,继承自Uiview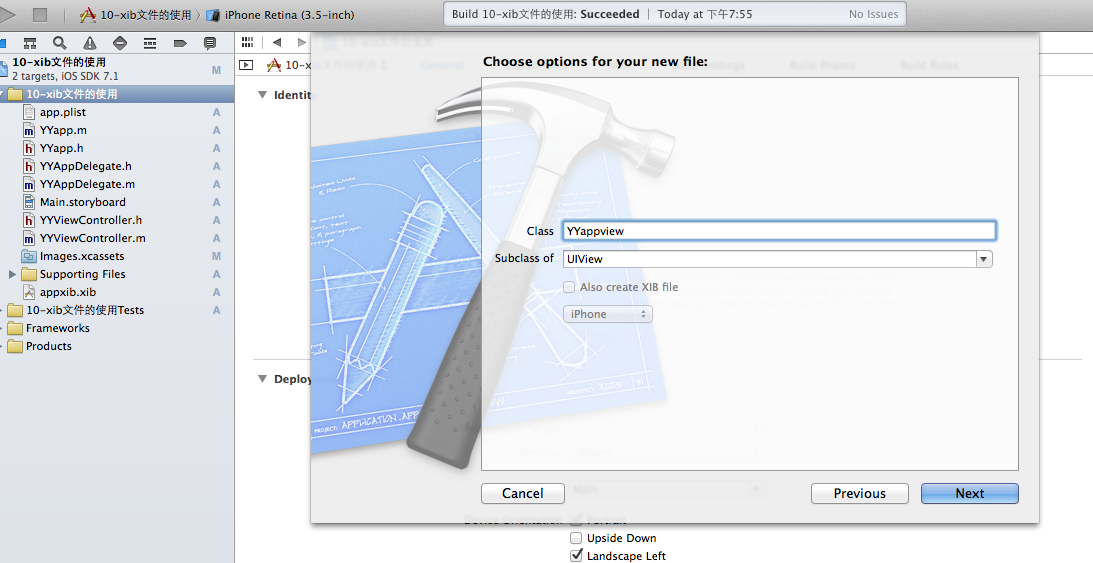
在xib界面右上角与新建的视图类进行关联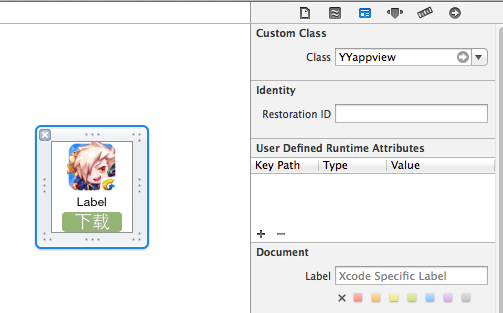
把xib和视图类进行连线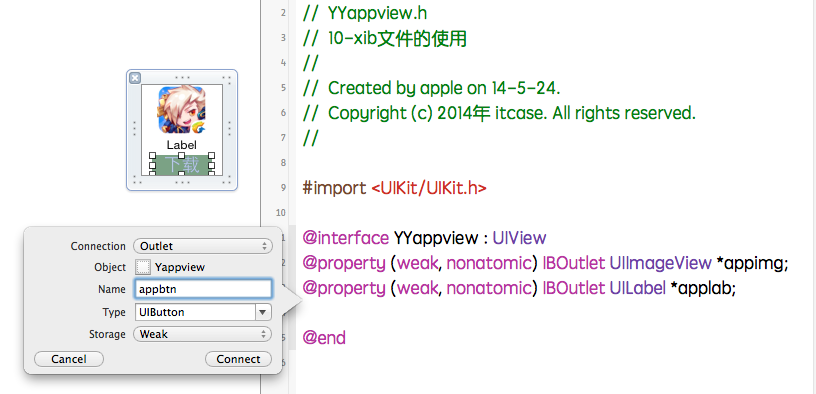
注意:在使用中把weak改成为强引用。否则...
2.连线后的代码示例
YYViewController.m文件代码如下:
//
// YYViewController.m
// 10-xib文件的使用
//
// Created by apple on 14-5-24.
// Copyright (c) 2014年 itcase. All rights reserved.
//

#import "YYViewController.h"
#import "YYapp.h"
#import "YYappview.h"

@interface YYViewController ()
@property(nonatomic,strong)NSArray *app;
@end

@implementation YYViewController

//1.加载数据信息
-(NSArray *)app
{
  if (!_app) {
    NSString *path=[[NSBundle mainBundle]pathForResource:@"app.plist" ofType:nil];
    NSArray *temparray=[NSArray arrayWithContentsOfFile:path];

    //字典转模型
    NSMutableArray *arrayM=[NSMutableArray array ];
    for (NSDictionary *dict in temparray) {
      [arrayM addObject:[YYapp appWithDict:dict]];
    }
    _app=arrayM;
  }
  return _app;
}

//创建界面原型
- (void)viewDidLoad
{
  [super viewDidLoad];
  NSLog(@"%d",self.app.count);

  //九宫格布局
  int totalloc=3;
  CGFloat appviewW=80;
  CGFloat appviewH=90;
  CGFloat margin=(self.view.frame.size.width-totalloc*appviewW)/(totalloc+1);

  int count=self.app.count;
  for (int i=0; i<count; i++) {

    int row=i/totalloc;
    int loc=i%totalloc;
    CGFloat appviewX=margin + (margin +appviewW)*loc;
    CGFloat appviewY=margin + (margin +appviewH)*row;
    YYapp *app=self.app[i];

    //拿出xib视图
    NSArray *apparray= [[NSBundle mainBundle]loadNibNamed:@"appxib" owner:nil options:nil];

    //注意这里的类型名!
    //UIView *appview=[apparray firstObject];
    YYappview *appview=[apparray firstObject];

    //加载视图
    appview.frame=CGRectMake(appviewX, appviewY, appviewW, appviewH);
     [self.view addSubview:appview];

    appview.appimg.image=app.image;
    appview.applab.text=app.name;
    appview.appbtn.tag=i;

    [ appview.appbtn addTarget:self action:@selector(appviewbtnClick:) forControlEvents:UIControlEventTouchUpInside];

  }
}

/**按钮的点击事件*/
-(void)appviewbtnClick:(UIButton *)btn
{
  YYapp *apps=self.app[btn.tag];
  UILabel *showlab=[[UILabel alloc]initWithFrame:CGRectMake(60, 450, 200, 20)];
  [showlab setText:[NSString stringWithFormat: @"%@下载成功",apps.name]];
  [showlab setBackgroundColor:[UIColor lightGrayColor]];
  [self.view addSubview:showlab];
  showlab.alpha=1.0;

  //简单的动画效果
  [UIView animateWithDuration:2.0 animations:^{
    showlab.alpha=0;
  } completion:^(BOOL finished) {
    [showlab removeFromSuperview];
  }];
}

@end
YYappview.h文件代码(已经连线)
#import <UIKit/UIKit.h>

@interface YYappview : UIView
@property (strong, nonatomic) IBOutlet UIImageView *appimg;
@property (strong, nonatomic) IBOutlet UILabel *applab;
@property (strong, nonatomic) IBOutlet UIButton *appbtn;
@end
以上就是本文的全部内容,希望对大家的学习有所帮助,也希望大家多多支持脚本之家。


