这是一个粒子效果实例教程,学习如何结合基本的动画和 ActionScript 3 绘图API。
演示:
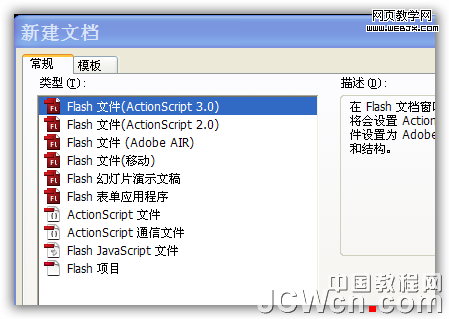
1、新建Flash文件,设置属性:宽、高默认为550*400 ,保存,名称任意。图1:
2、用椭圆工具画一个 10 × 10 大小的球,颜色任意。
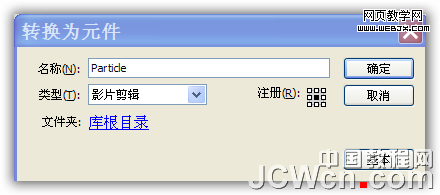
3、把球转换成影片剪辑,命名 "Particle ",注册点居中。图2:
4、把球从舞台上删除。
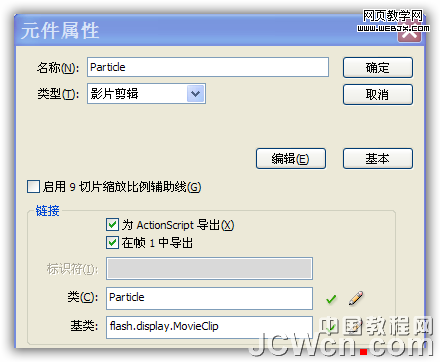
5、打开库面板,右键单击Particle影片剪辑,选择属性。在属性面板中的链接项,为ActionScript导出的复选框打勾。在类的文本输入框中输入" Particle " 。图3:
6、新建一个ActionScript文件,命名为 " Particle ",保存在fla文件相同的目录下。图4:

在编译器中输入代码:
package{
importflash.display.MovieClip;
publicclassParticleextendsMovieClip{
//Weneeddifferentspeedsfordifferentparticles.
//Thesevariablescanbeaccessedfromthemainmovie,becausetheyarepublic.
publicvarspeedX:Number;
publicvarspeedY:Number;
functionParticle():void{
}
}
}
7、切换到fla主类。生成粒子实例,显示在舞台上,而且增加一些效果。在第1帧输入代码:
//Weneedfewimportsforthefilters
importfl.motion.Color;
importflash.geom.ColorTransform;
//Createanarrayfortheparticlesforlateruse
varnumberOfParticles:Number=30;
varparticlesArray:Array=newArray();
//Thisloopcreates30particlesthatarepositionedrandomlyonthestage.
//Wealsoaddsomeeffectstotheparticles
for(vari=0;i<numberOfParticles;i++){
varparticle:Particle=newParticle();
//Giverandomxandyspeedtotheparticle.
//Math.randomreturnsarandomnumbern,where0<=n<1.
particle.speedX=2+Math.random();
particle.speedY=2+Math.random();
//Setthestartingposition
particle.y=Math.random()*stage.stageHeight;
particle.x=Math.random()*stage.stageWidth;
//Setarandomtinttotheparticle,sotheywillhavedifferentcolors.
varct:Color=newColor();
ct.setTint(0xFFFFFF*Math.random(),0.5);
particle.transform.colorTransform=ct;
//Setrandomsizetotheparticles,sotheparticleswilldifferinsize
particle.scaleX=0.5+Math.random();
particle.scaleY=particle.scaleX;
//Thisarrayisusedtostoreallofthefilters
varparticleFilters:Array=newArray();
//Createadifferentblureffectineachparticle
vartempBlurAmount=Math.random()*4;
varblur:BlurFilter=newBlurFilter(tempBlurAmount,tempBlurAmount,1);
particleFilters.push(blur);
//Createagloweffectineachparticle
varcolor:Number=0x000000;
varalphaValue:Number=0.5;
varblurX:Number=20;
varblurY:Number=20;
varstrength:Number=5;
varglow:GlowFilter=newGlowFilter(color,
alphaValue,
blurX,
blurY,
strength);
particleFilters.push(glow);
//Applythecreatedfilterstotheparticle(blur&glow)
particle.filters=particleFilters;
//Addtheparticletothestageandpushitintoanarrayforlateruse
addChild(particle);
particlesArray.push(particle);
}
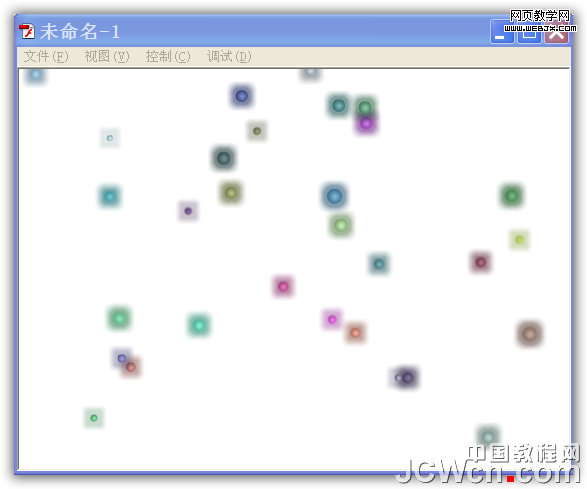
可能看起来很难的 ,但实际上非常简单。注释应该解释的很充分。测试一下影片剪辑,效果如图。图5:
8、注册Event.ENTER_FRAME事件,随机地移动粒子。接上面输入代码:
addEventListener(Event.ENTER_FRAME,enterFrameHandler);
//Thisfunctionisresponsibleforanimation
functionenterFrameHandler(e:Event):void{
//Let’sloopthroughtheparticles
for(i=0;i<particlesArray.length;i++){
varparticleOne:Particle=particlesArray[i];
//Movetheparticletoanewlocation
particleOne.x+=particleOne.speedX;
particleOne.y+=particleOne.speedY;
//Checktheboundaries.
//Ifahitoccurs,multiplythespeedby(-1)toreversethespeed.
//Rightedge
if(particleOne.x>stage.stageWidth){
particleOne.x=stage.stageWidth-particleOne.width/2;
particleOne.speedX*=-1;
}
//Leftedge
elseif(particleOne.x<0){
particleOne.x=particleOne.width/2;
particleOne.speedX*=-1;
}
//Bottom
if(particleOne.y>stage.stageHeight){
particleOne.y=stage.stageHeight-particleOne.width/2;
particleOne.speedY*=-1;
}
//Top
elseif(particleOne.y<0){
particleOne.y=particleOne.width/2;
particleOne.speedY*=-1;
}
}
}
测试影片剪辑,观看一下效果。未命名-1.swf:
9、为粒子加入连线,修改 enterFrameHandler,代码如下:
functionenterFrameHandler(e:Event):void{
//Clearthepreviouslines
graphics.clear();
//Let’sloopthroughtheparticles
for(i=0;i<particlesArray.length;i++){
varparticleOne:Particle=particlesArray[i];
//Movetheparticletoanewlocation
particleOne.x+=particleOne.speedX;
particleOne.y+=particleOne.speedY;
//Checktheboundaries
if(particleOne.x>stage.stageWidth){
particleOne.x=stage.stageWidth-particleOne.width/2;
particleOne.speedX*=-1;
}
elseif(particleOne.x<0){
particleOne.x=particleOne.width/2;
particleOne.speedX*=-1;
}
if(particleOne.y>stage.stageHeight){
particleOne.y=stage.stageHeight-particleOne.width/2;
particleOne.speedY*=-1;
}
elseif(particleOne.y<0){
particleOne.y=particleOne.width/2;
particleOne.speedY*=-1;
}
//Gothroughtheotherparticlestocheckthedistancewiththefirstparticle
for(varj:uint=i+1;j<particlesArray.length;j++){
varparticleTwo:Particle=particlesArray[j];
vardistanceX:Number=particleOne.x-particleTwo.x;
vardistanceY:Number=particleOne.y-particleTwo.y;
//UsePythagoreantheorem(a^2+b^2=c^2)tocalculatethedistance
vardistance:Number=Math.sqrt(distanceX*distanceX+distanceY*distanceY);
//Ifthedistanceissmallerthan80px,drawalinebetweentheparticles
if(distance<80){
drawLine(particleOne,particleTwo);
}
}
}
}
在enterFrameHandler之后添加方法drawLine实现画线功能。
//Thisfunctiondrawsablacklinebetweentwoparticles
functiondrawLine(particleOne:Particle,particleTwo:Particle):void{
graphics.lineStyle(1,0x000000);//线为白色,如黑色背景改为0xffffff
graphics.moveTo(particleOne.x,particleOne.y);
graphics.lineTo(particleTwo.x,particleTwo.y);
} 10、测试影片剪辑。
完整主类代码:
//Weneedfewimportsforthefilters
importfl.motion.Color;
importflash.geom.ColorTransform;
//Createanarrayfortheparticlesforlateruse
varnumberOfParticles:Number=30;
varparticlesArray:Array=newArray();
//Thisloopcreates30particlesthatarepositionedrandomlyonthestage.
//Wealsoaddsomeeffectstotheparticles
for(vari=0;i<numberOfParticles;i++){
varparticle:Particle=newParticle();
//Giverandomxandyspeedtotheparticle.
//Math.randomreturnsarandomnumbern,where0<=n<1.
particle.speedX=2+Math.random();
particle.speedY=2+Math.random();
//Setthestartingposition
particle.y=Math.random()*stage.stageHeight;
particle.x=Math.random()*stage.stageWidth;
//Setarandomtinttotheparticle,sotheywillhavedifferentcolors.
varct:Color=newColor();
ct.setTint(0xFFFFFF*Math.random(),0.5);
particle.transform.colorTransform=ct;
//Setrandomsizetotheparticles,sotheparticleswilldifferinsize
particle.scaleX=0.5+Math.random();
particle.scaleY=particle.scaleX;
//Thisarrayisusedtostoreallofthefilters
varparticleFilters:Array=newArray();
//Createadifferentblureffectineachparticle
vartempBlurAmount=Math.random()*4;
varblur:BlurFilter=newBlurFilter(tempBlurAmount,tempBlurAmount,1);
particleFilters.push(blur);
//Createagloweffectineachparticle
varcolor:Number=0x000000;
varalphaValue:Number=0.5;
varblurX:Number=20;
varblurY:Number=20;
varstrength:Number=5;
varglow:GlowFilter=newGlowFilter(color,
alphaValue,
blurX,
blurY,
strength);
particleFilters.push(glow);
//Applythecreatedfilterstotheparticle(blur&glow)
particle.filters=particleFilters;
//Addtheparticletothestageandpushitintoanarrayforlateruse
addChild(particle);
particlesArray.push(particle);
}
addEventListener(Event.ENTER_FRAME,enterFrameHandler);
//Thisfunctionisresponsibleforanimation
functionenterFrameHandler(e:Event):void{
//Clearthepreviouslines
graphics.clear();
//Let’sloopthroughtheparticles
for(i=0;i<particlesArray.length;i++){
varparticleOne:Particle=particlesArray[i];
//Movetheparticletoanewlocation
particleOne.x+=particleOne.speedX;
particleOne.y+=particleOne.speedY;
//Checktheboundaries
if(particleOne.x>stage.stageWidth){
particleOne.x=stage.stageWidth-particleOne.width/2;
particleOne.speedX*=-1;
}
elseif(particleOne.x<0){
particleOne.x=particleOne.width/2;
particleOne.speedX*=-1;
}
if(particleOne.y>stage.stageHeight){
particleOne.y=stage.stageHeight-particleOne.width/2;
particleOne.speedY*=-1;
}
elseif(particleOne.y<0){
particleOne.y=particleOne.width/2;
particleOne.speedY*=-1;
}
//Gothroughtheotherparticlestocheckthedistancewiththefirstparticle
for(varj:uint=i+1;j<particlesArray.length;j++){
varparticleTwo:Particle=particlesArray[j];
vardistanceX:Number=particleOne.x-particleTwo.x;
vardistanceY:Number=particleOne.y-particleTwo.y;
//UsePythagoreantheorem(a^2+b^2=c^2)tocalculatethedistance
vardistance:Number=Math.sqrt(distanceX*distanceX+distanceY*distanceY);
//Ifthedistanceissmallerthan80px,drawalinebetweentheparticles
if(distance<80){
drawLine(particleOne,particleTwo);
}
}
}
}
//Thisfunctiondrawsablacklinebetweentwoparticles
functiondrawLine(particleOne:Particle,particleTwo:Particle):void{
graphics.lineStyle(1,0x000000);
graphics.moveTo(particleOne.x,particleOne.y);
graphics.lineTo(particleTwo.x,particleTwo.y);
}


