
难点
svg图形的两块蒙版制作
先上代码
这是左边粉色框框的内容
这个没啥好说的
<div id="con">
    <div id="TA-con">
      <div id="text-con">
        <div id="linght"></div>
        <div id="TA">为TA充电</div>
      </div>
    </div>
body {
      margin: 0;
      padding: 0;
      background-color: #eee;
    }
    /* 设置白色容器 */
    #con {
      width: 350px;
      height: 85px;
      background-color: #fff;
      position: relative;
      border-radius: 4px;
      margin:50px auto;
    }
#TA-con {
      width: 157px;
      height: 50px;
      background-color: #f25d8e;
      box-shadow: 0 4px 4px rgba(255, 112, 159, .3);
      position: absolute;
      top: 50%;
      left: 5%;
      transform: translateY(-50%);
      border-radius: 4px;
      cursor: pointer;
    }
    /* 设置文本居中容器 */
    #text-con {
      width: 100px;
      height: 100%;
      margin: 0 auto;
      position: relative;
    }
    /* 做一个小闪电 */
    #linght {
      width: 0;
      height: 0;
      position: absolute;
      top: 36%;
      left: 4px;
      border-color: transparent;
      border-style: solid;
      border-width: 10px;
      border-top: 10px solid #fff;
      border-radius: 4px;
      transform: rotate(-55deg);
    }
    #linght::after {
      position: absolute;
      top: -13px;
      left: -11px;
      content: "";
      width: 0;
      height: 0;
      border-color: transparent;
      border-style: solid;
      border-width: 10px;
      border-top: 10px solid #fff;
      transform: rotate(180deg);
      border-radius: 4px;
    }
    /* 文字 */
    #TA {
      float: right;
      line-height: 50px;
      font-size: 15px;
      color: #fff;
    }
    #TA-con:hover {
      background-color: #ff6b9a;
    }
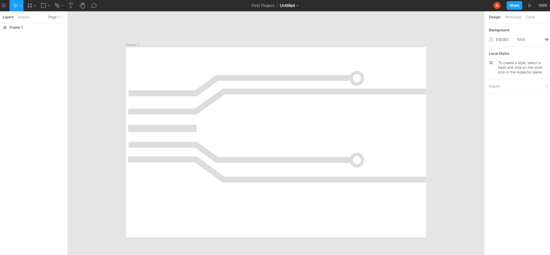
这里做的就是创建一个svg的图形,背景色是灰色,看着是不是很多很复杂,没事,这也不是我写的
 <div id="tube-con">
      <svg viewBox="0 0 1028 385" fill="none" xmlns="http://www.w3.org/2000/svg">
        <path d="M1 77H234.226L307.006 24H790" stroke="#e5e9ef" stroke-width="20" />
        <path d="M0 140H233.035L329.72 71H1028" stroke="#e5e9ef" stroke-width="20" />
        <path d="M1 255H234.226L307.006 307H790" stroke="#e5e9ef" stroke-width="20" />
        <path d="M0 305H233.035L329.72 375H1028" stroke="#e5e9ef" stroke-width="20" />
        <rect y="186" width="236" height="24" fill="#e5e9ef" />
        <ellipse cx="790" cy="25.5" rx="25" ry="25.5" fill="#e5e9ef" />
        <circle r="14" transform="matrix(1 0 0 -1 790 25)" fill="white" />
        <ellipse cx="790" cy="307.5" rx="25" ry="25.5" fill="#e5e9ef" />
        <circle r="14" transform="matrix(1 0 0 -1 790 308)" fill="white" />
      </svg>
用的是这玩意,网页版在线的,画好后就可以右击复制代码了,是不是很简单! www.figma.com/
既然svg图画好了,就要想怎么完成了
需要的东西:
1:svg底色为灰色的图;
2:一个粉色的svg图,当我鼠标hover到左边粉色框时,粉色svg图完全展开,初始为0;
3:快速移动的黄色小方块;
底色灰色做好了,还差粉色和黄色的svg图
mask是用来做粉色svg的蒙版的
<div id="mask">
跟灰色svg没有任何的区别,就是改改颜色
<svg viewBox="0 0 1028 385" fill="none" xmlns="http://www.w3.org/2000/svg">
<path d="M1 77H234.226L307.006 24H790" stroke="#f25d8e" stroke-width="20" />
<path d="M0 140H233.035L329.72 71H1028" stroke="#f25d8e" stroke-width="20" />
<path d="M1 255H234.226L307.006 307H790" stroke="#f25d8e" stroke-width="20" />
<path d="M0 305H233.035L329.72 375H1028" stroke="#f25d8e" stroke-width="20" />
<rect y="186" width="236" height="24" fill="#f25d8e" />
<ellipse cx="790" cy="25.5" rx="25" ry="25.5" fill="#f25d8e" />
<circle r="14" transform="matrix(1 0 0 -1 790 25)" fill="white" />
<ellipse cx="790" cy="307.5" rx="25" ry="25.5" fill="#f25d8e" />
<circle r="14" transform="matrix(1 0 0 -1 790 308)" fill="white" />
</svg>
</div>
orange-mask是用来做黄色svg的蒙版
<div id="orange-mask" >
跟灰色svg没有任何的区别,就是改改颜色
<svg viewBox="0 0 1028 385" fill="none" xmlns="http://www.w3.org/2000/svg">
<path d="M1 77H234.226L307.006 24H790" stroke="#ffd52b" stroke-width="20" />
<path d="M0 140H233.035L329.72 71H1028" stroke="#ffd52b" stroke-width="20" />
<path d="M1 255H234.226L307.006 307H790" stroke="#ffd52b" stroke-width="20" />
<path d="M0 305H233.035L329.72 375H1028" stroke="#ffd52b" stroke-width="20" />
<rect y="186" width="236" height="24" fill="#ffd52b" />
<ellipse cx="790" cy="25.5" rx="25" ry="25.5" fill="#ffd52b" />
<circle r="14" transform="matrix(1 0 0 -1 790 25)" fill="white" />
<ellipse cx="790" cy="307.5" rx="25" ry="25.5" fill="#ffd52b" />
<circle r="14" transform="matrix(1 0 0 -1 790 308)" fill="white" />
</svg>
</div>
<p id="people">共 <b>0</b> 人</p>
</div>
</div>
css的代码
/* 创建图形容器 */
    #tube-con {
      width: 157px;
      height: 55px;
      position: absolute;
      right: -5px;
      top: 15px;
    }
    /* 对svg图形设置宽高 */
    svg {
      width: 100%;
      height: 100%;
    }
    /* 创建一个蒙版 宽度为0,当我hover充电框的时候,宽度展开 */
    #mask {
      width: 0px;
      height: 100%;
      overflow: hidden;
      position: absolute;
      top: 0;
      left: 0;
      transition:all 0.5s;
    }
    /* 对蒙版的sbg单独设置宽高,保证宽度高低有一个固定值而不是百分比 */
    #mask svg {
      width: 157px;
      height: 55px;
    }
    /* 对充电框hover的时候开始动画,将粉色线条铺开 */
    #TA-con:hover+#tube-con>#mask{
      width:157px;
    }
    /* 对充电框hover的时候开始动画,添加黄色快速移动的动画 */
    #TA-con:hover+#tube-con>#orange-mask{
      animation: move1 0.5s linear 0.2s infinite;
    }
    #TA-con:hover+#tube-con>#orange-mask svg{
      animation: movetwo 0.5s linear 0.2s infinite;
    }
    /* 创建黄色移动的蒙版 */
    #orange-mask{
      width: 18px;
      height: 100%;
      overflow: hidden;
      position:absolute;
      left:-15px;
      top:0px;
    }
    /* 创建黄色移动的内容 */
    #orange-mask svg {
      position: absolute;;
      top:0;
      left:15px;
      width: 157px;
      height: 55px;
    }
    @keyframes move1 {
      0%{
        left:-15px;
      }
      100%{
        left:140px;
      }
    }
    @keyframes movetwo {
      0%{
        left:15px;
      }
      100%{
        left:-140px;
      }
    }
    #people{
      position:absolute;
      right:10px;
      top:8px;
      font-size:12px;
      font-family:"雅黑";
      color:#aaa;
    }
    #people>b{
      color:#777;
    }
其中css处理最难的地方在于黄色svg和黄色svg蒙版的地方
因为既要保证黄色svg的蒙版从左向右移动,又要保证黄色svg位置保证不变;
蒙版为父元素,黄色svg为子元素,
父元素添加定位后,父元素移动,子元素一定会跟着移动,
如果子元素添加定位,父元素不添加定位 或者 父元素正常定位,子元素定位为fixed,
这有会导致父元素蒙版不能对子元素溢出的部分进行隐藏,在这我纠结了好久
!!!然后我就突然发现
父元素无论以多块的速度移动多远的距离,子元素只要以相同的速度移动相反的距离,
子元素就能保证一直以一个位置保持不变!!!子元素就相对body是静止的!!
move1是父元素蒙版的,movetwo是黄色svg图形的,请不要吐槽起名。。。。
move1移动多远,movetwo就移动相反的距离
 @keyframes move1 {
      0%{
        left:-15px;
      }
      100%{
        left:140px;
      }
    }
    @keyframes movetwo {
      0%{
        left:15px;
      }
      100%{
        left:-140px;
      }
    }
全部的代码
<!DOCTYPE html>
<html lang="en">

<head>
  <meta charset="UTF-8">
  <meta name="viewport" content="width=device-width, initial-scale=1.0">
  <title>Document</title>
  <style>
    body {
      margin: 0;
      padding: 0;
      background-color: #eee;
    }
    /* 设置白色容器 */
    #con {
      width: 350px;
      height: 85px;
      background-color: #fff;
      position: relative;
      border-radius: 4px;
      margin:50px auto;
    }
    /* 设置文本内容容器 */
    #TA-con {
      width: 157px;
      height: 50px;
      background-color: #f25d8e;
      box-shadow: 0 4px 4px rgba(255, 112, 159, .3);
      position: absolute;
      top: 50%;
      left: 5%;
      transform: translateY(-50%);
      border-radius: 4px;
      cursor: pointer;
    }
    /* 设置文本居中容器 */
    #text-con {
      width: 100px;
      height: 100%;
      margin: 0 auto;
      position: relative;
    }
    /* 做一个小闪电 */
    #linght {
      width: 0;
      height: 0;
      position: absolute;
      top: 36%;
      left: 4px;
      border-color: transparent;
      border-style: solid;
      border-width: 10px;
      border-top: 10px solid #fff;
      border-radius: 4px;
      transform: rotate(-55deg);
    }
    #linght::after {
      position: absolute;
      top: -13px;
      left: -11px;
      content: "";
      width: 0;
      height: 0;
      border-color: transparent;
      border-style: solid;
      border-width: 10px;
      border-top: 10px solid #fff;
      transform: rotate(180deg);
      border-radius: 4px;
    }
    /* 文字 */
    #TA {
      float: right;
      line-height: 50px;
      font-size: 15px;
      color: #fff;
    }
    #TA-con:hover {
      background-color: #ff6b9a;
    }

    /* 创建图形容器 */
    #tube-con {
      width: 157px;
      height: 55px;
      position: absolute;
      right: -5px;
      top: 15px;
    }
    /* 对svg图形设置宽高 */
    svg {
      width: 100%;
      height: 100%;
    }
    /* 创建一个蒙版 宽度为0,当我hover充电框的时候,宽度展开 */
    #mask {
      width: 0px;
      height: 100%;
      overflow: hidden;
      position: absolute;
      top: 0;
      left: 0;
      transition:all 0.5s;
    }
    /* 对蒙版的sbg单独设置宽高,保证宽度高低有一个固定值而不是百分比 */
    #mask svg {
      width: 157px;
      height: 55px;
    }
    /* 对充电框hover的时候开始动画,将粉色线条铺开 */
    #TA-con:hover+#tube-con>#mask{
      width:157px;
    }
    /* 对充电框hover的时候开始动画,添加黄色快速移动的动画 */
    #TA-con:hover+#tube-con>#orange-mask{
      animation: move1 0.5s linear 0.2s infinite;
    }
    #TA-con:hover+#tube-con>#orange-mask svg{
      animation: movetwo 0.5s linear 0.2s infinite;
    }
    /* 创建黄色移动的蒙版 */
    #orange-mask{
      width: 18px;
      height: 100%;
      overflow: hidden;
      position:absolute;
      left:-15px;
      top:0px;
    }
    /* 创建黄色移动的内容 */
    #orange-mask svg {
      position: absolute;;
      top:0;
      left:15px;
      width: 157px;
      height: 55px;
    }
    @keyframes move1 {
      0%{
        left:-15px;
      }
      100%{
        left:140px;
      }
    }
    @keyframes movetwo {
      0%{
        left:15px;
      }
      100%{
        left:-140px;
      }
    }
    #people{
      position:absolute;
      right:10px;
      top:8px;
      font-size:12px;
      font-family:"雅黑";
      color:#aaa;
    }
    #people>b{
      color:#777;
    }
  </style>
</head>

<body>
  <div id="con">
    <div id="TA-con">
      <div id="text-con">
        <div id="linght"></div>
        <div id="TA">为TA充电</div>
      </div>
    </div>
    <div id="tube-con">
      <svg viewBox="0 0 1028 385" fill="none" xmlns="http://www.w3.org/2000/svg">
        <path d="M1 77H234.226L307.006 24H790" stroke="#e5e9ef" stroke-width="20" />
        <path d="M0 140H233.035L329.72 71H1028" stroke="#e5e9ef" stroke-width="20" />
        <path d="M1 255H234.226L307.006 307H790" stroke="#e5e9ef" stroke-width="20" />
        <path d="M0 305H233.035L329.72 375H1028" stroke="#e5e9ef" stroke-width="20" />
        <rect y="186" width="236" height="24" fill="#e5e9ef" />
        <ellipse cx="790" cy="25.5" rx="25" ry="25.5" fill="#e5e9ef" />
        <circle r="14" transform="matrix(1 0 0 -1 790 25)" fill="white" />
        <ellipse cx="790" cy="307.5" rx="25" ry="25.5" fill="#e5e9ef" />
        <circle r="14" transform="matrix(1 0 0 -1 790 308)" fill="white" />
      </svg>
      <div id="mask">
        <svg viewBox="0 0 1028 385" fill="none" xmlns="http://www.w3.org/2000/svg">
          <path d="M1 77H234.226L307.006 24H790" stroke="#f25d8e" stroke-width="20" />
          <path d="M0 140H233.035L329.72 71H1028" stroke="#f25d8e" stroke-width="20" />
          <path d="M1 255H234.226L307.006 307H790" stroke="#f25d8e" stroke-width="20" />
          <path d="M0 305H233.035L329.72 375H1028" stroke="#f25d8e" stroke-width="20" />
          <rect y="186" width="236" height="24" fill="#f25d8e" />
          <ellipse cx="790" cy="25.5" rx="25" ry="25.5" fill="#f25d8e" />
          <circle r="14" transform="matrix(1 0 0 -1 790 25)" fill="white" />
          <ellipse cx="790" cy="307.5" rx="25" ry="25.5" fill="#f25d8e" />
          <circle r="14" transform="matrix(1 0 0 -1 790 308)" fill="white" />
        </svg>
      </div>
      <div id="orange-mask" >
        <svg viewBox="0 0 1028 385" fill="none" xmlns="http://www.w3.org/2000/svg">
          <path d="M1 77H234.226L307.006 24H790" stroke="#ffd52b" stroke-width="20" />
          <path d="M0 140H233.035L329.72 71H1028" stroke="#ffd52b" stroke-width="20" />
          <path d="M1 255H234.226L307.006 307H790" stroke="#ffd52b" stroke-width="20" />
          <path d="M0 305H233.035L329.72 375H1028" stroke="#ffd52b" stroke-width="20" />
          <rect y="186" width="236" height="24" fill="#ffd52b" />
          <ellipse cx="790" cy="25.5" rx="25" ry="25.5" fill="#ffd52b" />
          <circle r="14" transform="matrix(1 0 0 -1 790 25)" fill="white" />
          <ellipse cx="790" cy="307.5" rx="25" ry="25.5" fill="#ffd52b" />
          <circle r="14" transform="matrix(1 0 0 -1 790 308)" fill="white" />
        </svg>
      </div>
      <p id="people">共 <b>0</b> 人</p>
    </div>
  </div>
</body>

</html>
到此这篇关于css+svg实现b站充电效果的示例代码的文章就介绍到这了,更多相关css b站充电内容请搜索脚本之家以前的文章或继续浏览下面的相关文章,希望大家以后多多支持脚本之家!


