本文实例讲述了基于CSS3实现的黑色个性导航菜单效果。分享给大家供大家参考。具体如下:
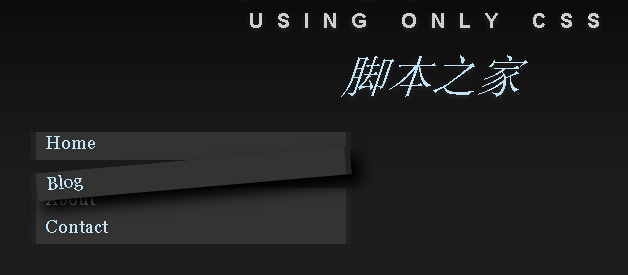
黑色个性的CSS3导航菜单,竖直排列的菜单,基本原理与横向的区别并不大,适合学习CSS。
运行效果截图如下:
在线演示地址如下:
http://demo.jb51.net/js/2015/css3-black-style-nav-menu-codes/
具体代码如下:
<!DOCTYPE html PUBLIC "-//W3C//DTD XHTML 1.0 Transitional//EN"
"http://www.w3.org/TR/xhtml1/DTD/xhtml1-transitional.dtd">
<html xmlns="http://www.w3.org/1999/xhtml">
<head>
<meta http-equiv="Content-Type" content="text/html; charset=utf-8" />
<title>黑色菜单</title>
<style>
ul,ol,li,h1,h2,h3,h4,h5,h6,pre,form,body,html,p,blockquote,fieldset,input{margin:0; padding:0;}
body { background: #1d1d1d; color: #fff; background-image:url("images/bg.png"); background-repeat:repeat-x; }
h1 { font: bold 65px/60px Helvetica, Arial, Sans-serif; text-align: center; color: #eee; text-shadow: 0px 2px 6px #333; }
h1 small{ font-size: 20px; text-transform:uppercase; letter-spacing: 14px; display: block; color: #ccc; }
h2 a { display: block; text-decoration: none; margin: 0 0 30px 0; font: italic 45px Georgia, Times, Serif; text-align: center; color: #bfe1f1; text-shadow: 0px 2px 6px #333; }
h2 a:hover { color: #90bcd0; }
h3 { font-style:italic; border-left:10px solid #eee; padding:10px 20px; margin:30px 0; color:#eee; }
h3 code { display:block; }
/* WRAPPER */
#wrapper { width:800px; margin:40px auto; }
/* LIST #1 */
#list1 { }
#list1 ul { list-style:none; text-align:center; border-top:1px solid #eee; border-bottom:1px solid #eee; padding:10px 0; }
#list1 ul li { display:inline; text-transform:uppercase; padding:0 10px; letter-spacing:10px; }
#list1 ul li a { text-decoration:none; color:#eee; }
#list1 ul li a:hover { text-decoration:underline; }
/* LIST #2 */
#list2 { width:320px; }
#list2 ol { font-style:italic; font-family:Georgia, Times, serif; font-size:24px; color:#bfe1f1; }
#list2 ol li { }
#list2 ol li p { padding:8px; font-style:normal; font-family:Arial; font-size:13px; color:#eee; border-left: 1px solid #999; }
#list2 ol li p em { display:block; }
/* LIST #3 */
#list3 { }
#list3 ul { list-style-image: url("images/arrow.png"); color:#eee; font-size:18px; }
#list3 ul li { line-height:30px; }
/* LIST #4 */
#list4 { width:320px; font-family:Georgia, Times, serif; font-size:15px; }
#list4 ul { list-style: none; }
#list4 ul li { }
#list4 ul li a { display:block; text-decoration:none; color:#000000; background-color:#FFFFFF; line-height:30px;
border-bottom-style:solid; border-bottom-width:1px; border-bottom-color:#CCCCCC; padding-left:10px; cursor:pointer; }
#list4 ul li a:hover { color:#FFFFFF; background-image:url(images/hover.png); background-repeat:repeat-x; }
#list4 ul li a strong { margin-right:10px; }
/* LIST #5 */
#list5 { color:#eee; }
#list5 ol { font-size:18px; }
#list5 ol li { }
#list5 ol li ol { list-style-image: url("images/nested.png"); padding:5px 0 5px 18px; font-size:15px; }
#list5 ol li ol li { color:#bfe1f1; height:15px; margin-left:10px; }
/* LIST #6 */
#list6 { font-family: 'Trebuchet MS', 'Lucida Grande', Verdana, Lucida, Geneva, Helvetica, Arial, sans-serif; }
#list6 ol { list-style-type: upper-roman; color:#eee; font-size:14px; list-style-position: inside; }
#list6 ol li { }
/* LIST #7 */
#list7 { }
#list7 ul { color:#eee; font-size:18px; font-family:Georgia, Times, serif; }
#list7 ul li { display: inline; }
#list7 ul li:after { content: ", "; }
#list7 ul li.last:after { content: ". "; }
/* LIST #8 */
#list8 { }
#list8 ul { list-style:none; }
#list8 ul li { font-family:Georgia,serif,Times; font-size:18px; }
#list8 ul li a { display:block; width:300px; height:28px; background-color:#333; border-left:5px solid #222; border-right:5px solid #222; padding-left:10px;
text-decoration:none; color:#bfe1f1; }
#list8 ul li a:hover { -moz-transform:rotate(-5deg); -moz-box-shadow:10px 10px 20px #000000;
-webkit-transform:rotate(-5deg); -webkit-box-shadow:10px 10px 20px #000000;
transform:rotate(-5deg); box-shadow:10px 10px 20px #000000; }
</style>
</head>
<body>
<div id="wrapper">
<h1>Styling your lists<small>using only CSS</small></h1>
<h2><a href="https://www.jb51.net/" title="Visit More Codes">脚本之家</a></h2>
<div id="list8">
<ul>
<li><a href="#">Home</a></li>
<li><a href="#">Blog</a></li>
<li><a href="#">About</a></li>
<li><a href="#">Contact</a></li>
</ul>
</div>
</div>
</body>
</html>
希望本文所述对大家CSS3网页设计有所帮助。


