

Android程序之一键锁屏
(1)布局文件activity_main.xml如下:
<RelativeLayout xmlns:android="http://schemas.android.com/apk/res/android"
  xmlns:tools="http://schemas.android.com/tools"
  android:layout_width="match_parent"
  android:layout_height="match_parent"
  tools:context=".MainActivity" >
  <Button
    android:layout_width="wrap_content"
    android:layout_height="wrap_content"
    android:onClick="openAdmin"
    android:text="开启管理员权限" />
  <Button
    android:layout_width="wrap_content"
    android:layout_height="wrap_content"
    android:layout_centerInParent="true"
    android:onClick="lockscreen"
    android:text="一键锁屏" />
  <Button
    android:layout_width="wrap_content"
    android:layout_height="wrap_content"
    android:layout_alignParentBottom="true"
    android:onClick="uninstall"
    android:text="卸载软件" />
</RelativeLayout>
(2)MainActivity.java
package com.xuliugen.lockscreen;
import com.itheima.lockscreen.R;
import android.app.Activity;
import android.app.admin.DevicePolicyManager;
import android.content.ComponentName;
import android.content.Intent;
import android.net.Uri;
import android.os.Bundle;
import android.view.View;
import android.widget.Toast;
public class MainActivity extends Activity {
  /**
   * 设备策略服务
   */
  private DevicePolicyManager dpm;
  @Override
  protected void onCreate(Bundle savedInstanceState) {
    super.onCreate(savedInstanceState);
    setContentView(R.layout.activity_main);
    dpm = (DevicePolicyManager) getSystemService(DEVICE_POLICY_SERVICE);
  }
  /**
   * 用代码去开启管理员
   */
  public void openAdmin(View view) {
    // 创建一个Intent
    Intent intent = new Intent(DevicePolicyManager.ACTION_ADD_DEVICE_ADMIN);
    // 我要激活谁
    ComponentName mDeviceAdminSample = new ComponentName(this,MyAdmin.class);
    intent.putExtra(DevicePolicyManager.EXTRA_DEVICE_ADMIN,mDeviceAdminSample);
    // 劝说用户开启管理员权限
    intent.putExtra(DevicePolicyManager.EXTRA_ADD_EXPLANATION,"哥们开启我可以一键锁屏,你的按钮就不会经常失灵");
    startActivity(intent);
  }
  /**
   * 一键锁屏
   */
  public void lockscreen(View view) {
    ComponentName who = new ComponentName(this, MyAdmin.class);
    if (dpm.isAdminActive(who)) {
      dpm.lockNow();// 锁屏
      dpm.resetPassword("", 0);// 设置屏蔽密码
      // 清除Sdcard上的数据
      // dpm.wipeData(DevicePolicyManager.WIPE_EXTERNAL_STORAGE);
      // 恢复出厂设置
      // dpm.wipeData(0);
    } else {
      Toast.makeText(this, "还没有打开管理员权限", 1).show();
      return;
    }
  }
  /**
   * 卸载当前软件
   */
  public void uninstall(View view) {
    // 1.先清除管理员权限
    ComponentName mDeviceAdminSample = new ComponentName(this,
        MyAdmin.class);
    dpm.removeActiveAdmin(mDeviceAdminSample);
    // 2.普通应用的卸载
    Intent intent = new Intent();
    intent.setAction("android.intent.action.VIEW");
    intent.addCategory("android.intent.category.DEFAULT");
    intent.setData(Uri.parse("package:" + getPackageName()));
    startActivity(intent);
  }
}
(3)根据API文档可知,需要一个类继承DeviceAdminReceiver:
package com.xuliugen.lockscreen;
import android.app.admin.DeviceAdminReceiver;
/**
 * 特殊的广播接收者
 * @author xuliugen
 */
public class MyAdmin extends DeviceAdminReceiver {
}
(4)广播接受者的设置(清单文件):
<?xml version="1.0" encoding="utf-8"?>
<manifest xmlns:android="http://schemas.android.com/apk/res/android"
  package="com.xuliugen.lockscreen"
  android:versionCode="1"
  android:versionName="1.0" >
  <uses-sdk
    android:minSdkVersion="10"
    android:targetSdkVersion="16" />
  <application
    android:allowBackup="true"
    android:icon="@drawable/ic_launcher"
    android:label="@string/app_name"
    android:theme="@style/AppTheme" >
    <activity
      android:name="com.xuliugen.lockscreen.MainActivity"
      android:label="@string/app_name" >
      <intent-filter>
        <action android:name="android.intent.action.MAIN" />
        <category android:name="android.intent.category.LAUNCHER" />
      </intent-filter>
    </activity>
    <!-- 广播接收者 -->
    <receiver
      android:name="com.xuliugen.lockscreen.MyAdmin"
      android:description="@string/sample_device_admin_description"
      android:label="@string/sample_device_admin"
      android:permission="android.permission.BIND_DEVICE_ADMIN" >
      <meta-data
        android:name="android.app.device_admin"
        android:resource="@xml/device_admin_sample" />
      <intent-filter>
        <action android:name="android.app.action.DEVICE_ADMIN_ENABLED" />
      </intent-filter>
    </receiver>
  </application>
</manifest>
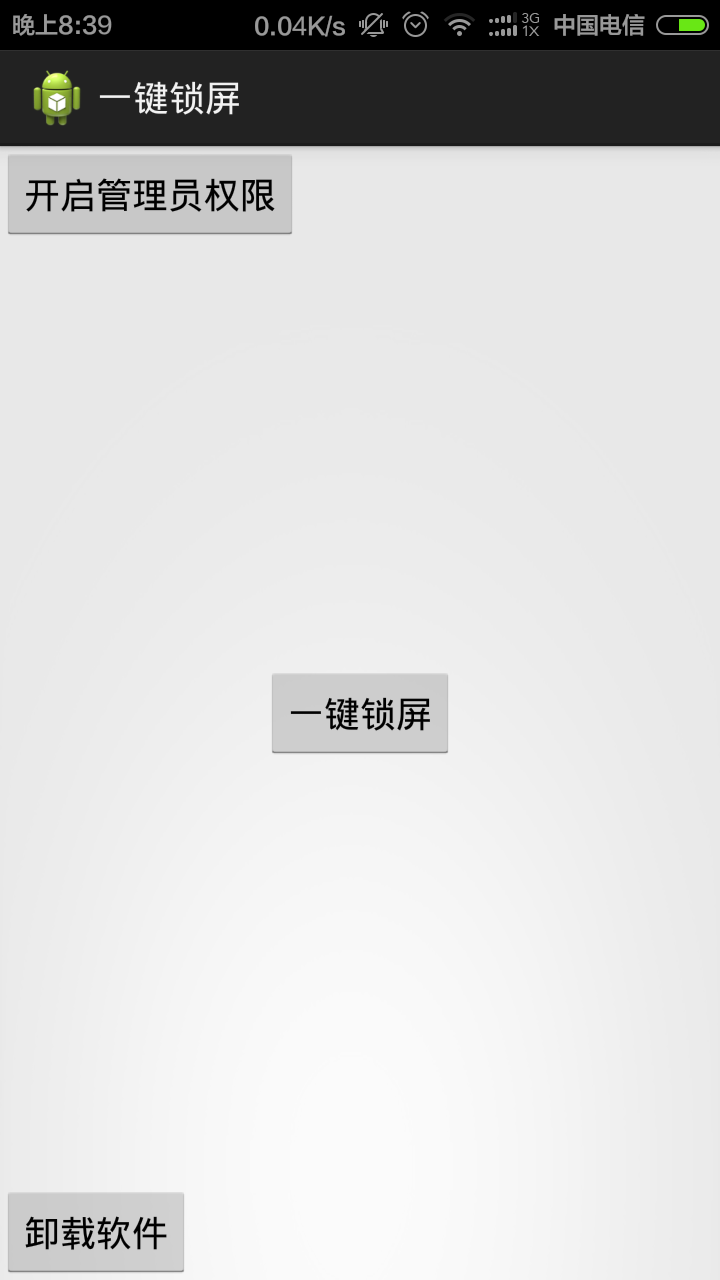
运行效果:
总结
以上就是这篇文章的全部内容了,希望本文的内容对大家的学习或者工作具有一定的参考学习价值,谢谢大家对脚本之家的支持。如果你想了解更多相关内容请查看下面相关链接


