
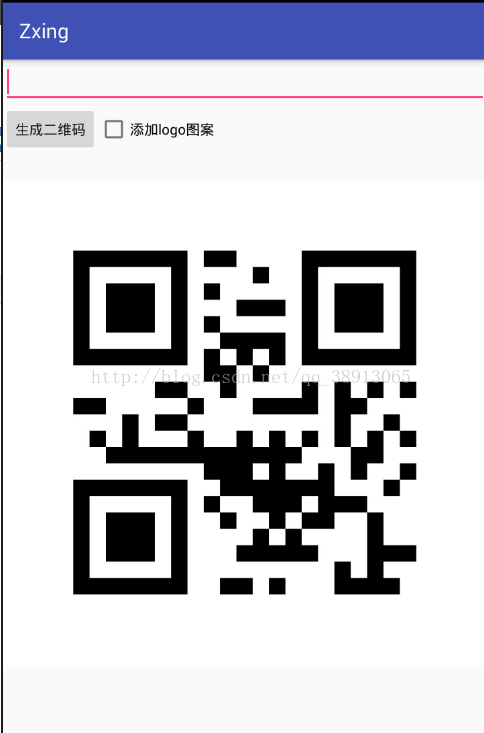
先看效果:
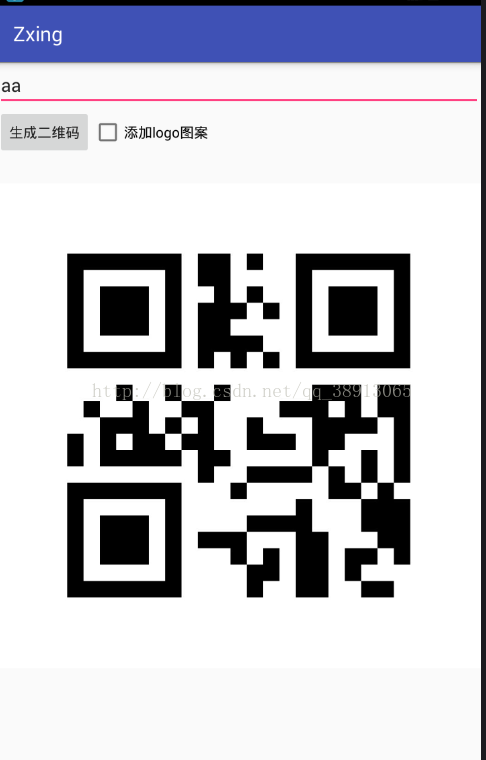
输入内容,点击生成二维码:
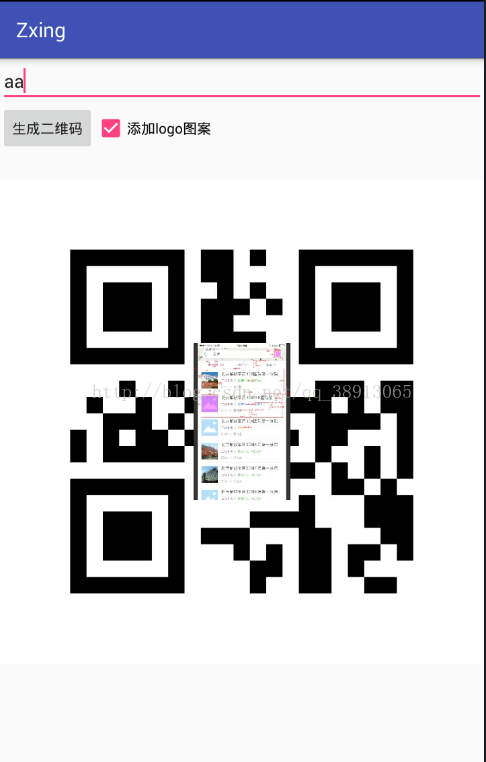
点击logo图案:
代码:
QRCodeUtil:
package com.example.administrator.zxing;
import android.graphics.Bitmap;
import android.graphics.Canvas;
import com.google.zxing.BarcodeFormat;
import com.google.zxing.EncodeHintType;
import com.google.zxing.WriterException;
import com.google.zxing.common.BitMatrix;
import com.google.zxing.qrcode.QRCodeWriter;
import com.google.zxing.qrcode.decoder.ErrorCorrectionLevel;
import java.io.FileOutputStream;
import java.io.IOException;
import java.util.HashMap;
import java.util.Map;
public class QRCodeUtil {
  public static boolean createQRImage(String content, int widthPix, int heightPix, Bitmap logoBm, String filePath) {
    try {
      if (content == null || "".equals(content)) {
        return false;
      }
      //配置参数
      Map<EncodeHintType, Object> hints = new HashMap<>();
      hints.put(EncodeHintType.CHARACTER_SET, "utf-8");
      //容错级别
      hints.put(EncodeHintType.ERROR_CORRECTION, ErrorCorrectionLevel.H);
      //设置空白边距的宽度
//      hints.put(EncodeHintType.MARGIN, 2); //default is 4
      // 图像数据转换,使用了矩阵转换
      BitMatrix bitMatrix = new QRCodeWriter().encode(content, BarcodeFormat.QR_CODE, widthPix, heightPix, hints);
      int[] pixels = new int[widthPix * heightPix];
      // 下面这里按照二维码的算法,逐个生成二维码的图片,
      // 两个for循环是图片横列扫描的结果
      for (int y = 0; y < heightPix; y++) {
        for (int x = 0; x < widthPix; x++) {
          if (bitMatrix.get(x, y)) {
            pixels[y * widthPix + x] = 0xff000000;
          } else {
            pixels[y * widthPix + x] = 0xffffffff;
          }
        }
      }
      // 生成二维码图片的格式,使用ARGB_8888
      Bitmap bitmap = Bitmap.createBitmap(widthPix, heightPix, Bitmap.Config.ARGB_8888);
      bitmap.setPixels(pixels, 0, widthPix, 0, 0, widthPix, heightPix);
      if (logoBm != null) {
        bitmap = addLogo(bitmap, logoBm);
      }
      //必须使用compress方法将bitmap保存到文件中再进行读取。直接返回的bitmap是没有任何压缩的,内存消耗巨大!
      return bitmap != null && bitmap.compress(Bitmap.CompressFormat.JPEG, 100, new FileOutputStream(filePath));
    } catch (WriterException | IOException e) {
      e.printStackTrace();
    }
    return false;
  }
  /**
   * 在二维码中间添加Logo图案
   */
  private static Bitmap addLogo(Bitmap src, Bitmap logo) {
    if (src == null) {
      return null;
    }
    if (logo == null) {
      return src;
    }
    //获取图片的宽高
    int srcWidth = src.getWidth();
    int srcHeight = src.getHeight();
    int logoWidth = logo.getWidth();
    int logoHeight = logo.getHeight();
    if (srcWidth == 0 || srcHeight == 0) {
      return null;
    }
    if (logoWidth == 0 || logoHeight == 0) {
      return src;
    }
    //logo大小为二维码整体大小的1/5
    float scaleFactor = srcWidth * 1.0f / 5 / logoWidth;
    Bitmap bitmap = Bitmap.createBitmap(srcWidth, srcHeight, Bitmap.Config.ARGB_8888);
    try {
      Canvas canvas = new Canvas(bitmap);
      canvas.drawBitmap(src, 0, 0, null);
      canvas.scale(scaleFactor, scaleFactor, srcWidth / 2, srcHeight / 2);
      canvas.drawBitmap(logo, (srcWidth - logoWidth) / 2, (srcHeight - logoHeight) / 2, null);
      canvas.save(Canvas.ALL_SAVE_FLAG);
      canvas.restore();
    } catch (Exception e) {
      bitmap = null;
      e.getStackTrace();
    }
    return bitmap;
  }
}
MainActivity:
package com.example.administrator.zxing;
import android.content.Context;
import android.graphics.BitmapFactory;
import android.os.Bundle;
import android.os.Environment;
import android.support.v7.app.AppCompatActivity;
import android.view.View;
import android.widget.Button;
import android.widget.CheckBox;
import android.widget.EditText;
import android.widget.ImageView;
import java.io.File;
public class MainActivity extends AppCompatActivity {
  @Override
  protected void onCreate(Bundle savedInstanceState) {
    super.onCreate(savedInstanceState);
    setContentView(R.layout.activity_main);
    //内容
    final EditText contentET = (EditText) findViewById(R.id.create_qr_content);
    //显示二维码图片
    final ImageView imageView = (ImageView) findViewById(R.id.create_qr_iv);
    //是否添加Logo
    final CheckBox addLogoCB = (CheckBox) findViewById(R.id.create_qr_addLogo);
    Button createQrBtn = (Button) findViewById(R.id.create_qr_btn);
    createQrBtn.setOnClickListener(new View.OnClickListener() {
      @Override
      public void onClick(View v) {
        final String filePath = getFileRoot(MainActivity.this) + File.separator
            + "qr_" + System.currentTimeMillis() + ".jpg";
        //二维码图片较大时,生成图片、保存文件的时间可能较长,因此放在新线程中
        new Thread(new Runnable() {
          @Override
          public void run() {
            boolean success = QRCodeUtil.createQRImage(contentET.getText().toString().trim(), 800, 800,
                addLogoCB.isChecked() ? BitmapFactory.decodeResource(getResources(), R.mipmap.qr_logo) : null,
                filePath);
            if (success) {
              runOnUiThread(new Runnable() {
                @Override
                public void run() {
                  imageView.setImageBitmap(BitmapFactory.decodeFile(filePath));
                }
              });
            }
          }
        }).start();
      }
    });
  }
  //文件存储根目录
  private String getFileRoot(Context context) {
    if (Environment.getExternalStorageState().equals(Environment.MEDIA_MOUNTED)) {
      File external = context.getExternalFilesDir(null);
      if (external != null) {
        return external.getAbsolutePath();
      }
    }
    return context.getFilesDir().getAbsolutePath();
  }
}
布局:
activity_main:
<?xml version="1.0" encoding="utf-8"?>
<LinearLayout xmlns:android="http://schemas.android.com/apk/res/android"
  xmlns:app="http://schemas.android.com/apk/res-auto"
  xmlns:tools="http://schemas.android.com/tools"
  android:layout_width="match_parent"
  android:layout_height="match_parent"
  android:orientation="vertical"
  tools:context="com.example.administrator.zxing.MainActivity">
  <EditText
    android:id="@+id/create_qr_content"
    android:layout_width="match_parent"
    android:layout_height="wrap_content" />
  <LinearLayout
    android:layout_width="match_parent"
    android:layout_height="wrap_content"
    android:orientation="horizontal">
    <Button
      android:id="@+id/create_qr_btn"
      android:layout_width="wrap_content"
      android:layout_height="wrap_content"
      android:text="生成二维码" />
    <CheckBox
      android:id="@+id/create_qr_addLogo"
      android:layout_width="wrap_content"
      android:layout_height="wrap_content"
      android:text="添加logo图案" />
  </LinearLayout>
  <ImageView
    android:id="@+id/create_qr_iv"
    android:layout_width="match_parent"
    android:layout_height="wrap_content" />
</LinearLayout>
以上所述是小编给大家介绍的Android 点击生成二维码功能实现代码,希望对大家有所帮助,如果大家有任何疑问请给我留言,小编会及时回复大家的。在此也非常感谢大家对脚本之家网站的支持!


