
Palette是一个可以从图片(Bitmap)中提取颜色的帮助类,可以使UI更加美观,根据图片动态的显示相应的颜色。现在最新的api是在版本22.0.0添加的,本篇文章也是使用的22.0.0的api版本(注意版本之间api的不同)。

应用项目:https://github.com/DingMouRen/PaletteImageView
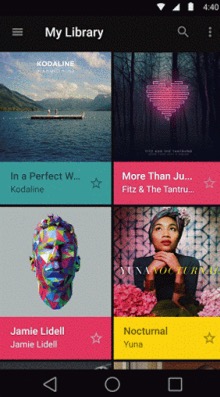
应用中的效果 Demo 效果
Palette可以提取的颜色:
使用方法: module的build.gradle中引用
compile 'com.android.support:palette-v7:25.3.1'
使用步骤:
1.获取Palette对象,也就是图像调色板
2.获取从图像调色板生成的色样
3.从色样中提取相应颜色
1.获取Palette对象,也就是图像调色板
获取Palette对象有同步和异步两种方式,建议使用异步获取Palette对象
 // Synchronous
 Palette p = Palette.from(bitmap).generate();

 // Asynchronous
 Palette.from(bitmap).generate(new PaletteAsyncListener() {
   public void onGenerated(Palette p) {
     // Use generated instance
   }
 });
2.获取从图像调色板生成的色样
可以获取到六种色样,但是有的时候获取不到对应的色样对象,必须注意非空判断。
Palette.Swatch vibrant = palette.getVibrantSwatch();//有活力的

Palette.Swatch vibrantDark = palette.getDarkVibrantSwatch();//有活力的,暗色

Palette.Swatch vibrantLight = palette.getLightVibrantSwatch();//有活力的,亮色

Palette.Swatch muted = palette.getMutedSwatch();//柔和的

Palette.Swatch mutedDark = palette.getDarkMutedSwatch();//柔和的,暗色

Palette.Swatch mutedLight = palette.getLightMutedSwatch();//柔和的,亮色
3.从色样中提取相应颜色
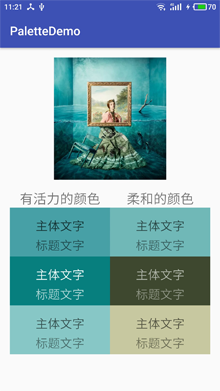
通过 getRgb() 可以得到最终的颜色值并应用到UI中。getBodyTextColor() 和 getTitleTextColor() 可以得到此颜色下文字适合的颜色,这样很方便我们设置文字的颜色,使文字看起来更加舒服。
swatch.getPopulation(): 样本中的像素数量
swatch.getRgb(): 颜色的RBG值
swatch.getHsl(): 颜色的HSL值
swatch.getBodyTextColor(): 主体文字的颜色值
swatch.getTitleTextColor(): 标题文字的颜色值
Demo的代码中没有对获取到的色样对象进行非空判断,注意一定要加上非空判断
public class MainActivity extends AppCompatActivity {
  private static final String TAG = MainActivity.class.getName();
  private LinearLayout line1,line2,line3,line4,line5,line6;
  private TextView tv1_1,tv1_2,tv2_1,tv2_2,tv3_1,tv3_2,tv4_1,tv4_2,tv5_1,tv5_2,tv6_1,tv6_2;
  private List<LinearLayout> bgs = new ArrayList<>();
  private List<TextView> bodyTexts = new ArrayList<>();
  private List<TextView> titleTexts = new ArrayList<>();
  private List<Palette.Swatch> swatchs = new ArrayList<>();
  @Override
  protected void onCreate(Bundle savedInstanceState) {
    super.onCreate(savedInstanceState);
    setContentView(R.layout.activity_main);
    ImageView img = (ImageView) findViewById(R.id.img);
    initView();
    Bitmap bitmap = ((BitmapDrawable)img.getDrawable()).getBitmap();
    if (bitmap == null){
      return;
    }
    Palette.from(bitmap).generate(listener);

  }

  private Palette.PaletteAsyncListener listener = new Palette.PaletteAsyncListener() {
    @Override
    public void onGenerated(Palette palette) {
      if (palette != null){
        Palette.Swatch vibrant = palette.getVibrantSwatch();//有活力的
        Palette.Swatch vibrantDark = palette.getDarkVibrantSwatch();//有活力的,暗色
        Palette.Swatch vibrantLight = palette.getLightVibrantSwatch();//有活力的,亮色
        Palette.Swatch muted = palette.getMutedSwatch();//柔和的
        Palette.Swatch mutedDark = palette.getDarkMutedSwatch();//柔和的,暗色
        Palette.Swatch mutedLight = palette.getLightMutedSwatch();//柔和的,亮色
        swatchs.clear();
        swatchs.add(vibrant);swatchs.add(vibrantDark);swatchs.add(vibrantLight);
        swatchs.add(muted);swatchs.add(mutedDark);swatchs.add(mutedLight);
        show();
      }
    }
  };

  private void show() {
    for (int i = 0; i < 6; i++) {
      bgs.get(i).setBackgroundColor(swatchs.get(i).getRgb());
      bodyTexts.get(i).setTextColor(swatchs.get(i).getBodyTextColor());
      titleTexts.get(i).setTextColor(swatchs.get(i).getTitleTextColor());
    }
  }


  private void initView() {
    line1 = (LinearLayout) findViewById(R.id.line1);
    line2 = (LinearLayout) findViewById(R.id.line2);
    line3 = (LinearLayout) findViewById(R.id.line3);
    line4 = (LinearLayout) findViewById(R.id.line4);
    line5 = (LinearLayout) findViewById(R.id.line5);
    line6 = (LinearLayout) findViewById(R.id.line6);
    bgs.clear();
    bgs.add(line1);bgs.add(line2);bgs.add(line3);bgs.add(line4);bgs.add(line5);bgs.add(line6);
    tv1_1 = (TextView) findViewById(R.id.tv1_1);
    tv2_1 = (TextView) findViewById(R.id.tv2_1);
    tv3_1 = (TextView) findViewById(R.id.tv3_1);
    tv4_1 = (TextView) findViewById(R.id.tv4_1);
    tv5_1 = (TextView) findViewById(R.id.tv5_1);
    tv6_1 = (TextView) findViewById(R.id.tv6_1);
    tv1_2 = (TextView) findViewById(R.id.tv1_2);
    tv2_2 = (TextView) findViewById(R.id.tv2_2);
    tv3_2 = (TextView) findViewById(R.id.tv3_2);
    tv4_2 = (TextView) findViewById(R.id.tv4_2);
    tv5_2 = (TextView) findViewById(R.id.tv5_2);
    tv6_2 = (TextView) findViewById(R.id.tv6_2);
    bodyTexts.clear();titleTexts.clear();
    bodyTexts.add(tv1_1);bodyTexts.add(tv2_1);bodyTexts.add(tv3_1);bodyTexts.add(tv4_1);bodyTexts.add(tv5_1);bodyTexts.add(tv6_1);
    titleTexts.add(tv1_2);titleTexts.add(tv2_2);titleTexts.add(tv3_2);titleTexts.add(tv4_2);titleTexts.add(tv5_2);titleTexts.add(tv6_2);
  }

}
以上就是本文的全部内容,希望对大家的学习有所帮助,也希望大家多多支持脚本之家。


