
keras 模块里面为我们提供了一个预训练好的模型,也就是开箱即可使用的图像识别模型
趁着国庆假期有时间我们就来看看这个预训练模型如何使用吧
可用的模型有哪些?
根据官方文档目前可用的模型大概有如下几个
1、VGG16
2、VGG19
3、ResNet50
4、InceptionResNetV2
5、InceptionV3
它们都被集成到了keras.applications 中
模型文件从哪来
当我们使用了这几个模型时,keras就会去自动下载这些已经训练好的模型保存到我们本机上面
模型文件会被下载到 ~/.keras/models/并在载入模型时自动载入
各个模型的信息:

如何使用预训练模型
使用大致分为三个步骤
1、导入所需模块
2、找一张你想预测的图像将图像转为矩阵
3、将图像矩阵放到模型中进行预测
关于图像矩阵的大小
VGG16,VGG19,ResNet50 默认输入尺寸是224x224
InceptionV3, InceptionResNetV2 模型的默认输入尺寸是299x299
代码demo
假设我现在有一张图片

我需要使用预训练模型来识别它
那我们就按照上面的步骤
第一步导入模块
from keras.applications import VGG16
from keras.applications import VGG19
from keras.applications import ResNet50
from keras.applications import InceptionV3
from keras.applications import InceptionResNetV2
第二步将图像转为矩阵
这里我们需要使用 keras.preprocessing.image 里面 img_to_array 来帮我们转
 image = cv2.imread(img)
 image = cv2.resize(image, self.dim)
 image = img_to_array(image)
 image = np.expand_dims(image, axis=0)
第三步 将图像矩阵丢到模型中进行预测
predict = model.predict(preprocess)
decode_predict = decode_predictions(predict)
完整代码如下
1、配置文件
2、获取配置文件的模块
3、图像预测模块
配置文件
[image]
image_path=/home/fantasy/Pictures/cat.jpg
[model]
model=vgg16
[weights]
weight=imagenet
获取配置文件的模块
import configparser
cf = configparser.ConfigParser()
cf.read("configs.cnf")
def getOption(section, key):
  return cf.get(section, key)
图像预测模块以及主要实现
# keras 提供了一些预训练模型,也就是开箱即用的 已经训练好的模型
# 我们可以使用这些预训练模型来进行图像识别,目前的预训练模型大概可以识别2.2w种类型的东西
# 可用的模型:
# VGG16
# VGG19
# ResNet50
# InceptionResNetV2
# InceptionV3
# 这些模型被集成到 keras.applications 中
# 当我们使用了这些内置的预训练模型时,模型文件会被下载到 ~/.keras/models/并在载入模型时自动载入
# VGG16,VGG19,ResNet50 默认输入尺寸是224x224
# InceptionV3, InceptionResNetV2 模型的默认输入尺寸是299x299

# 使用内置的预训练模型的步骤
# step1 导入需要的模型
# step2 将需要识别的图像数据转换为矩阵(矩阵的大小需要根据模型的不同而定)
# step3 将图像矩阵丢到模型里面进行预测
# -------------------------------------------------------
# step1
import cv2
import numpy as np
from getConfig import getOption
from keras.applications import VGG16
from keras.applications import VGG19
from keras.applications import ResNet50
from keras.applications import InceptionV3
from keras.applications import InceptionResNetV2
from keras.applications import imagenet_utils
from keras.applications.imagenet_utils import decode_predictions
from keras.preprocessing.image import load_img
from keras.preprocessing.image import img_to_array
from keras.applications.inception_v3 import preprocess_input

class ImageTools(object):
  """
  使用keras预训练模型进行图像识别
  """
  def __init__(self, img, model, w):
    self.image = img
    self.model = model
    self.weight = w

  # step2
  def image2matrix(self, img):
    """
    将图像转为矩阵
    """
    image = cv2.imread(img)
    image = cv2.resize(image, self.dim)
    image = img_to_array(image)
    image = np.expand_dims(image, axis=0)
    return image

  @property
  def dim(self):
    """
    图像矩阵的维度
    """
    if self.model in ["inceptionv3", "inceptionresnetv2"]:
      shape = (299, 299)
    else:
      shape = (224, 224)

    return shape

  @property
  def Model(self):
    """
    模型
    """
    models = {
      "vgg16": VGG16,
      "vgg19": VGG19,
      "resnet50": ResNet50,
      "inceptionv3": InceptionV3,
      "inceptionresnetv2": InceptionResNetV2
    }
    return models[self.model]

  # step3
  def prediction(self):
    """
    预测
    """
    model = self.Model(weights=self.weight)
    if self.model in ["inceptionv3", "inceptionresnetv2"]:
      preprocess = preprocess_input(self.image2matrix(self.image))
    else:
      preprocess = imagenet_utils.preprocess_input(self.image2matrix(self.image))

    predict = model.predict(preprocess)

    decode_predict = decode_predictions(predict)

    for (item, (imgId, imgLabel, proba)) in enumerate(decode_predict[0]):
      print("{}, {}, {:.2f}%".format(item + 1, imgLabel, proba * 100))


if __name__ == "__main__":
  image = getOption("image", "image_path")
  model = getOption("model", "model")
  weight = getOption("weights", "weight")
  tools = ImageTools(image, model, weight)
  tools.prediction()
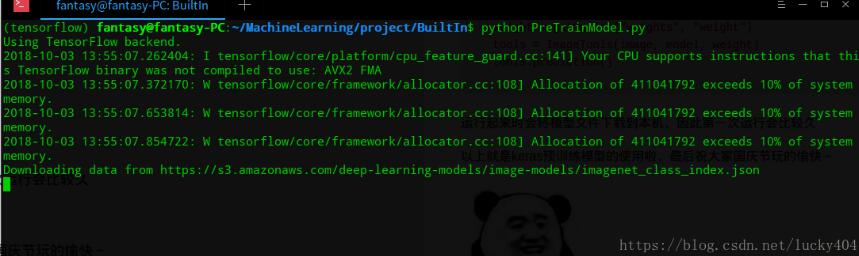
运行起来时会将模型文件下载到本机,因此第一次运行会比较久(有可能出现的情况就是下载不了,被墙了)
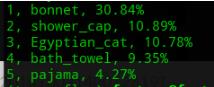
我们来看看使用VGG16的模型预测输出的效果如何
最后如果大家需要使用其他模型时修改 配置文件的model 即可
以上这篇使用keras内置的模型进行图片预测实例就是小编分享给大家的全部内容了,希望能给大家一个参考,也希望大家多多支持脚本之家。


