
本文实例为大家分享了vue实现移动端拖动排序的具体代码,供大家参考,具体内容如下
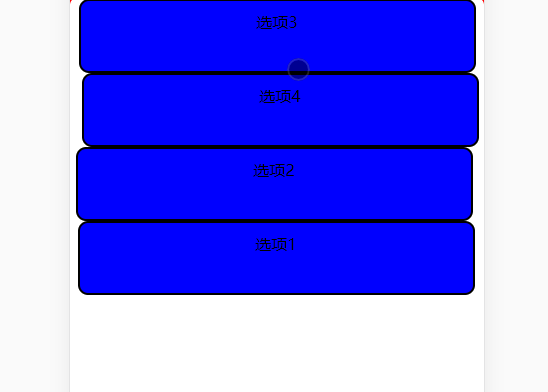
效果
代码:
<template>
 <div>
 <div class="mainDiv" id="columns">
 <div id="child"
  class="childDiv"
  v-for="(option,index) in options"
  :key="index"
 >
 {{option}}
 </div>

 <!-- <div id="test" class="test"
  @touchstart="down" @touchmove="move" @touchend="end"
 >什么都没有
 </div>-->
 </div>
 </div>
</template>
<script>
 export default {
 name: "touchMove",
 data() {
  return {
  options: ['选项1', '选项2', '选项3', '选项4'],
  columns: undefined,
  flags: false,
  position: {x: 0, y: 0},
  nx: '', ny: '', dx: '', dy: '', xPum: '', yPum: '',
  }
 },
 mounted() {
  this.columns = document.querySelectorAll('#child');
  let num = 0;
  for (let i of this.columns) {
  i.style.top = (i.offsetHeight * num) + 'px';
  i.addEventListener('touchstart', this.down);
  i.addEventListener('touchmove', this.move);
  i.addEventListener('touchend', this.end);
  num ++;
  }
 },
 methods: {
  down(e) {
  e.preventDefault();
  this.flags = true;
  var touch;
  if (e.touches) {
   touch = e.touches[0];
  } else {
   touch = e;
  }
  /*touch.clientX clientY 鼠标点击的位置与视图窗口的距离
  * e.target.offsetLeft offsetTop 鼠标点击的div与父元
  * 素的边框距离,父元素必须为定位样式,不然认为父元素为body
  * */
  this.position.x = touch.clientX;
  this.position.y = touch.clientY;
  this.dx = e.target.offsetLeft;
  this.dy = e.target.offsetTop;
  },
  move(e) {
  if (this.flags) {
   var touch;
   if (e.touches) {
   touch = e.touches[0];
   } else {
   touch = e;
   }
   this.nx = touch.clientX - this.position.x;
   this.ny = touch.clientY - this.position.y;//移动的距离
   this.xPum = this.dx + this.nx;
   this.yPum = this.dy + this.ny;
   e.target.style.left = this.xPum + 'px';
   e.target.style.top = this.yPum + 'px';
  }
  },
  end(e) {
  //处理边界问题
  let right= e.target.offsetLeft + e.target.offsetWidth;
  let bottom = e.target.offsetTop + e.target.offsetHeight;
  if(e.target.offsetLeft <= 0 || right >= e.target.offsetParent.offsetWidth){
   e.target.style.left = 0 + 'px';
  }
  if(e.target.offsetTop <= 0 || bottom >= e.target.offsetParent.offsetHeight){
   e.target.style.top = 0 + 'px';
  }
  this.dataTransfer(e);
  this.flags = false;
  },
  dataTransfer(e){
  let eleTop = e.target.offsetTop + Math.round(e.target.offsetHeight / 2);//找到当前元素的中间位置
  let arr = Array.from(this.columns);//将nodelist转为array
  let index = arr.indexOf(e.target);//找到当前元素下标
  for(let i in arr){
   //如果当前元素进入另一个元素的位置,将他们的值互换,位置还原
   if(eleTop > arr[i].offsetTop && eleTop < (arr[i].offsetTop + arr[i].offsetHeight)){
   //值互换,位置还原(保证数组的序列数据不变)
   let temp = arr[index].innerText;
   arr[index].innerText = arr[i].innerText;
   arr[i].innerText = temp;
   }
  }
  let num = 0;
  for (let i of this.columns) {
   i.style.top = (i.offsetHeight * num) + 'px';
   num ++;
  }
  }
 }
 }
</script>
<style scoped>
 .mainDiv {
 position: absolute;
 height: 500px;
 width: 100%;
 border: 3px solid red;
 border-radius: 10px;
 margin: 10px;
 }

 .mainDiv > .childDiv {
 position: absolute;
 height: 50px;
 width: 90%;
 background-color: blue;
 border: 2px solid;
 border-radius: 10px;
 margin: 1px auto;
 padding: 10px;
 text-align: center;
 }


 .test {
 position: relative;
 height: 50px;
 width: auto;
 background-color: red;
 border: 2px solid;
 border-radius: 3px;
 margin: 1px 0 1px;
 padding: 10px;
 text-align: center;
 }

</style>
以上就是本文的全部内容,希望对大家的学习有所帮助,也希望大家多多支持脚本之家。


