
windows下vue-cli及webpack 构建网站(一)环境安装
windows下vue-cli及webpack 构建网站(二)导入bootstrap样式
windows下vue-cli及webpack 构建网站(三)使用组件
1、本篇文章是建立在以上三篇文章的基础上的。
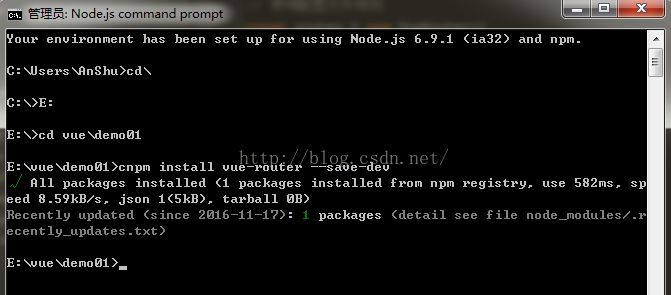
2、安装 vue-router 插件,运行cmd进入到项目目录下面,运行以下命令:
cnpm install vue-router --save-dev
3、在src文件夹下面新建一个文件夹page用于存放模板文件,然后分别在这个文件夹下面新建 index.vue、list.vue两个文件,然后打开index.vue粘贴以下代码:
<template>

 <div class="jumbotron">
    <h1>这里是首页!</h1>
 </div>

</template>
保存之后再打开list.vue粘贴以下代码:
<template>

  <div class="list-group">
   <a href="#" rel="external nofollow" rel="external nofollow" rel="external nofollow" rel="external nofollow" rel="external nofollow" class="list-group-item active">
    这里是列表页
   </a>
   <a href="#" rel="external nofollow" rel="external nofollow" rel="external nofollow" rel="external nofollow" rel="external nofollow" class="list-group-item">Dapibus ac facilisis in</a>
   <a href="#" rel="external nofollow" rel="external nofollow" rel="external nofollow" rel="external nofollow" rel="external nofollow" class="list-group-item">Morbi leo risus</a>
   <a href="#" rel="external nofollow" rel="external nofollow" rel="external nofollow" rel="external nofollow" rel="external nofollow" class="list-group-item">Porta ac consectetur ac</a>
   <a href="#" rel="external nofollow" rel="external nofollow" rel="external nofollow" rel="external nofollow" rel="external nofollow" class="list-group-item">Vestibulum at eros</a>
  </div>

</template>
好了,两个页面的内容都准备好了,接下来我们修改入口文件app.vue的内容吧
4、打开src文件夹下面的app.vue文件,修改代码为
<template>
 <div>
 <HtmlHeader></HtmlHeader>
   <router-view
    class="view"
    keep-alive
    transition
    transition-mode="out-in">
   </router-view>
<HtmlFooter></HtmlFooter><span style="white-space:pre"> </span>
  </div>
<span style="white-space:pre"> </span>
</template>


<script>
import HtmlHeader from './components/header'
import HtmlFooter from './components/footer'
export default {
 components: {
  HtmlHeader,
  HtmlFooter
 }
}
</script>
这里用了 router-view 来把刚才新建的两个页面加载到这里来
修改了入口文件接下来就是要进行路由规则的配置了。
5、在src文件夹下面新建一个文件夹config用来存放路由配置,在config文件夹下面新建routes.js文件并打开,然后粘贴以下代码并保存:
//加载模板文件
import index from '../page/index'
import list from '../page/list'
//路由规则设置
export default [
  {
    path: '/',
    component: index
  },
  {
    path: '/list',
    component: list
  }
]
现在路由配置文件也已经配置好了,我们接下来就是要打开sec文件夹下面的main.js文件设置路由使用了
6、打开main.js 文件,在头部加入以下代码
// 引用路由插件
import VueRouter from 'vue-router'
// 试用路由插件
Vue.use(VueRouter)
//引入路由配置文件
import routes from './config/routes'
// 使用配置文件规则
const router = new VueRouter({
 mode: 'history',
 base: __dirname,
 routes: routes })
这个是引入路由插件并且使用,然后加载路由规则
接着把
new Vue({
 el: '#app',
 template: '<App/>',
 components: { App }
})
修改为
const app = new Vue({
   router: router,
   render: h => h(App)
}).$mount('#app')
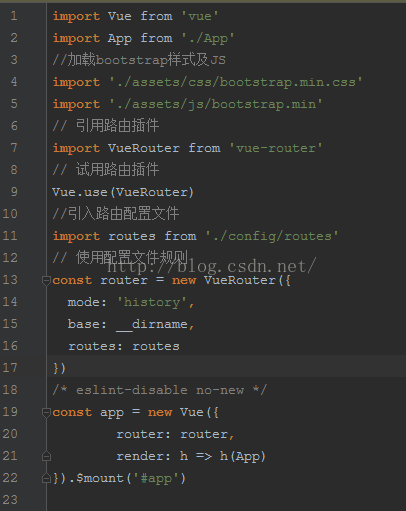
设置完之后整个页面代码如图
7、加载开始运行 npm run dev 查看效果吧,打开http://localhost:8080 和http://localhost:8080/list 就可以看到不同的效果了
以上就是本文的全部内容,希望对大家的学习有所帮助,也希望大家多多支持脚本之家。


