
1.pom.xml
<!-- Ehcache 坐标 -->
<dependency>
  <groupId>net.sf.ehcache</groupId>
  <artifactId>ehcache</artifactId>
</dependency>
2.ehcache.xml
<?xml version="1.0" encoding="UTF-8"?>
<ehcache>

  <diskStore path="java.io.tmpdir"/>

  <!--defaultCache:echcache的默认缓存策略 -->
  <defaultCache
      maxElementsInMemory="10000"
      eternal="false"
      timeToIdleSeconds="120"
      timeToLiveSeconds="120"
      maxElementsOnDisk="10000000"
      diskExpiryThreadIntervalSeconds="120"
      memoryStoreEvictionPolicy="LRU">
    <persistence strategy="localTempSwap"/>
  </defaultCache>
  <!--
    maxElementsInMemory设置成1,overflowToDisk设置成true,只要有一个缓存元素,就直接存到硬盘上去
    eternal设置成true,代表对象永久有效
    maxElementsOnDisk设置成0 表示硬盘中最大缓存对象数无限大
    diskPersistent设置成true表示缓存虚拟机重启期数据
  -->
  <cache name="usercache"
      maxElementsInMemory="1"
      eternal="true"
      overflowToDisk="true"
      maxElementsOnDisk="0"
      diskPersistent="true">
<!--    <persistence strategy="localTempSwap"/>--> <!--不能和diskPersistent 同时存在-->
  </cache>
diskStore是物理文件的存储路径,
cache标签中的name是多cache时区分的唯一标识, 和程序中初始化方法getCache("***")参数一致。<br>缓存参数和本地数据持久化存储需自行配置
3.application.yml
spring:
 cache:
  ehcache:
   config: classpath:/ehcache.xml
4.启动类添加
@EnableCaching
import org.mybatis.spring.annotation.MapperScan;
import org.springframework.boot.SpringApplication;
import org.springframework.boot.autoconfigure.SpringBootApplication;
import org.springframework.cache.annotation.EnableCaching;

@EnableCaching
@SpringBootApplication
public class DemoApplication {

  public static void main(String[] args) {
    SpringApplication.run(DemoApplication.class, args);
  }

}
5.springcloud 中使用cache
import net.sf.ehcache.Cache;
import net.sf.ehcache.CacheManager;
import net.sf.ehcache.Element;
import org.springframework.beans.factory.annotation.Autowired;
import org.springframework.core.io.ClassPathResource;
import org.springframework.stereotype.Component;

import java.io.IOException;


/**
 * @Author: Peacock__
 * @Date: 2019/6/14 17:30
 */
@Component
public class CacheService {

  @Autowired
  private CacheManager cacheManager;
  /**
   * 从缓存中获取数据
   * @return
   * @throws IOException
   */
  public String getCache() throws IOException {
   String res = "";

    Cache cache = cacheManager.getCache("usercache");
    if(cache != null){
      Element element = cache.get("name");
      if(element != null){
        Object objectValue = element.getObjectValue();
        res = (String) objectValue;
      }
    }
    return res;
  }

  /**
   * 数据存入缓存
   * @param data
   * @throws IOException
   */
  public void putCache(String data) throws IOException {
    //若cacheManager被关闭,则重新创建
    if(cacheManager == null || cacheManager.getStatus().intValue() != 1){
      cacheManager = new CacheManager(new ClassPathResource("ehcache.xml").getInputStream());
    }
    Cache cache = cacheManager.getCache("usercache");
    //处理成要缓存的数据

    //存入缓存(注意:需要保证存入缓存的数据都是可序列化的)
    cache.put(new Element("name", data));
    /**
     * ehcache和其它缓存类似,需要flush或shutdown后才会持久化到磁盘。
     * 会生成.data 的数据文件和 .index 的索引文件,方便重启恢复。
     * ehcache恢复数据是根据.index索引文件来进行数据恢复的。
     * 当程序再次启动的时候,ehcache的一个方法会将.data文件和.index文件的修改时间进行比较,如果不符合直接将.index文件删除。
     */
    //将所有缓存项从内存刷新到磁盘存储,并从DiskStore刷新到磁盘。
//    cache.flush();
    //更新.index文件
//    cacheManager.shutdown();
  }
}
6.controller层
import java.io.IOException;
@RestController
public class AppController{
@Autowired
private CacheService cacheService;
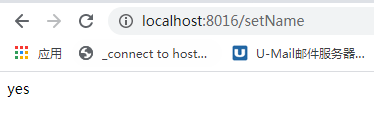
@RequestMapping("/setName")
public String setName() {
try {
cacheService.putCache( "heshan");
} catch (IOException e) {
e.printStackTrace();
}
return "yes";
}
@RequestMapping("/getName")
public String getName() {
String res = null;
try {
res = cacheService.getCache( );
} catch (IOException e) {
e.printStackTrace();
}
return res;
}
}
结果:

以上就是本文的全部内容,希望对大家的学习有所帮助,也希望大家多多支持脚本之家。


