
本文实例为大家分享了iOS UICollectionView实现横向滑动的具体代码,供大家参考,具体内容如下
UICollectionView的横向滚动,目前我使用在了显示输入框的输入历史上;
//
// SCVisitorInputAccessoryView.m
// 访客通行录入页面--访客姓名输入历史的InputAccessory

#import "SCInputAccessoryView.h"
#import "SCInputAccessoryCell.h"

#define SCHorizontalMargin 15.0f
#define SCVerticalMargin 10.0f

@interface SCInputAccessoryView () <UICollectionViewDelegate, UICollectionViewDataSource,UICollectionViewDelegateFlowLayout>

@property (weak, nonatomic) IBOutlet UICollectionView *collectionView;

/// 名字记录的数组
@property (nonatomic, strong) NSMutableArray *nameArray;

@end


@implementation SCInputAccessoryView

+ (instancetype)loadNibView {
 return [[[NSBundle mainBundle] loadNibNamed:[SCInputAccessoryView className] owner:self options:nil] objectAtIndex:0];
}

- (void)awakeFromNib {
 [super awakeFromNib];
 self.clipsToBounds = YES;
 self.collectionView.delegate = self;
 self.collectionView.dataSource = self;
 [self setupView];
}

- (void)setupView {

 /// 设置此属性为yes 不满一屏幕 也能滚动
 self.collectionView.alwaysBounceHorizontal = YES;
 self.collectionView.showsHorizontalScrollIndicator = NO;
 // 1.创建流水布局
 UICollectionViewFlowLayout *layout = [[UICollectionViewFlowLayout alloc] init];
 layout.scrollDirection = UICollectionViewScrollDirectionHorizontal;
 self.collectionView.collectionViewLayout = layout;
 [self registerNibWithTableView];
}

#pragma mark - 代理方法 Delegate Methods
// 设置分区

- (NSInteger)numberOfSectionsInCollectionView:(UICollectionView *)collectionView {
 return 1;
}

// 每个分区上得元素个数
- (NSInteger)collectionView:(UICollectionView *)collectionView numberOfItemsInSection:(NSInteger)section {
 return self.nameArray.count;
}

// 设置cell
- (UICollectionViewCell *)collectionView:(UICollectionView *)collectionView cellForItemAtIndexPath:(NSIndexPath *)indexPath {

 SCInputAccessoryCell *cell = [collectionView dequeueReusableCellWithReuseIdentifier:NSStringFromClass([SCInputAccessoryCell class]) forIndexPath:indexPath];
 [cell refreshCellWithTitle:self.nameArray[indexPath.row]];
 return cell;
}

// 设置cell大小 itemSize:可以给每一个cell指定不同的尺寸
- (CGSize)collectionView:(UICollectionView *)collectionView layout:(UICollectionViewLayout*)collectionViewLayout sizeForItemAtIndexPath:(NSIndexPath *)indexPath {
 CGFloat height = 35.0f;
 CGFloat width = [self gainStringWidthWithString:self.nameArray[indexPath.row] font:15.0f height:height];
 return CGSizeMake(width, height);
}


// 设置UIcollectionView整体的内边距(这样item不贴边显示)
- (UIEdgeInsets)collectionView:(UICollectionView *)collectionView layout:(UICollectionViewLayout *)collectionViewLayout insetForSectionAtIndex:(NSInteger)section {
 // 上 左 下 右
 return UIEdgeInsetsMake(SCVerticalMargin, SCHorizontalMargin, SCVerticalMargin, SCHorizontalMargin);
}

// 设置minimumLineSpacing:cell上下之间最小的距离
- (CGFloat)collectionView:(UICollectionView *)collectionView layout:(UICollectionViewLayout *)collectionViewLayout minimumLineSpacingForSectionAtIndex:(NSInteger)section {
 return SCHorizontalMargin;
}

// 设置minimumInteritemSpacing:cell左右之间最小的距离
- (CGFloat)collectionView:(UICollectionView *)collectionView layout:(UICollectionViewLayout *)collectionViewLayout minimumInteritemSpacingForSectionAtIndex:(NSInteger)section {
 return SCHorizontalMargin;
}

// 选中cell的回调
- (void)collectionView:(UICollectionView *)collectionView didSelectItemAtIndexPath:(NSIndexPath *)indexPath {
 if (self.selectRowBlock) {
 self.selectRowBlock(indexPath.row, self.nameArray[indexPath.row]);
 }
}

#pragma mark - 对外方法 Public Methods
/// array数组里面放的元素 必须字符串类型的
- (void)refreshUIWithNameArray:(NSArray<NSString *> *)array {
 [self.nameArray removeAllObjects];
 [self.nameArray addObjectsFromArray:array];
 [self.collectionView reloadData];
}


#pragma mark - 内部方法 Private Methods
// 注册cell
- (void)registerNibWithTableView {
 [self.collectionView registerNib:[UINib nibWithNibName:[SCInputAccessoryCell className] bundle:nil] forCellWithReuseIdentifier:NSStringFromClass([SCInputAccessoryCell class])];
}

- (CGFloat)gainStringWidthWithString:(NSString *)string font:(CGFloat)font height:(CGFloat)height {

 if (string.length == 0) {
 return 0.0f;
 }

 CGSize maxSize = CGSizeMake(MAXFLOAT, height);
 CGSize realSize = [string boundingRectWithSize:maxSize
   options:NSStringDrawingUsesLineFragmentOrigin | NSStringDrawingUsesFontLeading
   attributes:@{NSFontAttributeName:[UIFont systemFontOfSize:font]}
   context:nil].size;
 /// 左右各16
 return (realSize.width + 2 * (SCHorizontalMargin + 1.f));
}

#pragma mark - 点击/触碰事件 Action Methods

#pragma mark - 懒加载 Lazy Load

- (NSMutableArray *)nameArray {
 if (!_nameArray) {
 _nameArray = [NSMutableArray arrayWithCapacity:0];
 }
 return _nameArray;
}

@end
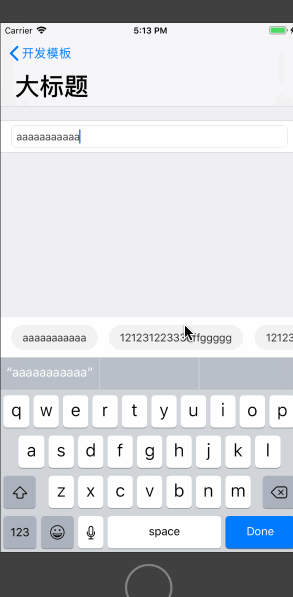
效果图:
Demo地址 :XGDevelopDemo
以上就是本文的全部内容,希望对大家的学习有所帮助,也希望大家多多支持脚本之家。


