
本文实例为大家分享了iOS自定义身份证键盘的具体代码,供大家参考,具体内容如下
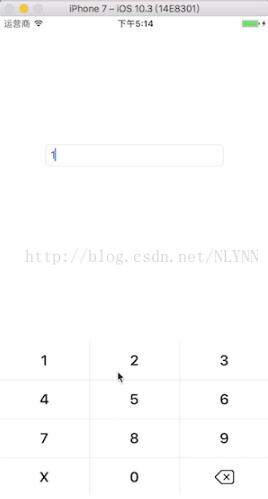
项目中有需要需要身份证的输入框, 用自带的输入切换很麻烦(如果最后一位带X), 所以自定义一个身份证输入键盘.
自定义键盘的关键: self.textField.inputView = [自定义的view],
支持长按一直删除
demo地址
开始自定义
1. 创建一个集成自UIView的视图 (NYLIDKeyBoard)
NYLIDKeyBoard.h
//
// NYLIDKeyBoard.h
// lqz
//
// Created by 聂银龙 on 2017/9/7.
// Copyright © 2017年 lqz. All rights reserved.
// 身份证键盘

#import <UIKit/UIKit.h>

@class NYLIDKeyBoard;

@protocol NYKIDKeyBoardDelegate <NSObject>

@optional

/**
 点击按钮代理回调
 @param idKeyboard 本类
 @param inputString 点击按钮拼接后的字符串
 */
- (void)idKeyboard:(NYLIDKeyBoard *)idKeyboard inputSring:(NSMutableString *)inputString;

@end

@interface NYLIDKeyBoard : UIView

@property(nonatomic, assign) id<NYKIDKeyBoardDelegate>delegate;

// 输入的字符串
@property(nonatomic, strong) NSMutableString *inputString;

@end
NYLIDKeyBoard.m
//
// NYLIDKeyBoard.m
// lqz
//
// Created by 聂银龙 on 2017/9/7.
// Copyright © 2017年 lqz. All rights reserved.
//

#import "NYLIDKeyBoard.h"

#define RGB(r,g,b)   [UIColor colorWithRed:r/255.0 green:g/255.0 blue:b/255.0 alpha:1.0]

// 屏幕高度
#define SCREEN_HEIGHT   [[UIScreen mainScreen] bounds].size.height
// 屏幕宽度
#define SCREEN_WIDTH   [[UIScreen mainScreen] bounds].size.width
#define GETSIZE(num) (SCREEN_WIDTH/375*num)


@implementation NYLIDKeyBoard

/*
// Only override drawRect: if you perform custom drawing.
// An empty implementation adversely affects performance during animation.
- (void)drawRect:(CGRect)rect {
 // Drawing code
}
*/


- (instancetype)initWithFrame:(CGRect)frame
{
 self = [super initWithFrame:frame];
 if (self) {
  self.inputString = [NSMutableString string];
  [self initViewFrame:frame];
 }
 return self;
}


- (void)initViewFrame:(CGRect)frame {
 self.userInteractionEnabled = YES;
 CGFloat width = frame.size.width;
 CGFloat height = frame.size.height;
//
// UIView *topBgView = nil;
// topBgView = [[UIView alloc] initWithFrame:CGRectMake(-1, 0, width +2, 40)];
// topBgView.backgroundColor = RGB(249, 249, 249);//[UIColor colorWithWhite:0.92 alpha:0.92];
// topBgView.userInteractionEnabled = YES;
// topBgView.layer.borderColor = RGB(214, 213, 214).CGColor;
// topBgView.layer.borderWidth = 0.6;
// topBgView.alpha = 0.99;
// [self addSubview:topBgView];
//
// UIButton *okBtn = [UIButton buttonWithType:(UIButtonTypeCustom)];
// okBtn.frame = CGRectMake(SCREEN_WIDTH-50-4, 0, 50, 40);
// [okBtn setTitle:@"完成" forState:(UIControlStateNormal)];
// [okBtn setTitleColor:BASE_BACKGROUNG_BLUE_COLOR forState:(UIControlStateNormal)];
// [okBtn setTitleColor:[UIColor blueColor] forState:(UIControlStateHighlighted)];
// [topBgView addSubview:okBtn];
// [okBtn addTarget:self action:@selector(okbtnClick) forControlEvents:(UIControlEventTouchUpInside)];

 NSInteger totalColumns = 3;  // 总列数
 CGFloat cellW = width/3; // 每个格子的宽度
 CGFloat cellH = GETSIZE(54);    // 格子高度

 NSArray *titles = @[@"1", @"2", @"3", @"4", @"5", @"6", @"7", @"8", @"9", @"X", @"0", @""];
 for (int i = 0; i < titles.count ; i++) {

  int row = i / totalColumns; // 行
  int col = i % totalColumns; // 列
  //根据行号和列号来确定 子控件的坐标
  CGFloat cellX = col * cellW;
  CGFloat cellY = row * cellH;


  UIButton *btn = [UIButton buttonWithType:(UIButtonTypeCustom)];

  btn.frame = CGRectMake(cellX, cellY, cellW, cellH);
  [btn setTitle:titles[i] forState:(UIControlStateNormal)];
  btn.titleLabel.font = [UIFont boldSystemFontOfSize:20];
  [btn setTitleColor:[UIColor blackColor] forState:(UIControlStateNormal)];

  [btn setBackgroundImage:[UIImage imageNamed:@"nyl_keyboard_white"] forState:(UIControlStateNormal)];
  [btn setBackgroundImage:[UIImage imageNamed:@"nyl_keyboard"] forState:(UIControlStateHighlighted)];

  [self addSubview:btn];
  btn.tag = 100 + i;
  //NSLog(@"%.2f === %.2f == %.2f", btn.left, cellX, btn.bottom);
  [btn addTarget:self action:@selector(actionBtnClick:) forControlEvents:(UIControlEventTouchUpInside)];

  if (btn.tag == 111) { // 删除按钮
   //button长按事件
    UILongPressGestureRecognizer *longPress = [[UILongPressGestureRecognizer alloc] initWithTarget:self action:@selector(btnLong:)];
    //longPress.minimumPressDuration = ; //定义按的时间
   [btn addGestureRecognizer:longPress];


   // 删除按钮上面加图片
   UIImageView *delImageV = [[UIImageView alloc] init];
   delImageV.image = [UIImage imageNamed:@"nylKeyBoard_del"];

   CGFloat img_width = cellW / 4.6;
   CGFloat img_height = img_width * 30 / 40; // 比例高度

   delImageV.frame = CGRectMake( (cellW - img_width) / 2, (cellH - img_height) / 2, img_width, img_height);
   [btn addSubview:delImageV];


  }

 }


 //CGFloat topBottom = topBgView.bottom;


 // 竖线
 for (int i = 0; i < 2; i++) {

  UIView *line = [[UIView alloc] initWithFrame:CGRectMake(cellW + i * (cellW), 0, 0.5, height)];
  line.backgroundColor = RGB(214, 213, 214);
  [self addSubview:line];
 }

 // 横线
 for (int i = 0; i < 3; i++) {
    UIView *line = [[UIView alloc] initWithFrame:CGRectMake(0, cellH+ i * cellH, width, 0.5)];
  line.backgroundColor = RGB(214, 213, 214);
  [self addSubview:line];
 }

}


- (void)okbtnClick {
 [self removeFromSuperview];
 if (_delegate && [_delegate respondsToSelector:@selector(idKeyboard:inputSring:)]) {
  [_delegate idKeyboard:self inputSring:self.inputString];
 }
}


- (void)actionBtnClick:(UIButton *)btn {
 NSLog(@"自定义键盘按钮方法===== %@", btn.titleLabel.text);


 if (btn.tag == 111 && self.inputString.length > 0) {
  [self.inputString deleteCharactersInRange:NSMakeRange(self.inputString.length-1, 1)];
 } else {

  if (btn.tag != 111) {
   [self.inputString appendString:btn.titleLabel.text];
  }
 }


 if (_delegate && [_delegate respondsToSelector:@selector(idKeyboard:inputSring:)]) {
  [_delegate idKeyboard:self inputSring:self.inputString];
 }
}


#pragma mark - 长按钮删除
-(void)btnLong:(UILongPressGestureRecognizer *)gestureRecognizer{

 if (self.inputString.length > 0) {
  [self.inputString deleteCharactersInRange:NSMakeRange(self.inputString.length-1, 1)];

  NSLog(@"长按==== %@", self.inputString);

  if (_delegate && [_delegate respondsToSelector:@selector(idKeyboard:inputSring:)]) {
   [_delegate idKeyboard:self inputSring:self.inputString];
  }
 }

}

@end
在controller中使用
//
// ViewController.m
// NYL_IDCardKeyBoard
//
// Created by 聂银龙 on 2017/9/8.
// Copyright © 2017年 聂银龙. All rights reserved.
//

#import "ViewController.h"
#import "NYLIDKeyBoard.h"
// 屏幕高度
#define SCREEN_HEIGHT   [[UIScreen mainScreen] bounds].size.height
// 屏幕宽度
#define SCREEN_WIDTH   [[UIScreen mainScreen] bounds].size.width
#define GETSIZE(num) (SCREEN_WIDTH/375*num)

@interface ViewController ()<NYKIDKeyBoardDelegate>

@property (weak, nonatomic) IBOutlet UITextField *textField;
@property(nonatomic, strong) NYLIDKeyBoard *idKeyBoard;
@end

@implementation ViewController

- (void)viewDidLoad {
 [super viewDidLoad];

 // 设置自定义键盘
 self.textField.inputView = self.idKeyBoard;


}


#pragma mark - 输入代理回调
- (void)idKeyboard:(NYLIDKeyBoard *)idKeyboard inputSring:(NSMutableString *)inputString {

 _textField.text = inputString;

}


- (void)touchesEnded:(NSSet<UITouch *> *)touches withEvent:(UIEvent *)event {
 [self.textField resignFirstResponder];
}


// 身份证键盘
- (NYLIDKeyBoard *)idKeyBoard {
 if (!_idKeyBoard) {
  _idKeyBoard = [[NYLIDKeyBoard alloc] initWithFrame:CGRectMake(0, SCREEN_HEIGHT - GETSIZE(216), SCREEN_WIDTH, GETSIZE(216) )];
  _idKeyBoard.delegate = self;

 }
 return _idKeyBoard;
}

- (void)didReceiveMemoryWarning {
 [super didReceiveMemoryWarning];
 // Dispose of any resources that can be recreated.
}


@end
以上就是本文的全部内容,希望对大家的学习有所帮助,也希望大家多多支持脚本之家。


