教程细节
软件:Adobe Illustrator CS3
难易:初级
预计完成时间:30分钟
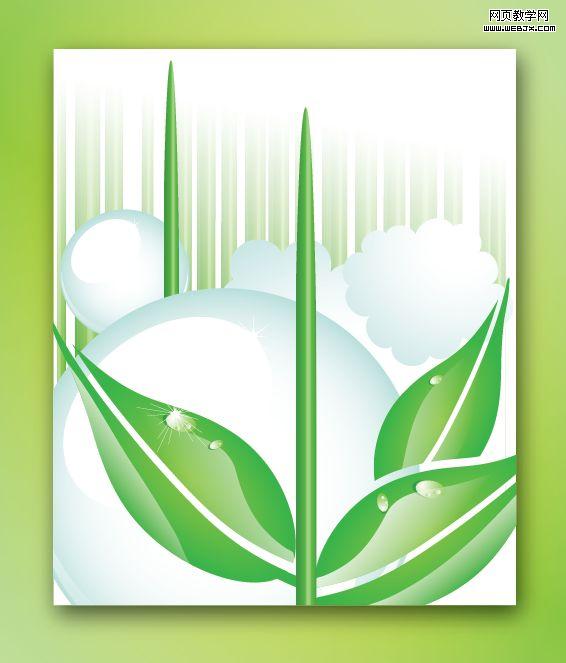
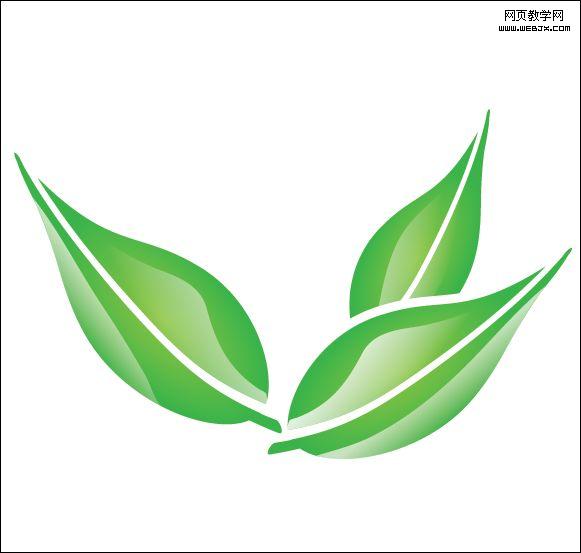
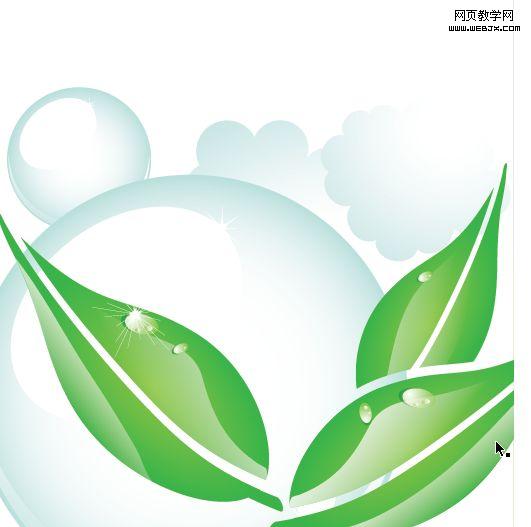
Final Product What You'll Be Creating
成品图
In this tutorial you will learn how to make an illustration for a magazine cover and learn how to use the opacity mask ,the gradient tool and the pen tool to make some leaves with water drops on them and cloudy background. This technique can be applied to many different objects. Let’s get started!
本教程你要学习怎样绘制杂志封面上的矢量图,学习怎样使用不透明调板,渐变工具,怎样使用钢笔工具绘制滴着露珠的叶子和云的背景。这种技巧可以应用在各个不同的对象上。好了,让我们现在开始吧!
Step 1
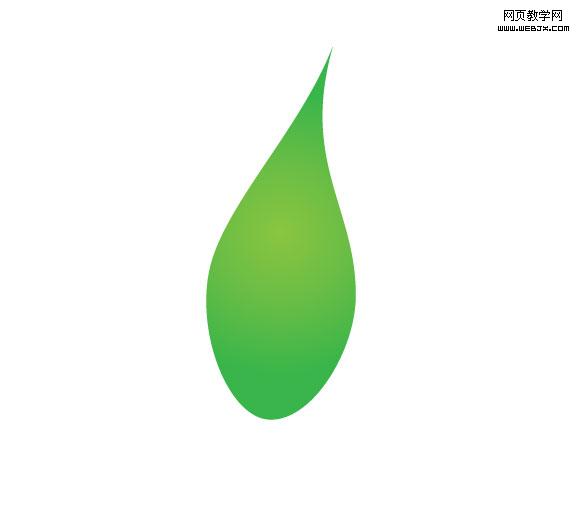
First, make a leaf shape using the Pen Tool.
1.首先,使用钢笔工具绘制出一片叶子的形状。
Step 2
Add a white stroke along the leaf and then press (Command + C) to copy ,(Command + B) to send to the back. Now you have two strokes , the white one in the front and color the other one with green and move it a little bit to the left. Use the image below for reference.
2.沿着叶子的脉络绘制一条白色的描边,然后按Ctrl+C复制,Ctrl+B粘贴在后面。现在你有2条描边了,白色的在前面,另一条填上绿色并且绿色的这条向左移动一点。参照下图。
注:实际2.5pt,2pt没有下图所示那么粗,这里可以设定为20pt,10pt,具体可以根据图像大小自定。

Step 3
Expand the strokes (Object > Expand), select them all and from the Pathfinder panel press merge.
3.扩展描边(对象>扩展),全部选中,切到路径查找器调板,按合并按钮。
注:合并的话得不到图示的路径,我重新写一下。
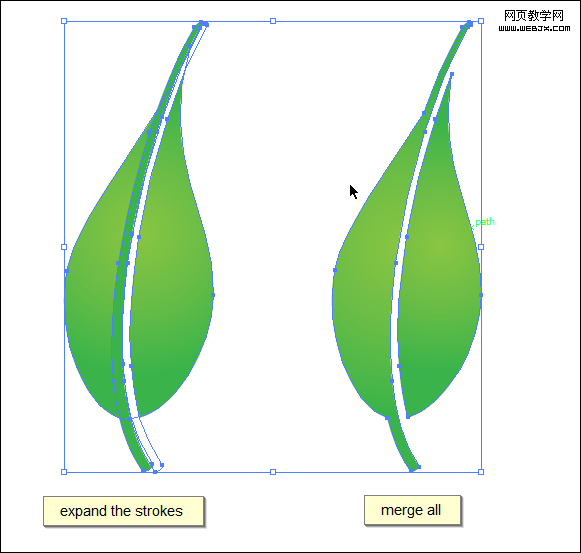
扩展描边后,叶子和扩展后的绿色描边形状相加,然后减去扩展后的白色描边(在路径查找器中完成)。完成后得到上图右边的路径。
注:白色描边的堆栈顺序必须在叶子和绿色描边形状相加后的复合路径之上。
形状相减的另一层隐义就是减去前面的形状。
相加相减之后叶子可能需要重新填色渐变,重新填色即可。
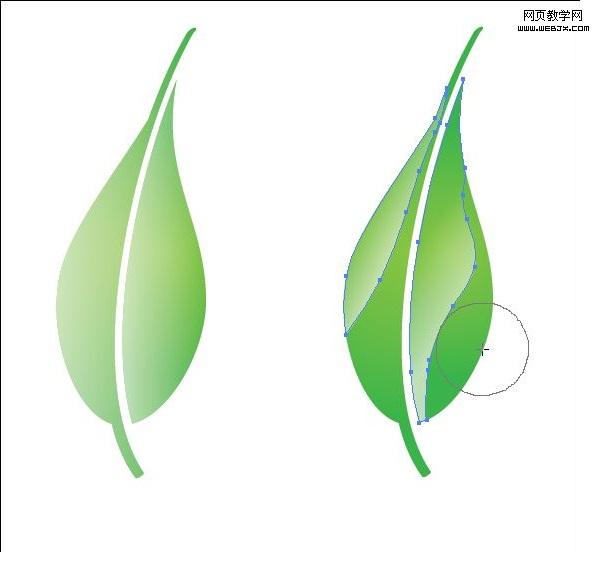
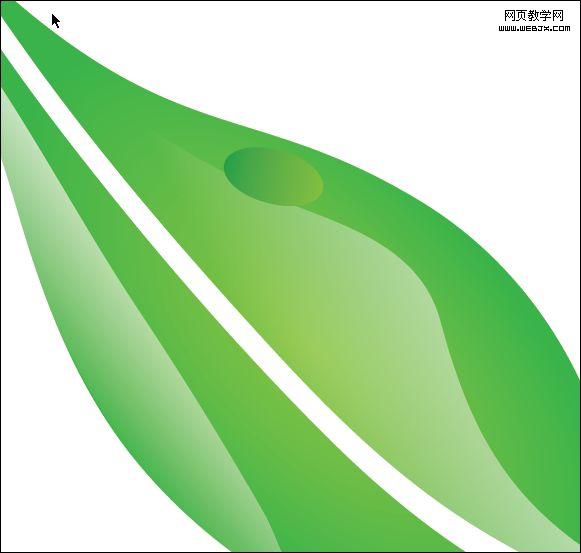
Step 4
Select the leaf then press (Command + C) for copy, (Command + F) paste in front, select the copy and fill it with gradient of half opacity white to 0 opacity white. Erase parts of the leaf (like in the image) to make the leaf shine.
4.选择叶子,然后按Ctrl+C复制,Ctrl+F粘贴在前面,选择副本,填色50%不透明白色到0%不透明白色渐变。去除叶子多余的部分(如图)以创建叶子的光亮面。
Step 5
Make several leaves in the same manner, and arrange them in a manner similar to the image below.
5.用同样的方法绘制其它的叶子,然后用你喜欢的方法把它们进行排列组合,就像下图一样。
Step 6
Begin making the water drop with an ellipse shape with a green gradient.
6.使用椭圆工具绘制露珠,填充绿色渐变。
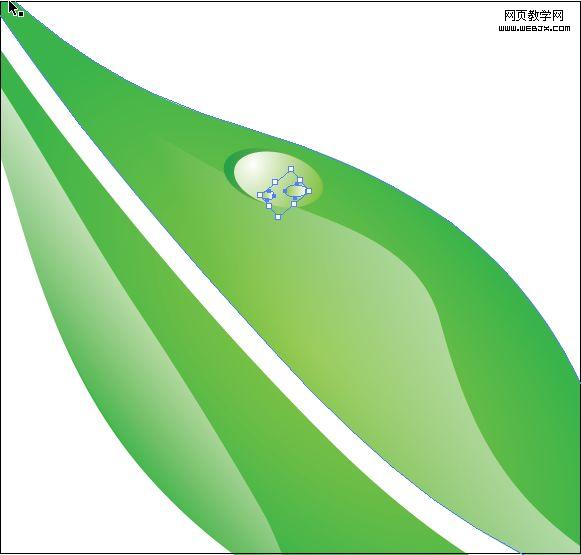
Step 7
Make a smaller ellipse with a white to green gradient and add smaller ellipses inside of it.
7.绘制更小的椭圆,应用白到绿色渐变,然后再在椭圆内部绘制更小的椭圆。
Step 8
Distribute the drops on the leaves like in the image below
8.在其它叶子上也添加几滴露珠,如图所示。
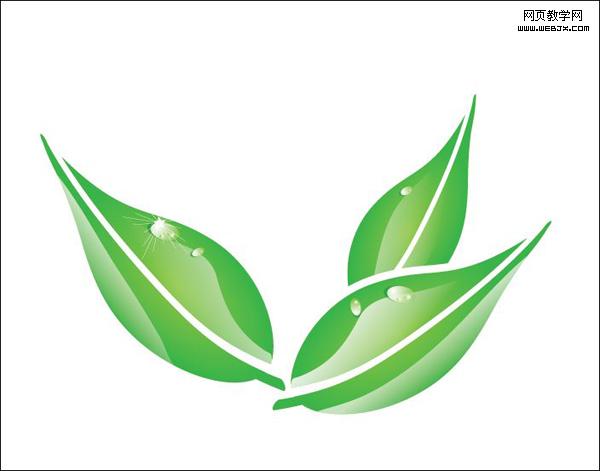
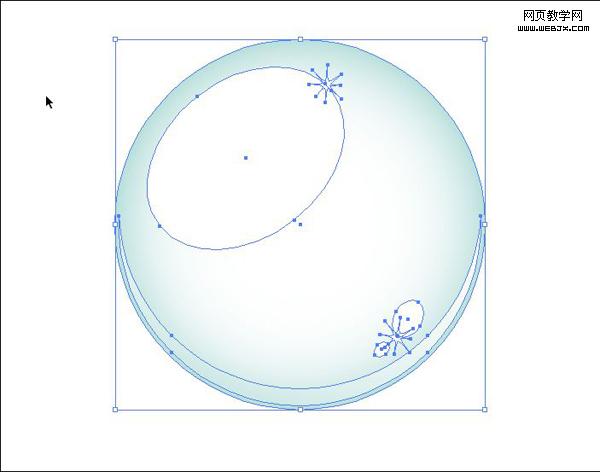
露珠上的发散光,可以先绘制一个几角星(如:七角星),然后选择“效果”菜单>扭曲和变换>收缩和膨胀,收缩(负数为收缩)来实现。
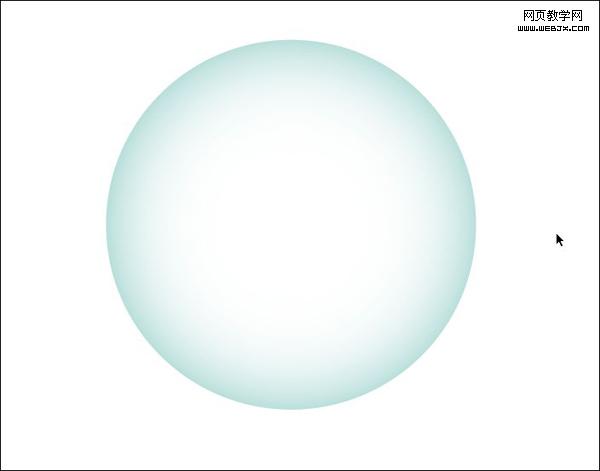
Step 9
Now we will make the bubble for behind the leaves, start by making a circle with radial gradient (blue to white).
9.现在我们来绘制叶子后面的水泡,先创建一个径向渐变的圆(蓝到白渐变)。
Step 10
Like with the water drop, make circles inside with a white to transparent gradient and then add a moon shape at the bottom .
10.创建水滴的样子,先在内部再创建一个圆,应用白色到0%不透明白色渐变,然后在底部绘制出月亮的形状,其余删除。
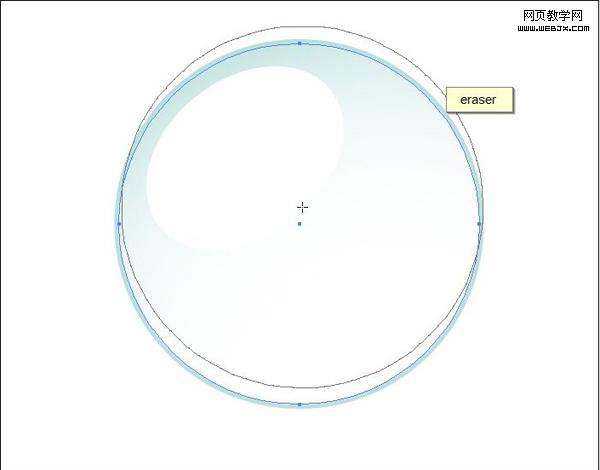
这里图示的星,可以先绘制一个圆,然后选择效果菜单>扭曲和变换>波纹来实现。
Step 11
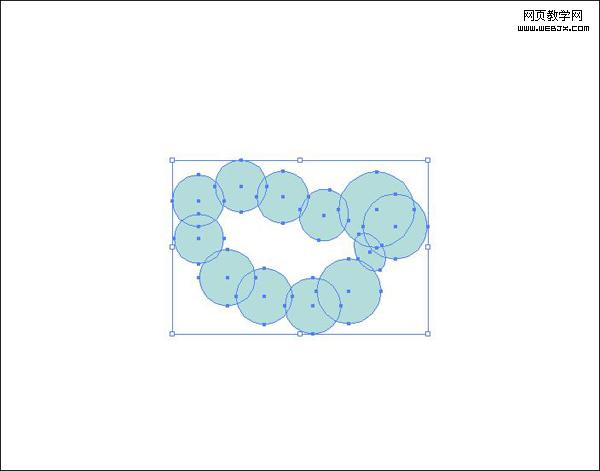
To make the cloud, make several circles with the ellipse tool and put them together to form the cloud.
11.绘制云,先使用椭圆工具绘制几个圆,然后把它们进行排列组合,拼合成一个云。
Step 12
Now fill the empty space in the middle, select all the shapes and merge them with the Pathfinder.
12.现在闭合中间的空白区域,选择所有的形状,按路径查找器中的合并按钮。

Step 13
Build your illustration by starting with the clouds, then bubbles, then the leaves.
13.现在云,露珠,叶子都已经绘制好了。
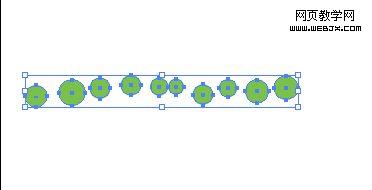
Step 14
Make a line of circles and group them.
14.绘制一排圆,然后把它们编为一组(Ctrl+G)。
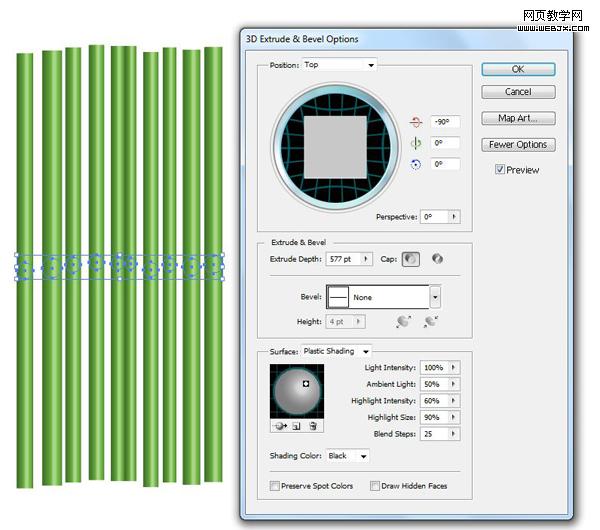
Step 15
Apply a 3D Extrude & Bevel with the settings shown below.
15.应用3D凸出和斜角,设置如下。
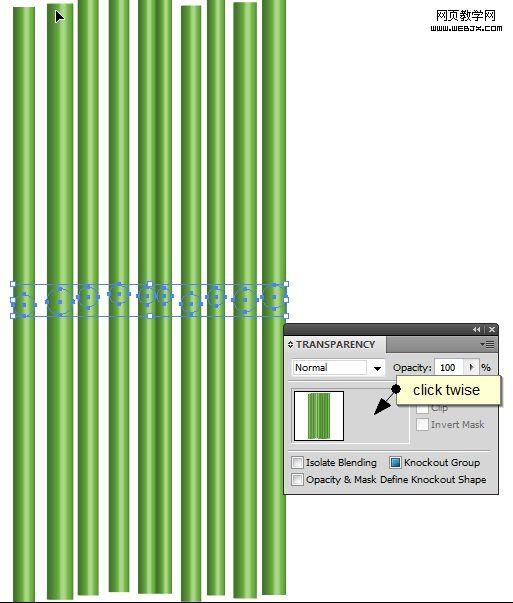
By clicking twice in the transparency panel, you’re going to make an opacity mask and the cylinders will disappear.
在透明度调板上点击2次,你就可以创建不透明面板了,此时圆柱隐藏。
Step 16
Alt + Click the opacity mask to edit it, make a rectangle with a gradient gray to black ( the black makes the object disappear and the white makes the object appear).
16.Alt+点击不透明面板你就可以编辑修改它了,绘制一个矩形,应用灰到黑渐变(黑色使对象隐藏,白色使对象显示)。

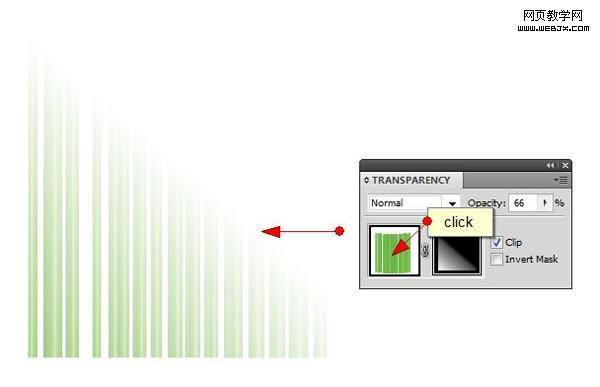
Step 17
Do the same thing as before, but use a pointy shape like below as the mask. This time the opacity mask will look like the image below.
17.像之前一样重复操作,但使用尖的形状的不透明面板如下图所示。这次不透明面板如图所示。

Conclusion
And there you have it. A soft looking environmental illustration. If you want to use this as a magazine cover, simply add your text and export it for print. I hope you’ve enjoyed this tut.
尾声
现在你完成了绘制,得到了一个柔和的自然的景观矢量图。如果你想把它用于杂志的封面,只要简简单单地添加一些文本就可以拿去印刷了。我希望你会喜欢它。