
本文实例为大家分享了C++简单实现Dijkstra算法的具体代码,供大家参考,具体内容如下
// Dijkstra.cpp : 定义控制台应用程序的入口点。
//
#include "stdafx.h"
#include <iostream>
#include <stack>
#define MAX_VALUE 1000
using namespace std;
struct MGraph
{
int *edges[MAX_VALUE];
int iVertexCount, iEdageCount;
};
void ReadDate(MGraph *mGraph, int *iBegin, int *iEnd);
void Dijkstra(MGraph *mGraph, int *pArrDis, int *pArrPath, int iBegin);
void PrintResult(int *pArrDis, int *pArrPath, int iBegin, int iEnd);
int main()
{
int iBegin, iEnd;
int *pArrPath = new int[MAX_VALUE];
int *pArrDis = new int[MAX_VALUE];
MGraph mGraph;
for (int i = 0; i < MAX_VALUE; i++){
mGraph.edges[i] = new int[MAX_VALUE];
}
ReadDate(&mGraph, &iBegin, &iEnd);
Dijkstra(&mGraph, pArrDis, pArrPath, iBegin);
PrintResult(pArrDis,pArrPath, iBegin, iEnd);
system("pause");
return 0;
}
void ReadDate(MGraph *mGraph, int *iBegin, int *iEnd){
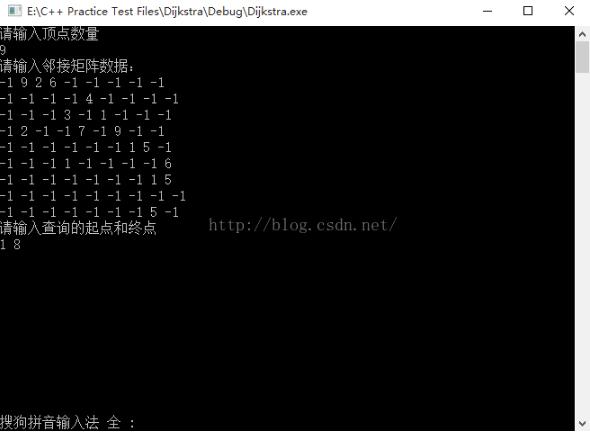
cout << "请输入顶点数量" << endl;
cin >> mGraph->iVertexCount;
cout << "请输入邻接矩阵数据:" << endl;
for (int iRow = 1; iRow <= mGraph->iVertexCount; iRow++){
for (int iCol = 1; iCol <= mGraph->iVertexCount; iCol++){
cin >> mGraph->edges[iRow][iCol];
}
}
//cout << "请输入顶点数和边数" << endl;
//cin >> mGraph->iVertexCount >> mGraph->iEdageCount;
//for (int iRow = 1; iRow <= mGraph->iVertexCount; iRow++){
// for (int iCol = 1; iCol <= mGraph->iVertexCount; iCol++){
// mGraph->edges[iRow][iCol] = -1;
// }
//}
//cout << "请输入连通边及权重" << endl;
//int iRow, iCol, iWeight;
//for (int i = 1; i <= mGraph->iEdageCount; i++){
// cin >> iRow >> iCol >> iWeight;
// mGraph->edges[iRow][iCol] = iWeight;
//}
cout << "请输入查询的起点和终点" << endl;
cin >> *iBegin >> *iEnd;
}
void Dijkstra(MGraph *mGraph, int *pArrDis, int *pArrPath, int iBegin){
int iMin;
int bArrVisited[MAX_VALUE];
memset(bArrVisited, false, sizeof(bArrVisited));
for (int i = 1; i <= mGraph->iVertexCount; i++){
pArrPath[i] = -1;
mGraph->edges[i][i] = 0;
pArrDis[i] = mGraph->edges[iBegin][i] != -1 ? mGraph->edges[iBegin][i] : INT_MAX;
}
int iNewCost;
int iSelected = iBegin;
for (int i = 1; i <= mGraph->iVertexCount; i++){
int iPre = iSelected;
iMin = INT_MAX;
for (int j = 1; j <= mGraph->iVertexCount; j++){
if (!bArrVisited[j] && pArrDis[j] < iMin){
iMin = pArrDis[j];
iSelected = j;
}
}
for (int j = 1; j <= mGraph->iVertexCount; j++){
iNewCost = pArrDis[iSelected] != -1 && mGraph->edges[iSelected][j] != -1 ? pArrDis[iSelected] + mGraph->edges[iSelected][j] : INT_MAX;
if (!bArrVisited[j] && iNewCost < pArrDis[j]){
pArrPath[j] = iSelected;
pArrDis[j] = iNewCost;
//pArrPath[iSelected] = iSelected;
}
}
//pArrPath[iSelected] = iPre;
bArrVisited[iSelected] = true;
}
}
void PrintResult(int *pArrDis, int *pArrPath, int iBegin, int iEnd){
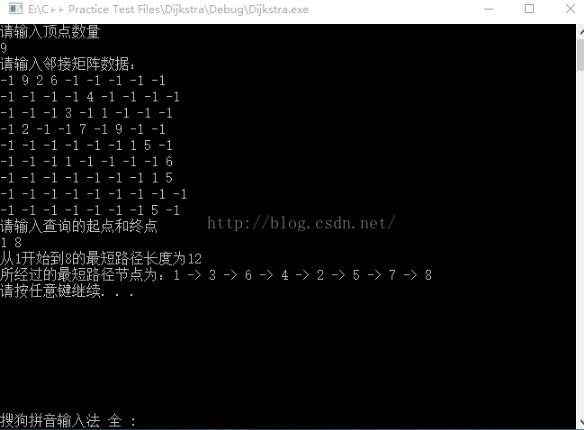
cout << "从" << iBegin << "开始到" << iEnd << "的最短路径长度为";
cout << pArrDis[iEnd] << endl;
cout << "所经过的最短路径节点为:";
stack<int> stackVertices;
int k = iEnd;
do{
k = pArrPath[k];
stackVertices.push(k);
} while (k != pArrPath[k] && k != -1);
cout << stackVertices.top()*-1;
stackVertices.pop();
unsigned int nLength = stackVertices.size();
for (unsigned int nIndex = 0; nIndex < nLength; nIndex++)
{
cout << " -> " << stackVertices.top();
stackVertices.pop();
}
cout << " -> " << iEnd << endl;
}
以上就是本文的全部内容,希望对大家的学习有所帮助,也希望大家多多支持脚本之家。


