
写在前面
微软在更新.Net Core版本的时候,动作往往很大,使得每次更新版本的时候都得小心翼翼,坑实在是太多。往往是悄咪咪的移除了某项功能或者组件,或者不在支持XX方法,这就很花时间去找回需要的东西了,下面是个人在迁移.Net Core WebApi项目过程中遇到的问题汇总:
开始迁移
1. 修改*.csproj项目文件
<TargetFramework>netcoreapp2.2</TargetFramework>
修改为
<TargetFramework>netcoreapp3.1</TargetFramework>
2 修改Program
public static void Main(string[] args)
    {
      CreateWebHostBuilder(args).Build().Run();
    }

    public static IWebHostBuilder CreateWebHostBuilder(string[] args) =>
        WebHost.CreateDefaultBuilder(args)
          .UseStartup<Startup>().ConfigureAppConfiguration((hostingContext, config) =>
          {
            config.AddJsonFile($"你的json文件.json", optional: true, reloadOnChange: true);
          }
          );
修改为
public static void Main(string[] args)
    {
      CreateHostBuilder(args).Build().Run();
    }

    public static IHostBuilder CreateHostBuilder(string[] args) =>
      Host.CreateDefaultBuilder(args)
        .ConfigureWebHostDefaults(webBuilder =>
        {
          webBuilder.UseStartup<Startup>()
                .ConfigureAppConfiguration((hostingContext, config)=>
                {
                  config.AddJsonFile($"你的json文件.json", optional: true, reloadOnChange: true);
                });
        });
3.1 修改Startup.ConfigureServices
services.AddMvc();
修改为
services.AddControllers();
3.2 修改Startup.Configure
public void Configure(IApplicationBuilder app, IHostingEnvironment env)

修改为
using Microsoft.Extensions.Hosting;
public void Configure(IApplicationBuilder app, IWebHostEnvironment env)
IHostingEnvironment在3.0之后已被标记弃用。
路由配置:
app.UseMvc(routes =>
        {
          routes.MapRoute(
            name: "areas",
            template: "{area:exists}/{controller=Home}/{action=Index}/{id?}"
          );

          routes.MapRoute(
            name: "default",
            template: "{controller=Home}/{action=Index}/{id?}"
          );
        });

修改为

      app.UseRouting();
      app.UseEndpoints(endpoints =>
      {
        endpoints.MapControllers();
        endpoints.MapControllerRoute(
            name: "areas",
            pattern: "{area:exists}/{controller=Home}/{action=Index}/{id?}");
        endpoints.MapControllerRoute(
            name: "default",
            pattern: "{controller=Home}/{action=Index}/{id?}");
      });
你以为结束了?还没。
坑
这时候你以为结束了,兴高采烈的去服务器装好runningTime和hosting相应的版本,运行……
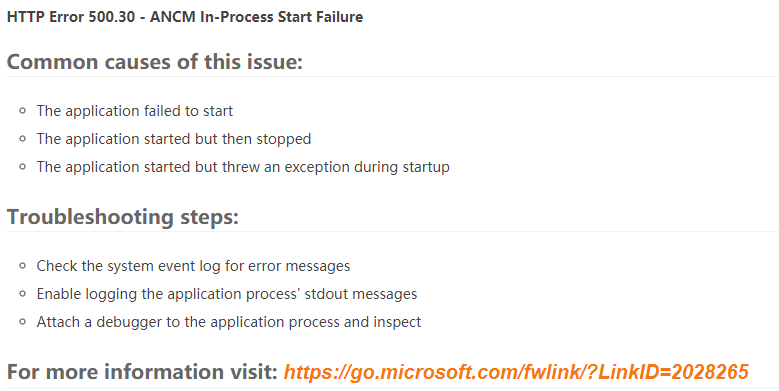
HTTP Error 500.30 – ANCM In-Process Start Failure
直接cmd,进入到发布目录,执行:
E:\你的路径>dotnet xxx.dll
显示详细错误
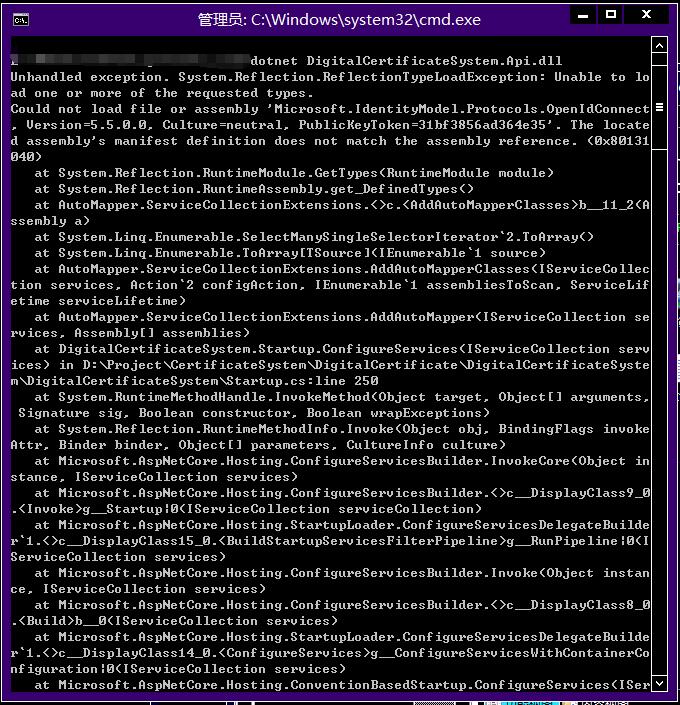
而我的相应250代码行是:
services.AddAutoMapper(AppDomain.CurrentDomain.GetAssemblies());
搜索最新的AutoMapper根本没更新或改变,所以不是这个组件的问题。
尝试下载补丁Windows6.1-KB974405-x64.msu,无果……
卸载sdk重置,无果……
修改web.config,无果……
修改应用池32位,无果……
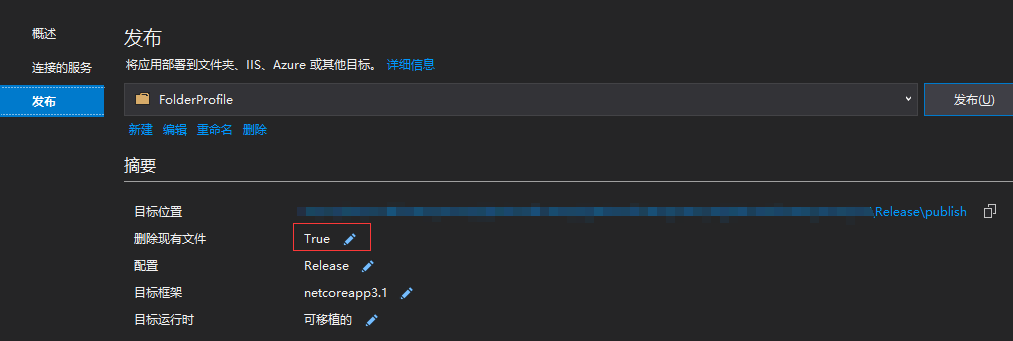
最后,查看发布:勾选上【删除现有文件】,解决……
Endpoint contains CORS metadata, but a middleware was not found that supports CORS.
顺利可以启动项目之后,发现有些接口:
2020-06-29 10:02:23,357 [14] ERROR System.String - 全局异常捕捉:异常:Endpoint contains CORS metadata, but a middleware was not found that supports CORS.
Configure your application startup by adding app.UseCors() inside the call to Configure(..) in the application startup code. The call to app.UseAuthorization() must appear between app.UseRouting() and app.UseEndpoints(...).
提示很明显,在.net core 2.2 的时候
app.UseCors();
不是需要强制在指定位置的,在3.0之后需要设置在app.UseRouting和app.UseEndpoints 之间
app.UseRouting();//跨域
app.UseCors(one);
app.UseCors(two);
……
app.UseEndpoints(endpoints => ……
The JSON value could not be converted to System.Int32. Path……
运行之后,有些接口没有数据返回,而有些直接报错了。原因又是爸爸把Newtonsoft.Json移除,使用内置的System.Text.Json,所以依赖于Newtonsoft.Json的组件将不可用,那么,只能手动添加。
Install-Package Microsoft.AspNetCore.Mvc.NewtonsoftJson -Version 3.1.5
然后添加引用
public void ConfigureServices(IServiceCollection services)
{
  services.AddControllers().AddNewtonsoftJson();
}
目前还不太建议你使用内置的序列化,因为实在太多功能或方法不支持,详细对比请参考https://docs.microsoft.com/zh-cn/dotnet/standard/serialization/system-text-json-migrate-from-newtonsoft-how-to
授权相关
基于策略授权,我想在座的加班狗都是大同小异,在2.2以前:
public class PolicyHandler : AuthorizationHandler<PolicyRequirement>
  {
    /// <summary>
    /// 授权方式(cookie, bearer, oauth, openid)
    /// </summary>
    public IAuthenticationSchemeProvider Schemes { get; set; }

    private IConfiguration _configuration;

    /// <summary>
    /// ctor
    /// </summary>
    /// <param name="configuration"></param>
    /// <param name="schemes"></param>
    /// <param name="jwtApp"></param>
    public PolicyHandler(IConfiguration configuration, IAuthenticationSchemeProvider schemes)
    {
      Schemes = schemes;
      _jwtApp = jwtApp;
      _configuration = configuration;
    }

    /// <summary>
    /// 授权处理
    /// </summary>
    /// <param name="context"></param>
    /// <param name="requirement"></param>
    protected override async Task HandleRequirementAsync(AuthorizationHandlerContext context, PolicyRequirement requirement)
    {
      var httpContext = (context.Resource as AuthorizationFilterContext).HttpContext;

      //获取授权方式
      var defaultAuthenticate = await Schemes.GetDefaultAuthenticateSchemeAsync();
      if (defaultAuthenticate != null)
      {
        //验证签发的用户信息
        var result = await httpContext.AuthenticateAsync(defaultAuthenticate.Name);
        if (result.Succeeded)
        {
          httpContext.User = result.Principal;

          //判断是否过期
          var expirationTime = DateTime.Parse(httpContext.User.Claims.SingleOrDefault(s => s.Type == ClaimTypes.Expiration).Value);
          if (expirationTime >= DateTime.UtcNow)
          {
             //你的校验方式
             //todo
            context.Succeed(requirement);
          }
          else
          {
            HandleBlocked(context, requirement);
          }
          return;
        }
      }
      HandleBlocked(context, requirement);
    }

    /// <summary>
    /// 验证失败返回
    /// </summary>
    private void HandleBlocked(AuthorizationHandlerContext context, PolicyRequirement requirement)
    {
      var authorizationFilterContext = context.Resource as AuthorizationFilterContext;
      authorizationFilterContext.Result = new Microsoft.AspNetCore.Mvc.JsonResult(new UnAuthorizativeResponse()) { StatusCode = 202 };
      //不要调用 context.Fail(),设置为403会显示不了自定义信息,改为Accepted202,由客户端处理,;
      context.Succeed(requirement);
    }
  }
然后发现升级到3.0之后,
var httpContext = (context.Resource as AuthorizationFilterContext).HttpContext;
3.0不再支持返回AuthorizationFilterContext,而是返回的是RouteEndpoint,这句代码就会报错,所以修改的方式就是注入IHttpContextAccessor,从里面获取HttpContext,这里就不用演示了吧。
并修改PolicyHandler校验失败时候调用的方法:
/// <summary>
    /// 验证失败返回
    /// </summary>
    private void HandleBlocked(AuthorizationHandlerContext context, PolicyRequirement requirement)
    {
      context.Fail();
    }
并在Startup.ConfigureServices修改
services.AddHttpContextAccessor();
在AddJwtBearer中
.AddJwtBearer(s =>
      {
        //3、添加 Jwt bearer
        s.TokenValidationParameters = new TokenValidationParameters
        {
          ValidIssuer = issuer,
          ValidAudience = audience,
          IssuerSigningKey = key,
          //允许的服务器时间偏差的偏移量
          ClockSkew = TimeSpan.FromSeconds(5),
          ValidateLifetime = true
        };
        s.Events = new JwtBearerEvents
        {
          OnAuthenticationFailed = context =>
          {
            //Token 过期
            if (context.Exception.GetType() == typeof(SecurityTokenExpiredException))
            {
              context.Response.Headers.Add("Token-Expired", "true");
            }
            return Task.CompletedTask;
          },
          OnChallenge = context =>
          {
            context.HandleResponse();
            context.Response.StatusCode = StatusCodes.Status200OK;
            context.Response.ContentType = "application/json";
            //无授权返回自定义信息
            context.Response.WriteAsync(JsonConvert.SerializeObject(new UnAuthorizativeResponse()));
            return Task.CompletedTask;
          }
        };
      });
UnAuthorizativeResponse 是自定义返回的内容。
Startup.Configure中启用Authentication,注意顺序
app.UseRouting();
//跨域
app.UseCors(one);
app.UseCors(two);
……
//启用 Authentication
app.UseAuthorization();
app.UseAuthentication();
app.UseEndpoints(endpoints => ……
也必须在app.UseRouting和app.UseEndpoints之间。
文件下载
单独封装的HttpContext下载方法:
public static void DownLoadFile(this HttpContext context,string fileName, byte[] fileByte, string contentType = "application/octet-stream")
    {
      int bufferSize = 1024;

      context.Response.ContentType = contentType;
      context.Response.Headers.Append("Content-Disposition", "attachment;filename=" + HttpUtility.UrlEncode(fileName));
      context.Response.Headers.Append("Charset", "utf-8");
      context.Response.Headers.Append("Access-Control-Expose-Headers", "Content-Disposition");

      //context.Response.Headers.Append("Access-Control-Allow-Origin", "*");
      //使用FileStream开始循环读取要下载文件的内容
      using (Stream fs = new MemoryStream(fileByte))
      {
        using (context.Response.Body)
        {
          long contentLength = fs.Length;
          context.Response.ContentLength = contentLength;

          byte[] buffer;
          long hasRead = 0;
          while (hasRead < contentLength)
          {
            if (context.RequestAborted.IsCancellationRequested)
            {
              break;
            }

            buffer = new byte[bufferSize];
            //从下载文件中读取bufferSize(1024字节)大小的内容到服务器内存中
            int currentRead = fs.Read(buffer, 0, bufferSize);
            context.Response.Body.Write(buffer, 0, currentRead);
            context.Response.Body.Flush();
            hasRead += currentRead;
          }
        }
      }
    }
下载的时候发现以下错误:Synchronous operations are disallowed. Call WriteAsync or set AllowSynchronousIO to true instead.
2020-06-29 14:18:38,898 [109] ERROR System.String - System.InvalidOperationException: Synchronous operations are disallowed. Call WriteAsync or set AllowSynchronousIO to true instead.
  at Microsoft.AspNetCore.Server.IIS.Core.HttpResponseStream.Write(Byte[] buffer, Int32 offset, Int32 count)
  at Microsoft.AspNetCore.Server.IIS.Core.WrappingStream.Write(Byte[] buffer, Int32 offset, Int32 count)
  at DigitalCertificateSystem.Common.Extensions.HttpContextExtension.DownLoadFile(HttpContext context, String fileName, Byte[] fileByte, String contentType) in ……
意思不运行同步操作,修改为
context.Response.Body.WriteAsync(buffer, 0, currentRead);
这才顺利完成了更新。真的太坑了,不过也感觉微软的抽象化做得很好,按需引入,减少项目的冗余。
更多升级指南请参考“孙子兵法”:https://docs.microsoft.com/zh-cn/aspnet/core/migration/22-to-30?view=aspnetcore-2.1&tabs=visual-studio
作者:EminemJK(山治先生)
出处:https://www.cnblogs.com/EminemJK/


