
本文实例为大家分享了Android实现个人信息管理系统的具体代码,供大家参考,具体内容如下
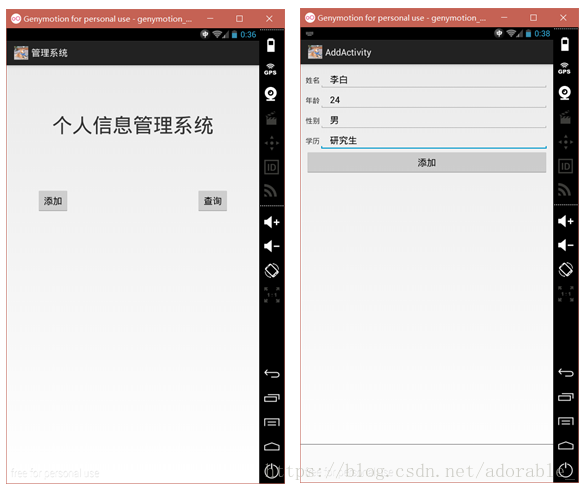
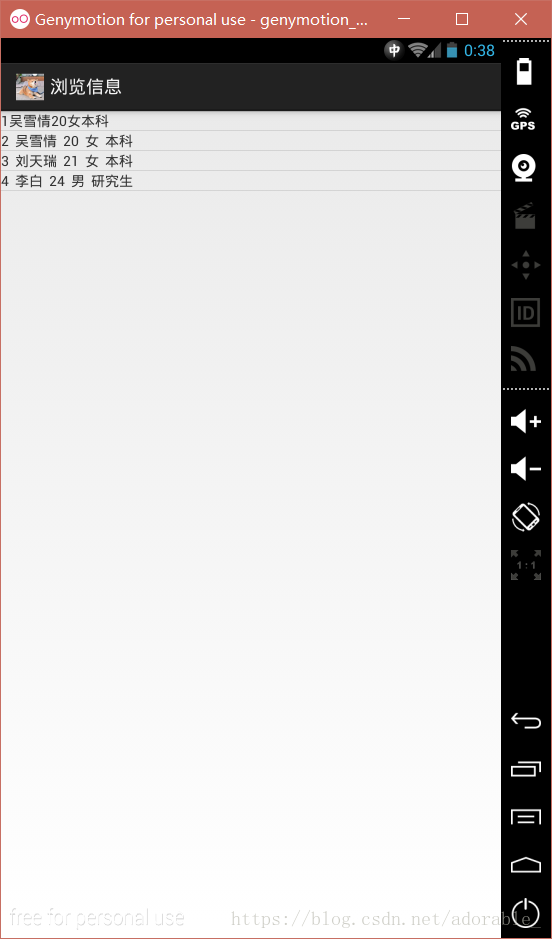
要求:使用SQLite实现个人信息管理系统,个人信息包括姓名,年龄,性别以及学历
(1)DBHelper.java代码如下:
package com.example.system;

import android.content.ContentValues;
import android.content.Context;
import android.database.Cursor;
import android.database.sqlite.SQLiteDatabase;
import android.database.sqlite.SQLiteOpenHelper;

public class DBHelper extends SQLiteOpenHelper{

 private static final String DB_NAME ="people.db";
 private static final String TBL_NAME="Message";
 private SQLiteDatabase db;

 public DBHelper(Context c){
 super(c,DB_NAME,null,2);
 }

 @Override
 public void onCreate(SQLiteDatabase db){
 this.db=db;
 String CREATE_TBL="create table Message(_id integer primary key autoincrement,name text,age text,sex text,edu text)";
 db.execSQL(CREATE_TBL);
 }

 public void insert(ContentValues values){
 SQLiteDatabase db=getWritableDatabase();
 db.insert(TBL_NAME, null, values);
 db.close();
 }

 public Cursor query(){
 SQLiteDatabase db=getWritableDatabase();
 Cursor c=db.query(TBL_NAME, null, null, null, null, null, null);
 return c;
 }

 @Override
 public void onUpgrade(SQLiteDatabase arg0, int arg1, int arg2) {
 // TODO Auto-generated method stub

 }

}
(2)MainActivity.java代码如下:
package com.example.system;

import android.app.Activity;
import android.content.Intent;
import android.os.Bundle;
import android.view.Menu;
import android.view.MenuItem;
import android.view.View;
import android.view.View.OnClickListener;
import android.widget.Button;
import android.widget.TextView;

public class MainActivity extends Activity {

 private TextView textview;
 private Button btn1,btn2;

 @Override
 protected void onCreate(Bundle savedInstanceState) {
 super.onCreate(savedInstanceState);
 setContentView(R.layout.activity_main);

 textview = (TextView)findViewById(R.id.textview);
 btn1 = (Button)findViewById(R.id.btn1);
 btn2 = (Button)findViewById(R.id.btn2);

 //添加监听器
 btn1.setOnClickListener(new OnClickListener() {

 @Override
 public void onClick(View v) {
 // TODO Auto-generated method stub

 Intent intent = new Intent(MainActivity.this,AddActivity.class);
 startActivity(intent);
 }
 });

 btn2.setOnClickListener(new OnClickListener() {

 @Override
 public void onClick(View v) {
 // TODO Auto-generated method stub

 Intent intent = new Intent(MainActivity.this,QueryActivity.class);
 startActivity(intent);

 }
 });

 }
}
对应布局文件如下:
<RelativeLayout xmlns:android="http://schemas.android.com/apk/res/android"
 xmlns:tools="http://schemas.android.com/tools"
 android:layout_width="match_parent"
 android:layout_height="match_parent">

 <TextView
 android:id="@+id/textview"
 android:layout_width="fill_parent"
 android:layout_height="wrap_content"
 android:layout_marginTop="90dp"
 android:gravity="center"
 android:text="个人信息管理系统"
 android:textSize="40dp" />

 <Button
 android:id="@+id/btn2"
 android:layout_width="wrap_content"
 android:layout_height="wrap_content"
 android:layout_alignBaseline="@+id/btn1"
 android:layout_alignBottom="@+id/btn1"
 android:layout_alignParentRight="true"
 android:layout_marginRight="60dp"
 android:text="查询" />

 <Button
 android:id="@+id/btn1"
 android:layout_width="wrap_content"
 android:layout_height="wrap_content"
 android:layout_alignParentLeft="true"
 android:layout_below="@+id/textview"
 android:layout_marginLeft="60dp"
 android:layout_marginTop="100dp"
 android:text="添加" />
</RelativeLayout>
(3)AddActivity.java代码如下:
package com.example.system;

import android.app.Activity;
import android.content.ContentValues;
import android.content.Intent;
import android.os.Bundle;
import android.view.View;
import android.view.View.OnClickListener;
import android.widget.Button;
import android.widget.EditText;

public class AddActivity extends Activity {
 //声明组件
 private EditText name,age,sex,edu;
 private Button add;


 @Override
 public void onCreate(Bundle savedInstanceState) {
 super.onCreate(savedInstanceState);
 setContentView(R.layout.activity_add);

 name=(EditText)findViewById(R.id.name);
 age=(EditText)findViewById(R.id.age);
 sex=(EditText)findViewById(R.id.sex);
 edu=(EditText)findViewById(R.id.edu);
 add=(Button)findViewById(R.id.ButtonAdd);

 //根据ID 获取组件
 add.setOnClickListener(new OnClickListener() {
 @Override
 public void onClick(View v) {
 // TODO Auto-generated method stub

 String name1=name.getText().toString();
 String age1=age.getText().toString();
 String sex1=sex.getText().toString();
 String edu1=edu.getText().toString();

 //封装信息
 ContentValues values=new ContentValues();
 values.put("name", name1);
 values.put("age", age1);
 values.put("sex", sex1);
 values.put("edu", edu1);

 DBHelper helper=new DBHelper(getApplicationContext());
 helper.insert(values);

 Intent intent = new Intent(AddActivity.this,MainActivity.class);
 startActivity(intent);

 }
 });

 }
}
对应布局文件如下:
<LinearLayout xmlns:android="http://schemas.android.com/apk/res/android"
 android:layout_width="fill_parent"
 android:layout_height="fill_parent"
 android:orientation="vertical"
 android:padding="10dp">

 <TableLayout
 android:id="@+id/TableLayout"
 android:layout_width="wrap_content"
 android:layout_height="wrap_content"
 android:stretchColumns="1">

 <TableRow
 android:id="@+id/TableRow01"
 android:layout_width="wrap_content"
 android:layout_height="wrap_content">

 <TextView
 android:id="@+id/textview1"
 android:layout_width="wrap_content"
 android:layout_height="wrap_content"
 android:text="姓名"/>
 <EditText
 android:id="@+id/name"
 android:layout_width="fill_parent"
 android:layout_height="wrap_content"
 android:text=""/>
 </TableRow>

 <TableRow
 android:id="@+id/TableRow02"
 android:layout_width="wrap_content"
 android:layout_height="wrap_content">

 <TextView
 android:id="@+id/textview2"
 android:layout_width="wrap_content"
 android:layout_height="wrap_content"
 android:text="年龄"/>
 <EditText
 android:id="@+id/age"
 android:layout_width="fill_parent"
 android:layout_height="wrap_content"
 android:text=""/>
 </TableRow>

 <TableRow
 android:id="@+id/TableRow03"
 android:layout_width="wrap_content"
 android:layout_height="wrap_content">

 <TextView
 android:id="@+id/textview3"
 android:layout_width="wrap_content"
 android:layout_height="wrap_content"
 android:text="性别"/>
 <EditText
 android:id="@+id/sex"
 android:layout_width="fill_parent"
 android:layout_height="wrap_content"
 android:text=""/>
 </TableRow>

 <TableRow
 android:id="@+id/TableRow04"
 android:layout_width="wrap_content"
 android:layout_height="wrap_content">

 <TextView
 android:id="@+id/textview4"
 android:layout_width="wrap_content"
 android:layout_height="wrap_content"
 android:text="学历"/>
 <EditText
 android:id="@+id/edu"
 android:layout_width="fill_parent"
 android:layout_height="wrap_content"
 android:text=""/>
 </TableRow>

 <Button
 android:id="@+id/ButtonAdd"
 android:layout_width="wrap_content"
 android:layout_height="wrap_content"
 android:text="添加"/>
 </TableLayout>
</LinearLayout>
(4)QueryActivity.java代码如下:
package com.example.system;

import android.app.AlertDialog;
import android.app.ListActivity;
import android.content.DialogInterface;
import android.database.Cursor;
import android.os.Bundle;
import android.view.View;
import android.widget.AdapterView;
import android.widget.AdapterView.OnItemClickListener;
import android.widget.ListView;
import android.widget.SimpleCursorAdapter;

public class QueryActivity extends ListActivity{

 private ListView listview=null;

 @Override
 public void onCreate(Bundle savedInstanceState){
 super.onCreate(savedInstanceState);

 this.setTitle("浏览信息");

 listview=getListView();

 final DBHelper helper=new DBHelper(this);

 Cursor c=helper.query();

 String[] from={"_id","name","age","sex","edu"};

 int[] to={R.id.text0,R.id.text1,R.id.text2,R.id.text3,R.id.text4};

 SimpleCursorAdapter adapter=new SimpleCursorAdapter(this, R.layout.activity_query, c, from, to);
 listview.setAdapter(adapter);
 }
}
对应布局文件如下:
<LinearLayout xmlns:android="http://schemas.android.com/apk/res/android"
 android:layout_width="match_parent"
 android:layout_height="match_parent">
<TextView
 android:id="@+id/text0"
 android:layout_width="wrap_content"
 android:layout_height="wrap_content"
 />

<TextView
 android:id="@+id/text1"
 android:layout_width="wrap_content"
 android:layout_height="wrap_content"
 />
<TextView
 android:id="@+id/text2"
 android:layout_width="wrap_content"
 android:layout_height="wrap_content"
 />
<TextView
 android:id="@+id/text3"
 android:layout_width="wrap_content"
 android:layout_height="wrap_content"
 />
<TextView
 android:id="@+id/text4"
 android:layout_width="wrap_content"
 android:layout_height="wrap_content"
 />
</LinearLayout>
实现效果如下:
更多学习资料请关注专题《管理系统开发》。
以上就是本文的全部内容,希望对大家的学习有所帮助,也希望大家多多支持脚本之家。


