

在TabLayout出现之前,基本都是通过 ViewPager+FragmentPagerAdapter+第三方开源tab指示器(TabPageIndicator)来实现的。现在Android内部提供了现成的TabLayout控件来实现ViewPager指示器的效果。
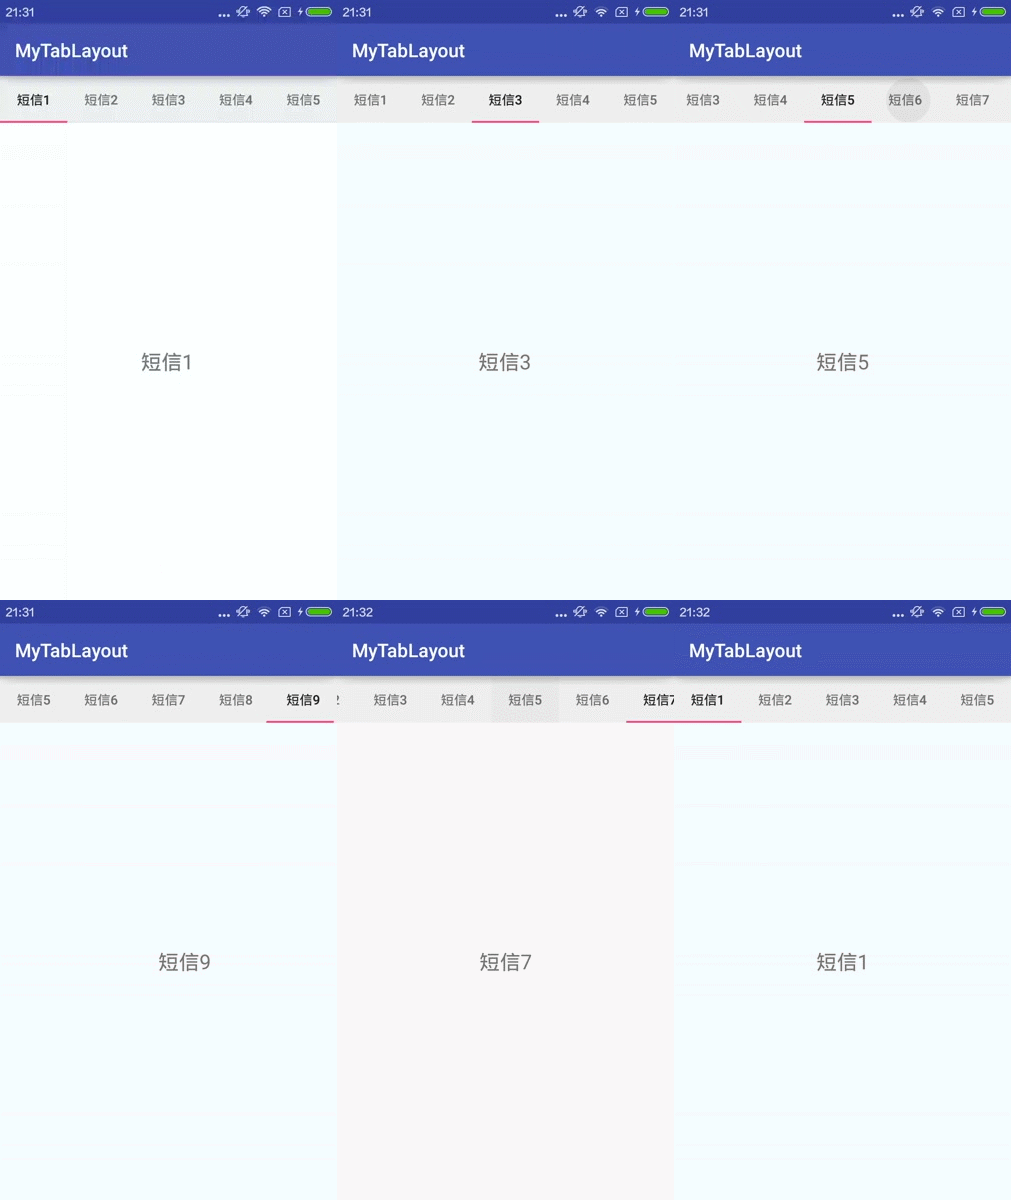
先看效果图:
导入依赖
在Gradle文件中导入依赖,代码如下:
compile 'com.android.support:design:23.4.0'
TabLayout类就在这个依赖包中定义的。
布局文件中使用
<LinearLayout
 xmlns:android="http://schemas.android.com/apk/res/android"
 xmlns:tools="http://schemas.android.com/tools"
 xmlns:app="http://schemas.android.com/apk/res-auto"
 android:layout_width="match_parent"
 android:layout_height="match_parent"
 android:orientation="vertical"
 tools:context="tech.czh.example.MainActivity">

 <android.support.design.widget.TabLayout
  android:id="@+id/tablayout"
  android:layout_width="match_parent"
  android:layout_height="50dp"
  android:layout_gravity="top"/>

 <android.support.v4.view.ViewPager
  android:id="@+id/viewpager"
  android:layout_width="match_parent"
  android:layout_height="match_parent"
  android:background="@android:color/white">

 </android.support.v4.view.ViewPager>

</LinearLayout>
在LinearLayout中使用TabLayout标签和ViewPager标签。
Activity代码编写
public class MainActivity extends AppCompatActivity
{

 public static final String[] tabTitles =
   new String[]{"短信1","短信2","短信3","短信4","短信5","短信6","短信7","短信8","短信9"};

 private TabLayout mTabLayout;
 private ViewPager mViewPager;

 private List<SingleFragment> mFragments = new ArrayList<SingleFragment>();

 @Override
 protected void onCreate(Bundle savedInstanceState)
 {
  super.onCreate(savedInstanceState);
  setContentView(R.layout.activity_main);

  initViews();
 }

 private void initViews()
 {
  mTabLayout = (TabLayout) findViewById(R.id.tablayout);
  mViewPager = (ViewPager) findViewById(R.id.viewpager);

  for(int i = 0; i < tabTitles.length; i++)
  {
   mFragments.add(SingleFragment.createFragment(tabTitles[i]));
  }

  //为ViewPager设置FragmentPagerAdapter
  mViewPager.setAdapter(new FragmentPagerAdapter(getSupportFragmentManager())
  {
   @Override
   public Fragment getItem(int position)
   {
    return mFragments.get(position);
   }

   @Override
   public int getCount()
   {
    return mFragments.size();
   }

   /**
    * 为TabLayout中每一个tab设置标题
    */
   @Override
   public CharSequence getPageTitle(int position)
   {
    return tabTitles[position];
   }
  });

  //TabLaout和ViewPager进行关联
  mTabLayout.setupWithViewPager(mViewPager);
  //防止tab太多,都拥挤在一起
  mTabLayout.setTabMode(TabLayout.MODE_SCROLLABLE);
 }
}
大部分功能都在initViews()方法中实现,大致讲解一下:第23,24行获得TabLayout和ViewPager控件实例;26~29行创建了需要的Fragment实例,并保存在mFragments列表中。第32行,为ViewPager设置FragmentPagerAdapter,并通过getSupportFragmentManager()方法将FragmentManager传递给FragmentPagerAdapter。第50行,getPageTitle()回调函数,来为TabLayout中的Tab设置标题。第57行,将TabLayout和ViewPager进行关联。最后,设置了TabLayout的模式,TabLayout.MODE_SCROLLABLE表示TabLayout可以滑动,这样就可以防止过多的Tab拥挤在一屏内。
Fragment代码编写
public class SingleFragment extends Fragment
{
 public static final String ARGUMENT = "ARGUMENT";

 @Nullable
 @Override
 public View onCreateView(LayoutInflater inflater, ViewGroup container, Bundle savedInstanceState)
 {
  Bundle bundle = getArguments();
  String text = "";
  if(bundle != null) {
   text = bundle.getString(ARGUMENT);
  }
  TextView tv = new TextView(getActivity());
  tv.setText(text);
  tv.setTextSize(TypedValue.COMPLEX_UNIT_SP, 22);
  tv.setGravity(Gravity.CENTER);

  return tv;
 }

 public static SingleFragment createFragment(String argument)
 {
  Bundle bundle = new Bundle();
  bundle.putString(ARGUMENT, argument);

  SingleFragment fragment = new SingleFragment();
  fragment.setArguments(bundle);

  return fragment;
 }
}
Fragment的UI控件很简单,仅仅包含一个TextView。外部通过静态方法createFragment()用来创建Fragment实例,并且可以传递参数,传递的参数将设置到TextView中。
OK,至此TabLayout就可以正常使用了,效果就为文章开始贴的gif图。
另外,TabLayout还提供了很多自定义属性,让我们自定义Tab的样式。
示例代码:
<LinearLayout
 xmlns:android="http://schemas.android.com/apk/res/android"
 xmlns:tools="http://schemas.android.com/tools"
 xmlns:app="http://schemas.android.com/apk/res-auto"
 android:layout_width="match_parent"
 android:layout_height="match_parent"
 android:orientation="vertical"
 tools:context="tech.czh.example.MainActivity">

 <android.support.design.widget.TabLayout
  android:id="@+id/tablayout"
  android:layout_width="match_parent"
  android:layout_height="50dp"
  android:layout_gravity="top"
  app:tabTextColor="@color/colorPrimary"
  app:tabSelectedTextColor="@color/colorAccent"
  app:tabIndicatorColor="@color/colorAccent"
  app:tabIndicatorHeight="5dp"/>

 <android.support.v4.view.ViewPager
  android:id="@+id/viewpager"
  android:layout_width="match_parent"
  android:layout_height="match_parent"
  android:background="@android:color/white">

 </android.support.v4.view.ViewPager>

</LinearLayout>
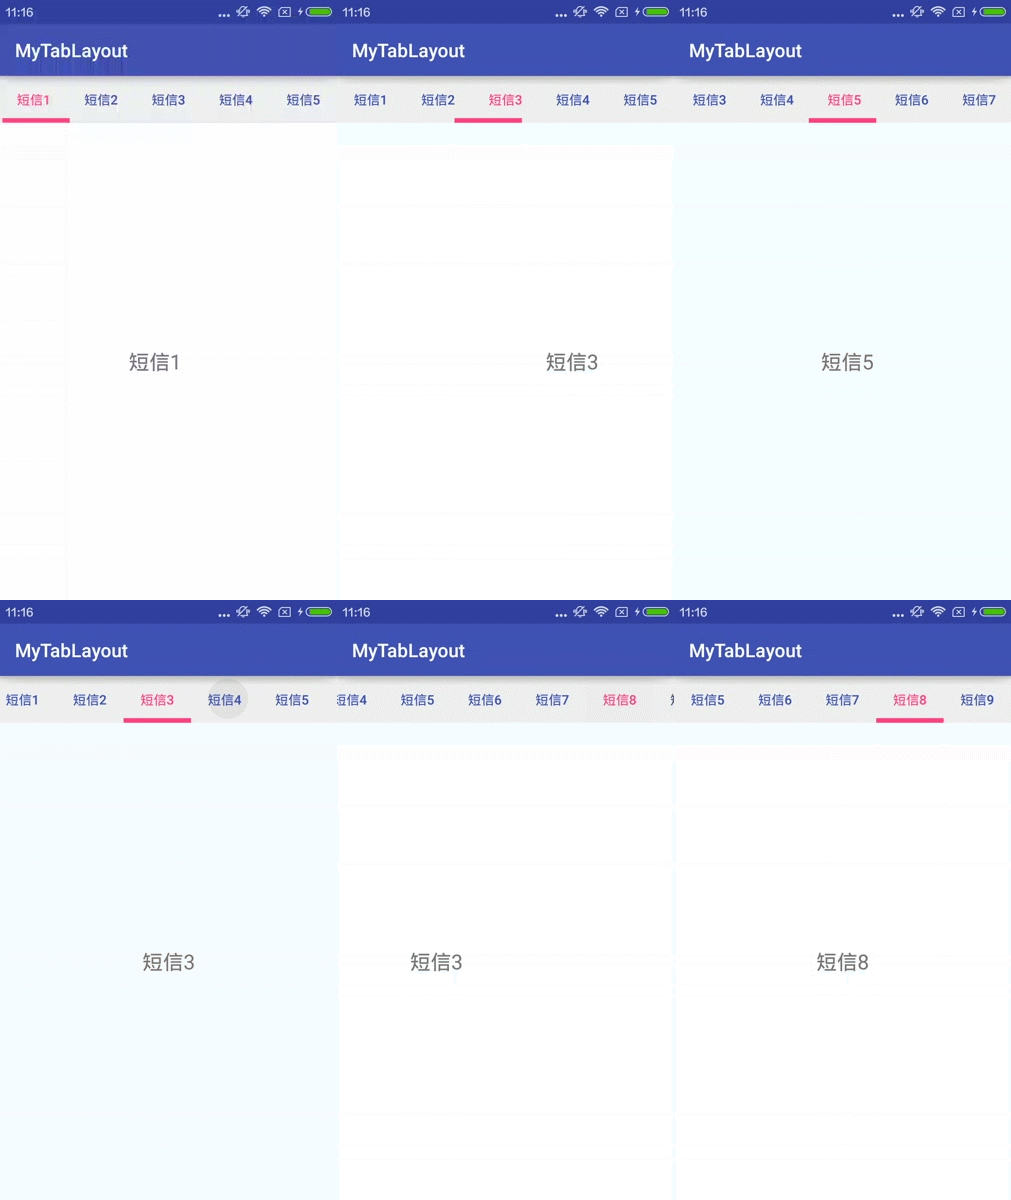
这里我们使用一些属性,比如:tabTextColor用来设置Tab中文字颜色;
tabSelectedTextColor用来设置Tab被选中时文字颜色;tabIndicatorColor用来设置指示器颜色;tabIndicatorHeight用来设置指示器的高度。
最后,看一下效果:
好的,TabLayout的使用就说这么多。可以看出TabLayout使用起来还是很方便的,并且最终效果也很nice。
以上就是本文的全部内容,希望对大家的学习有所帮助,也希望大家多多支持脚本之家。


