
本文实例为大家分享了Android第三方登录之QQ的具体代码,供大家参考,具体内容如下
第三方登录之QQ
代码区
public class MainActivity extends AppCompatActivity {

 private Button btn;
 private TextView tv;
 private ImageView image;

 @Override
 protected void onCreate(Bundle savedInstanceState) {
  super.onCreate(savedInstanceState);
  setContentView(R.layout.activity_main);
  btn = (Button) findViewById(R.id.btn);
  tv = (TextView) findViewById(R.id.tv);
  image = (ImageView) findViewById(R.id.image);
  btn.setOnClickListener(new View.OnClickListener() {
   @Override
   public void onClick(View view) {
    UMShareAPI.get(MainActivity.this).getPlatformInfo(MainActivity.this, SHARE_MEDIA.QQ, umAuthListener);
   }
  });
 }
 private UMAuthListener umAuthListener = new UMAuthListener() {
  @Override
  public void onStart(SHARE_MEDIA platform) {
   //授权开始的回调
  }
  @Override
  public void onComplete(SHARE_MEDIA platform, int action, Map<String, String> data) {
   Toast.makeText(getApplicationContext(), "Authorize succeed", Toast.LENGTH_SHORT).show();
   String name = data.get("name");
   String gender = data.get("gender");
   String photoUrl = data.get("iconurl");
   tv.setText(name + " " +gender);
   ImageLoader.getInstance().displayImage(photoUrl,image);
  }

  @Override
  public void onError(SHARE_MEDIA platform, int action, Throwable t) {
   Toast.makeText( getApplicationContext(), "Authorize fail", Toast.LENGTH_SHORT).show();
  }

  @Override
  public void onCancel(SHARE_MEDIA platform, int action) {
   Toast.makeText( getApplicationContext(), "Authorize cancel", Toast.LENGTH_SHORT).show();
  }
 };
 @Override
 protected void onActivityResult(int requestCode, int resultCode, Intent data) {
  super.onActivityResult(requestCode, resultCode, data);
  UMShareAPI.get(this).onActivityResult(requestCode, resultCode, data);
 }
}
<manifest xmlns:android="http://schemas.android.com/apk/res/android" package="com.example.qqqqq">
 <uses-permission android:name="android.permission.ACCESS_NETWORK_STATE" />
 <uses-permission android:name="android.permission.ACCESS_WIFI_STATE" />
 <uses-permission android:name="android.permission.READ_PHONE_STATE" />
 <uses-permission android:name="android.permission.WRITE_EXTERNAL_STORAGE"/>
 <uses-permission android:name="android.permission.READ_EXTERNAL_STORAGE"/>
 <uses-permission android:name="android.permission.INTERNET" />
 <uses-permission android:name="android.permission.ACCESS_FINE_LOCATION" />
 <uses-permission android:name="android.permission.ACCESS_COARSE_LOCATION" />
 <uses-permission android:name="android.permission.ACCESS_LOCATION_EXTRA_COMMANDS" />
 <application android:allowBackup="true" android:icon="@mipmap/ic_launcher"
  android:label="@string/app_name" android:roundIcon="@mipmap/ic_launcher_round"
  android:supportsRtl="true" android:theme="@style/AppTheme"
  android:name=".appliction">
  <activity android:name=".MainActivity">
   <intent-filter>
    <action android:name="android.intent.action.MAIN" />

    <category android:name="android.intent.category.LAUNCHER" />
   </intent-filter>
  </activity>
  <activity
   android:name="com.tencent.tauth.AuthActivity"
   android:launchMode="singleTask"
   android:noHistory="true" >

   <intent-filter>
    <action android:name="android.intent.action.VIEW" />
    <category android:name="android.intent.category.DEFAULT" />
    <category android:name="android.intent.category.BROWSABLE" />
    <data android:scheme="tencent100424468" />
   </intent-filter>

  </activity>

  <activity
   android:name="com.tencent.connect.common.AssistActivity"
   android:screenOrientation="portrait"
   android:theme="@android:style/Theme.Translucent.NoTitleBar"
   android:configChanges="orientation|keyboardHidden|screenSize"/>


 </application>
 <meta-data
  android:name="UMENG_APPKEY"
  android:value="59af450107fe652856001419" >
 </meta-data>
</manifest>
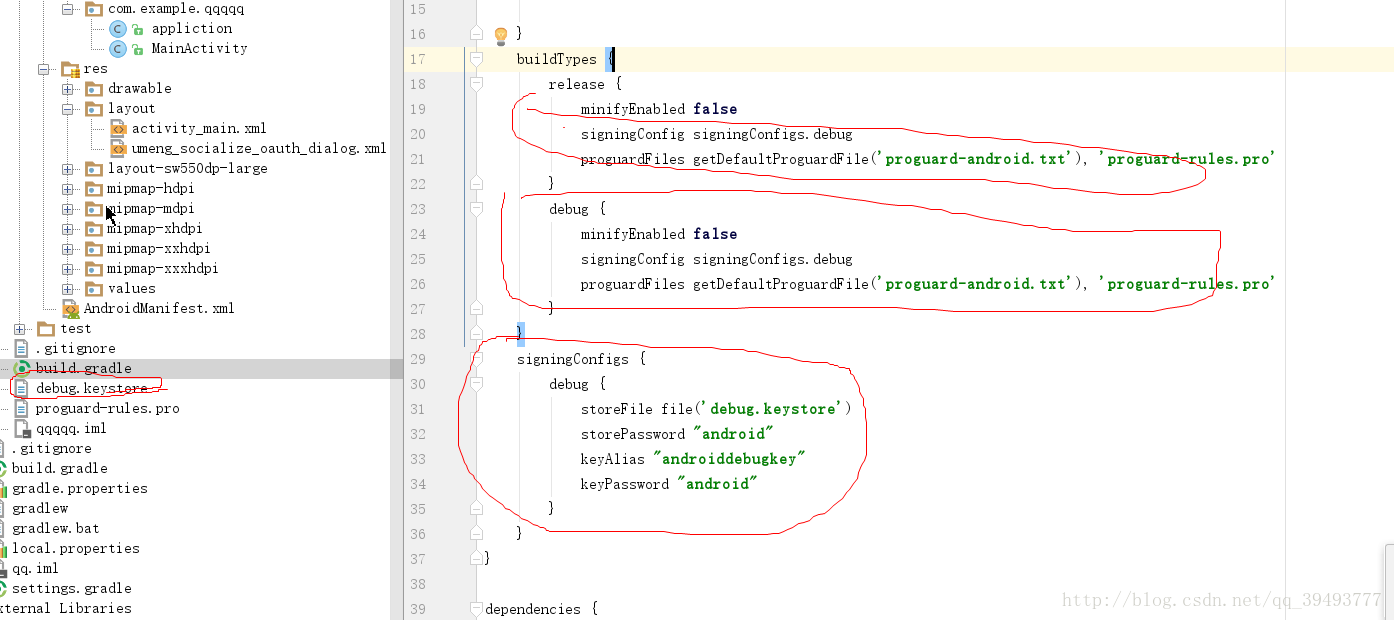
buildTypes {
 release {
  minifyEnabled false
  signingConfig signingConfigs.debug
  proguardFiles getDefaultProguardFile('proguard-android.txt'), 'proguard-rules.pro'
 }
 debug {
  minifyEnabled false
  signingConfig signingConfigs.debug
  proguardFiles getDefaultProguardFile('proguard-android.txt'), 'proguard-rules.pro'
 }
}
signingConfigs {
 debug {
  storeFile file('debug.keystore')
  storePassword "android"
  keyAlias "androiddebugkey"
  keyPassword "android"
 }
}
附带一张照片
以上就是本文的全部内容,希望对大家的学习有所帮助,也希望大家多多支持脚本之家。


