

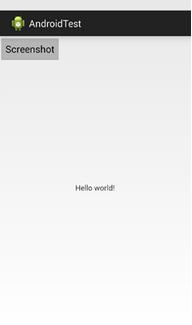
android开发中通过View的getDrawingCache方法可以达到截屏的目的,只是缺少状态栏!
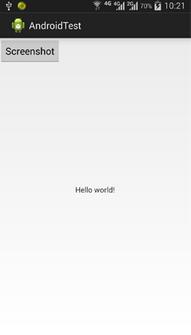
原始界面
截屏得到的图片
代码实现
1. 添加权限(AndroidManifest.xml文件里)
2. 添加1个Button(activity_main.xml文件)
<RelativeLayout xmlns:android="http://schemas.android.com/apk/res/android"
  xmlns:tools="http://schemas.android.com/tools"
  android:layout_width="match_parent"
  android:layout_height="match_parent"
  tools:context=".MainActivity" >

  <TextView
    android:layout_width="wrap_content"
    android:layout_height="wrap_content"
    android:layout_centerHorizontal="true"
    android:layout_centerVertical="true"
    android:text="@string/hello_world" />

  <Button
    android:id="@+id/btn_save"
    android:layout_width="wrap_content"
    android:layout_height="wrap_content"
    android:text="Screenshot"
    />

</RelativeLayout>
3. 实现截屏(MainActivity.java文件)
package com.example.androidtest;

import java.io.File;
import java.io.FileOutputStream;

import android.os.Bundle;
import android.os.Environment;
import android.app.Activity;
import android.graphics.Bitmap;
import android.view.Menu;
import android.view.View;
import android.widget.Button;

public class MainActivity extends Activity {

 @Override
 protected void onCreate(Bundle savedInstanceState) {
 super.onCreate(savedInstanceState);
 setContentView(R.layout.activity_main);

 Button btn = (Button) this.findViewById(R.id.btn_save);
 btn.setOnClickListener(new View.OnClickListener() {

  @Override
  public void onClick(View v) {
  screenshot();
  }
 });
 }

 private void screenshot()
 {
 // 获取屏幕
 View dView = getWindow().getDecorView();
 dView.setDrawingCacheEnabled(true);
 dView.buildDrawingCache();
    Bitmap bmp = dView.getDrawingCache();
    if (bmp != null)
    {
     try {
     // 获取内置SD卡路径
     String sdCardPath = Environment.getExternalStorageDirectory().getPath();
     // 图片文件路径
     String filePath = sdCardPath + File.separator + "screenshot.png";

     File file = new File(filePath);
     FileOutputStream os = new FileOutputStream(file);
     bmp.compress(Bitmap.CompressFormat.PNG, 100, os);
     os.flush();
     os.close();
  } catch (Exception e) {
  }
    }
 }

 @Override
 public boolean onCreateOptionsMenu(Menu menu) {
 // Inflate the menu; this adds items to the action bar if it is present.
 getMenuInflater().inflate(R.menu.activity_main, menu);
 return true;
 }

}
以上就是本文的全部内容,希望对大家的学习有所帮助,也希望大家多多支持脚本之家。


