

Android UI工具包提供了一些布局管理器,它们使用起来相当容易,而且,大多数的时候,你只需要使用它们最基本的特征来实现UI。
执着于基本特征的使用对于创建UI来说,往往不是最高效的。一个常见的例子就是滥用LinearLayout,它将会导致View树中的View数量激增。View——更糟的是,布局管理器——添加到应用程序里都会带来一定的消耗:初始化,布局和绘制变得更加缓慢。嵌套布局的花销尤其“昂贵”,例如,如果你嵌套了一些LinearLayout,并使用了weight参数,这会导致子元素要计算两次。
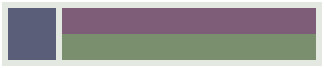
让我们看一个非常简单且常见的布局例子:一个列表项,左边是一个图标,右边是标题和描述,上方是标题,下方是可选的描述。列表项可能看起来如下图:

为了清楚地认识View之间(一个ImageView和两个TextView)的相对位置,下图是使用HierarchyViewer抓获的布局剪影:
实现这个布局,直接使用LinearLayout就可以了。列表项本身是一个水平的LinearLayout,里面有一个ImageView和一个垂直的LinearLayout,垂直的LinearLayout里包含两个TextView。以下是这个布局的源代码:
<LinearLayout xmlns:android="http://schemas.android.com/apk/res/android"
  android:layout_width="fill_parent"
  android:layout_height="?android:attr/listPreferredItemHeight"
  android:padding="6dip">
  <ImageView
    android:id="@+id/icon"
    android:layout_width="wrap_content"
    android:layout_height="fill_parent"
    android:layout_marginRight="6dip"
    android:src="@drawable/icon" />
  <LinearLayout
    android:orientation="vertical"
    android:layout_width="0dip"
    android:layout_weight="1"
    android:layout_height="fill_parent">
    <TextView
      android:layout_width="fill_parent"
      android:layout_height="0dip"
      android:layout_weight="1"
      android:gravity="center_vertical"
      android:text="My Application" />
    <TextView
      android:layout_width="fill_parent"
      android:layout_height="0dip"
      android:layout_weight="1"
      android:singleLine="true"
      android:ellipsize="marquee"
      android:text="Simple application that shows how to use RelativeLayout" />
    </LinearLayout>
</LinearLayout>
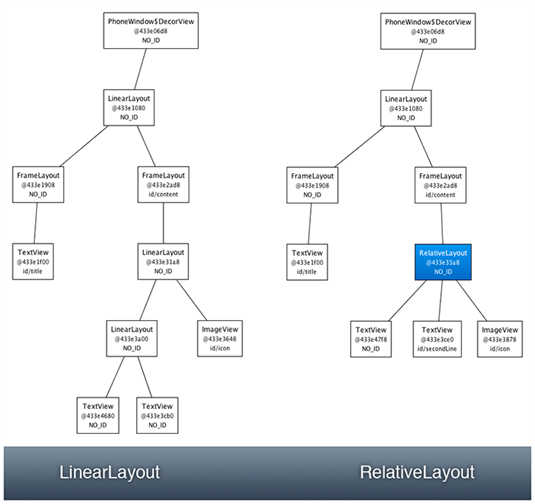
如果你将它作为ListView的item,它能正常工作,但却是相当浪费的。相同的布局可以使用RelativeLayout进行重写,相对于每个列表项来说,可以节省一个View,且View层级上更好,只有一层。使用RelativeLayout也很简单:
<RelativeLayout xmlns:android="http://schemas.android.com/apk/res/android"
  android:layout_width="fill_parent"
  android:layout_height="?android:attr/listPreferredItemHeight"
  android:padding="6dip">
  <ImageView
    android:id="@+id/icon"
    android:layout_width="wrap_content"
    android:layout_height="fill_parent"
    android:layout_alignParentTop="true"
    android:layout_alignParentBottom="true"
    android:layout_marginRight="6dip"
    android:src="@drawable/icon" />
<TextView
    android:id="@+id/secondLine"
    android:layout_width="fill_parent"
    android:layout_height="26dip"
    android:layout_toRightOf="@id/icon"
    android:layout_alignParentBottom="true"
    android:layout_alignParentRight="true"
    android:singleLine="true"
    android:ellipsize="marquee"
    android:text="Simple application that shows how to use RelativeLayout" />
  <TextView
    android:layout_width="fill_parent"
    android:layout_height="wrap_content"
    android:layout_toRightOf="@id/icon"
    android:layout_alignParentRight="true"
    android:layout_alignParentTop="true"
    android:layout_above="@id/secondLine"
    android:layout_alignWithParentIfMissing="true"
    android:gravity="center_vertical"
    android:text="My Application" />
</RelativeLayout>
新的实现与老的实现看起来效果完全一致,除了一种情况。每个列表项显示两行文字:标题和可选的描述。当某一个列表项的描述不可获得时,应用程序可能希望将第二个TextView的Visibility设为GONE。LinearLayout实现版表现得很完美,但RelativeLayout实现版就有点差强人意了:

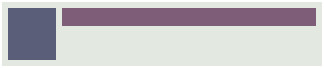
在RelativeLayout里,每个View都是和父元素RelativeLayout对齐或是和其它View对齐的。例如,我们声明描述部分是和RelativeLayout的底部对齐,标题位于其上并与RelativeLayout的顶端对齐。当描述GONE时,RelativeLayout不知道怎么去放置标题的底边缘。为了解决这个问题,你可以使用一个非常简单的布局参数:layout_alignWithParentIfMissing。
这个布尔参数告诉RelativeLayout:如果目标对象消失时使用自己的边缘作为锚点。例如,如果你放置一个View到另一个Visibiity属性设为GONE的View的右边,且设定alignWithParentIfMissing为true,RelativeLayout就会将其左边缘作为View的对齐锚点。在我们的这个场合,使用alignWithParentIfMissing的结果是RelativeLayout将标题部分的底部与自己的底部对齐。结果如下所示:

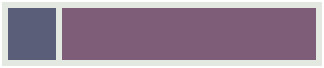
现在,我们的布局表现得很完美了,即使描述部分的Visibility属性设为GONE。更好的是,层级更加简单,因为我们不再使用LinearLayout,而且,更加高效了。当我们使用HierarchyViewer来比较两个实现版的时候,事实就更明显了:
另外,当你使用这么一个布局作为ListView的列表项时,这种差异就更为重要了。希望这个简单的例子能让你了解布局,了解如何优化你的UI。
以上就是本文的全部内容,希望对大家的学习有所帮助,也希望大家多多支持脚本之家。


