
最近Google在自己推出的Material design中增加了Bottom Navigation导航控制。Android一直没有官方的导航控制器,自己实现确实是五花八门,有了这个规定之后,就类似苹果的底部Toolbar,以后我们的APP就会有一致的风格,先看一张效果:
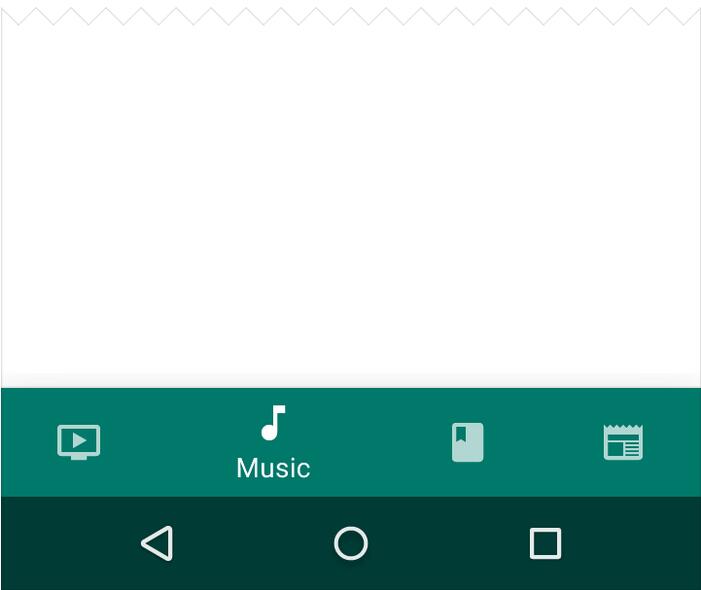
这是官方在Material design中给出一张图,确实很不错。
1.BottomNavigationBar的下载地址
https://github.com/Ashok-Varma/BottomNavigation
2.使用的方法
2.1在Gradle中添加
compile ‘com.ashokvarma.android:bottom-navigation-bar:0.9.5'
2.2布局实现
 <com.ashokvarma.bottomnavigation.BottomNavigationBar
 android:layout_gravity="bottom"
 android:id="@+id/bottom_navigation_bar"
 android:layout_width="match_parent"
 android:layout_height="wrap_content"/>
2.3类中Activity中添加BottomNavigationItem
BottomNavigationBar bottomNavigationBar = (BottomNavigationBar) findViewById(R.id.bottom_navigation_bar);

bottomNavigationBar
 .addItem(new BottomNavigationItem(R.drawable.ic_home_white_24dp, "Home"))
 .addItem(new BottomNavigationItem(R.drawable.ic_book_white_24dp, "Books"))
 .addItem(new BottomNavigationItem(R.drawable.ic_music_note_white_24dp, "Music"))
 .addItem(new BottomNavigationItem(R.drawable.ic_tv_white_24dp, "Movies & TV"))
 .addItem(new BottomNavigationItem(R.drawable.ic_videogame_asset_white_24dp, "Games"))
 .initialise();
2.4设置事件监听器TabChangeListener
 bottomNavigationBar.setTabSelectedListener(new BottomNavigationBar.OnTabSelectedListener(){
 @Override
 public void onTabSelected(int position) {
 }
 @Override
 public void onTabUnselected(int position) {]
 }
 @Override
 public void onTabReselected(int position) {
 }
 });
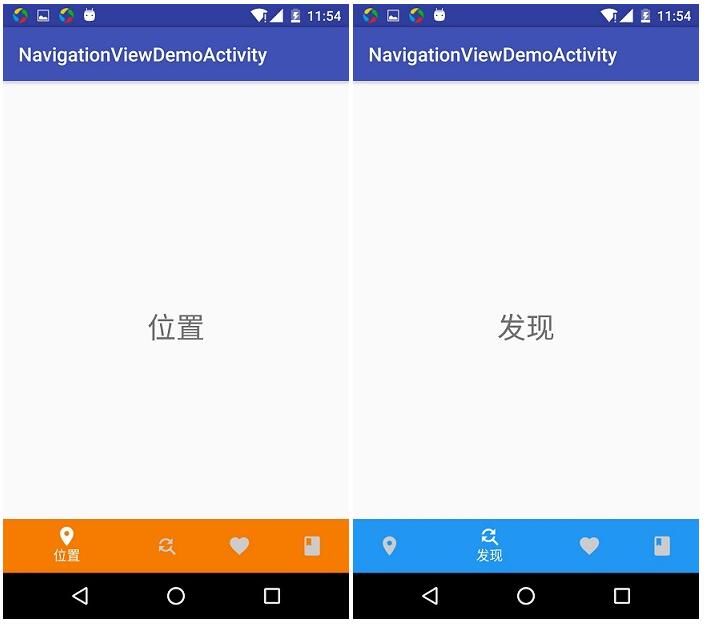
3.案例的实现
布局文件
<?xml version="1.0" encoding="utf-8"?>
<RelativeLayout xmlns:android="http://schemas.android.com/apk/res/android"
 xmlns:tools="http://schemas.android.com/tools"
 xmlns:app="http://schemas.android.com/apk/res-auto" android:layout_width="match_parent"
 android:layout_height="match_parent"
 app:layout_behavior="@string/appbar_scrolling_view_behavior"
 tools:showIn="@layout/activity_navigation_view_demo"
 tools:context="com.lidong.demo.navigation_view.BottomNavigationBarDemoActivity">

 <LinearLayout
 android:id="@+id/tb"
 android:layout_width="match_parent"
 android:layout_height="match_parent"
 android:orientation="vertical" />
 <com.ashokvarma.bottomnavigation.BottomNavigationBar
 android:id="@+id/bottom_navigation_bar"
 android:layout_width="match_parent"
 android:layout_alignParentBottom="true"
 android:layout_height="wrap_content"/>
</RelativeLayout>
Activity的代码:
package com.lidong.demo.navigation_view;

import android.app.FragmentManager;
import android.app.FragmentTransaction;
import android.os.Bundle;
import android.support.v7.app.AppCompatActivity;
import android.support.v7.widget.Toolbar;
import android.util.Log;

import com.ashokvarma.bottomnavigation.BottomNavigationBar;
import com.ashokvarma.bottomnavigation.BottomNavigationItem;
import com.lidong.demo.R;

/**
 * BottomNavigationBar实现
 */
public class BottomNavigationBarDemoActivity extends AppCompatActivity implements BottomNavigationBar.OnTabSelectedListener {

 private BottomNavigationBar bottomNavigationBar;
 int lastSelectedPosition = 0;
 private String TAG = BottomNavigationBarDemoActivity.class.getSimpleName();
 private LocationFragment mLocationFragment;
 private FindFragment mFindFragment;
 private FavoritesFragment mFavoritesFragment;
 private BookFragment mBookFragment;

 @Override
 protected void onCreate(Bundle savedInstanceState) {
 super.onCreate(savedInstanceState);
 setContentView(R.layout.activity_navigation_view_demo);
 Toolbar toolbar = (Toolbar) findViewById(R.id.toolbar);
 setSupportActionBar(toolbar);
 bottomNavigationBar = (BottomNavigationBar) findViewById(R.id.bottom_navigation_bar);

 bottomNavigationBar
 .addItem(new BottomNavigationItem(R.mipmap.ic_location_on_white_24dp, "位置").setActiveColor(R.color.orange))
 .addItem(new BottomNavigationItem(R.mipmap.ic_find_replace_white_24dp, "发现").setActiveColor(R.color.blue))
 .addItem(new BottomNavigationItem(R.mipmap.ic_favorite_white_24dp, "爱好").setActiveColor(R.color.green))
 .addItem(new BottomNavigationItem(R.mipmap.ic_book_white_24dp, "图书").setActiveColor(R.color.blue))
 .setFirstSelectedPosition(lastSelectedPosition )
 .initialise();

 bottomNavigationBar.setTabSelectedListener(this);
 setDefaultFragment();
 }

 /**
 * 设置默认的
 */
 private void setDefaultFragment() {
 FragmentManager fm = getFragmentManager();
 FragmentTransaction transaction = fm.beginTransaction();
 mLocationFragment = LocationFragment.newInstance("位置");
 transaction.replace(R.id.tabs, mLocationFragment);
 transaction.commit();
 }

 @Override
 public void onTabSelected(int position) {
 Log.d(TAG, "onTabSelected() called with: " + "position = [" + position + "]");
 FragmentManager fm = this.getFragmentManager();
 //开启事务
 FragmentTransaction transaction = fm.beginTransaction();
 switch (position) {
 case 0:
 if (mLocationFragment == null) {
  mLocationFragment = LocationFragment.newInstance("位置");
 }
 transaction.replace(R.id.tb, mLocationFragment);
 break;
 case 1:
 if (mFindFragment == null) {
  mFindFragment = FindFragment.newInstance("发现");
 }
 transaction.replace(R.id.tb, mFindFragment);
 break;
 case 2:
 if (mFavoritesFragment == null) {
  mFavoritesFragment = FavoritesFragment.newInstance("爱好");
 }
 transaction.replace(R.id.tb, mFavoritesFragment);
 break;
 case 3:
 if (mBookFragment == null) {
  mBookFragment = BookFragment.newInstance("图书");
 }
 transaction.replace(R.id.tb, mBookFragment);
 break;
 default:
 break;
 }
 // 事务提交
 transaction.commit();
 }

 @Override
 public void onTabUnselected(int position) {
 Log.d(TAG, "onTabUnselected() called with: " + "position = [" + position + "]");
 }

 @Override
 public void onTabReselected(int position) {

 }
}
fragment的代码
package com.lidong.demo.navigation_view;

import android.app.Fragment;
import android.os.Bundle;
import android.view.LayoutInflater;
import android.view.View;
import android.view.ViewGroup;
import android.widget.TextView;

import com.lidong.demo.R;

public class LocationFragment extends Fragment {


 public static LocationFragment newInstance(String param1) {
 LocationFragment fragment = new LocationFragment();
 Bundle args = new Bundle();
 args.putString("agrs1", param1);
 fragment.setArguments(args);
 return fragment;
 }

 public LocationFragment() {

 }

 @Override
 public void onCreate(Bundle savedInstanceState) {
 super.onCreate(savedInstanceState);
 }

 @Override
 public View onCreateView(LayoutInflater inflater, ViewGroup container,
  Bundle savedInstanceState) {
 View view = inflater.inflate(R.layout.fragment_location, container, false);
 Bundle bundle = getArguments();
 String agrs1 = bundle.getString("agrs1");
 TextView tv = (TextView)view.findViewById(R.id.tv_location);
 tv.setText(agrs1);
 return view;
 }


}
代码下载:https://github.com/lidong1665/AndroidRapidLibrary
代码实现起来很简单,就加载布局,添加BottomNavigationItem,设置TabChangeListener就这三步搞定底部导航控制器。
以上就是关于BottomNavigationBar底部导航控制器,希望对大家的学习有所帮助。


