
之前一篇文章,介绍了如何定义从屏幕底部弹出PopupWindow即《Android Animation实战之屏幕底部弹出PopupWindow》,写完之后,突然想起之前写过自定义内容显示的弹出框,就随手写了两个实例,分享出来:
第一种实现方式:继承Dialog
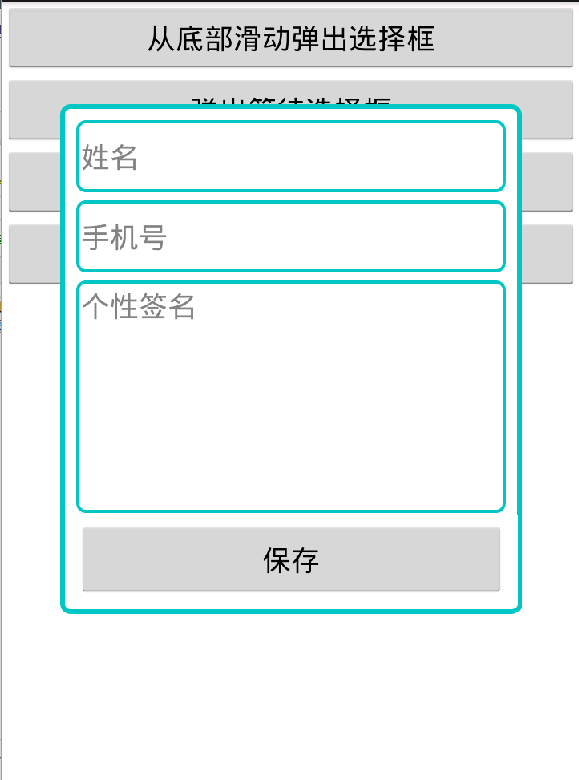
1.1 线定义弹出框要显示的内容:create_user_dialog.xml
<?xml version="1.0" encoding="utf-8"?>
<LinearLayout xmlns:android="http://schemas.android.com/apk/res/android"
 android:id="@+id/create_user_dialog_view"
 android:layout_width="fill_parent"
 android:layout_height="wrap_content"
 android:background="@drawable/dialog_load_bg"
 android:minWidth="200dp"
 android:orientation="vertical"
 android:padding="10dp"
 android:paddingBottom="30dp"
 android:paddingTop="30dp">

 <EditText
 android:id="@+id/text_name"
 android:layout_width="fill_parent"
 android:layout_height="wrap_content"
 android:background="@drawable/edit_bg"
 android:hint="姓名"
 android:minHeight="45dp"
 android:textSize="18sp" />

 <EditText
 android:id="@+id/text_mobile"
 android:layout_width="fill_parent"
 android:layout_height="wrap_content"
 android:layout_marginTop="5dp"
 android:background="@drawable/edit_bg"
 android:hint="手机号"
 android:minHeight="45dp"
 android:textSize="18sp" />

 <EditText
 android:id="@+id/text_info"
 android:layout_width="fill_parent"
 android:layout_height="wrap_content"
 android:layout_marginTop="5dp"
 android:background="@drawable/edit_bg"
 android:gravity="top|left"
 android:hint="个性签名"
 android:minHeight="145dp"
 android:textSize="18sp" />

 <Button
 android:id="@+id/btn_save_pop"
 android:layout_width="fill_parent"
 android:layout_height="wrap_content"
 android:layout_marginTop="5dp"
 android:text="保存" />

</LinearLayout>
1.2 定义要弹出的Dialog
public class CreateUserDialog extends Dialog {

 /**
 * 上下文对象 *
 */
 Activity context;

 private Button btn_save;

 public EditText text_name;

 public EditText text_mobile;

 public EditText text_info;


 private View.OnClickListener mClickListener;

 public CreateUserDialog(Activity context) {
 super(context);
 this.context = context;
 }

 public CreateUserDialog(Activity context, int theme, View.OnClickListener clickListener) {
 super(context, theme);
 this.context = context;
 this.mClickListener = clickListener;
 }

 @Override
 protected void onCreate(Bundle savedInstanceState) {
 super.onCreate(savedInstanceState);
 // 指定布局
 this.setContentView(R.layout.create_user_dialog);

 text_name = (EditText) findViewById(R.id.text_name);
 text_mobile = (EditText) findViewById(R.id.text_mobile);
 text_info = (EditText) findViewById(R.id.text_info);

 /*
 * 获取圣诞框的窗口对象及参数对象以修改对话框的布局设置, 可以直接调用getWindow(),表示获得这个Activity的Window
 * 对象,这样这可以以同样的方式改变这个Activity的属性.
 */
 Window dialogWindow = this.getWindow();

 WindowManager m = context.getWindowManager();
 Display d = m.getDefaultDisplay(); // 获取屏幕宽、高用
 WindowManager.LayoutParams p = dialogWindow.getAttributes(); // 获取对话框当前的参数值
 // p.height = (int) (d.getHeight() * 0.6); // 高度设置为屏幕的0.6
 p.width = (int) (d.getWidth() * 0.8); // 宽度设置为屏幕的0.8
 dialogWindow.setAttributes(p);

 // 根据id在布局中找到控件对象
 btn_save = (Button) findViewById(R.id.btn_save);

 // 为按钮绑定点击事件监听器
 btn_save.setOnClickListener(mClickListener);

 this.setCancelable(true);
 }
}
1.3 调用弹出框
public void showEditDialog(View view) {
 createUserDialog = new CreateUserDialog(this,R.style.loading_dialog,onClickListener);
 createUserDialog.show();
}


private View.OnClickListener onClickListener = new View.OnClickListener() {
 @Override
 public void onClick(View v) {

 switch (v.getId()) {
 case R.id.btn_save:

  String name = createUserDialog.text_name.getText().toString().trim();
  String mobile = createUserDialog.text_mobile.getText().toString().trim();
  String info = createUserDialog.text_info.getText().toString().trim();

  System.out.println(name+"——"+mobile+"——"+info);
  break;
 }
 }
 };
第二种实现方式:继承PopupWindow
2.1 定义弹出框布局文件,和1.1定义的一致
2.2 定义要弹出的PopupWindow
public class CreateUserPopWin extends PopupWindow {

 private Context mContext;

 private View view;

 private Button btn_save_pop;

 public EditText text_name;

 public EditText text_mobile;

 public EditText text_info;


 public CreateUserPopWin(Activity mContext, View.OnClickListener itemsOnClick) {

 this.mContext = mContext;

 this.view = LayoutInflater.from(mContext).inflate(R.layout.create_user_pop, null);

 text_name = (EditText) view.findViewById(R.id.text_name);
 text_mobile = (EditText) view.findViewById(R.id.text_mobile);
 text_info = (EditText) view.findViewById(R.id.text_info);

 btn_save_pop = (Button) view.findViewById(R.id.btn_save_pop);

 // 设置按钮监听
 btn_save_pop.setOnClickListener(itemsOnClick);

 // 设置外部可点击
 this.setOutsideTouchable(true);


 /* 设置弹出窗口特征 */
 // 设置视图
 this.setContentView(this.view);

 // 设置弹出窗体的宽和高
 /*
 * 获取圣诞框的窗口对象及参数对象以修改对话框的布局设置, 可以直接调用getWindow(),表示获得这个Activity的Window
 * 对象,这样这可以以同样的方式改变这个Activity的属性.
 */
 Window dialogWindow = mContext.getWindow();

 WindowManager m = mContext.getWindowManager();
 Display d = m.getDefaultDisplay(); // 获取屏幕宽、高用
 WindowManager.LayoutParams p = dialogWindow.getAttributes(); // 获取对话框当前的参数值

 this.setHeight(RelativeLayout.LayoutParams.WRAP_CONTENT);
 this.setWidth((int) (d.getWidth() * 0.8));

 // 设置弹出窗体可点击
 this.setFocusable(true);

 }
}
2.3 调用该弹框组件
public void showEditPopWin(View view) {

 createUserPopWin = new CreateUserPopWin(this,onClickListener);

 createUserPopWin.showAtLocation(findViewById(R.id.main_view), Gravity.CENTER, 0, 0);
 }


private View.OnClickListener onClickListener = new View.OnClickListener() {
 @Override
 public void onClick(View v) {

 switch (v.getId()) {
 case R.id.btn_save_pop:

  String name1 = createUserPopWin.text_name.getText().toString().trim();
  String mobile1 = createUserPopWin.text_mobile.getText().toString().trim();
  String info1 = createUserPopWin.text_info.getText().toString().trim();

  System.out.println(name1+"——"+mobile1+"——"+info1);

  createUserPopWin.dismiss();
  break;
 }
 }
 };
以上就是本文的全部内容,希望对大家的学习Android有所帮助。


